Netgear FSM726v3 7000 Series Managed Switch Administration Guide for Software - Page 380

Replacing a Stack Member with a New Unit, Renumber Stack Members

Page 380 highlights

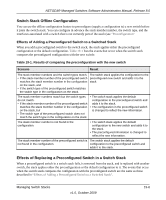
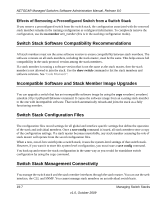
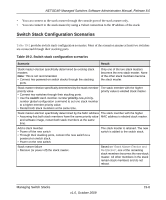
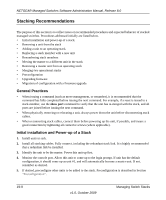
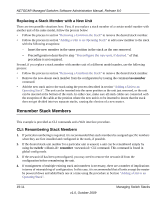
NETGEAR Managed Switches Software Administration Manual, Release 8.0 Replacing a Stack Member with a New Unit There are two possible situations here. First, if you replace a stack member of a certain model number with another unit of the same model, follow the process below: • Follow the process in section "Removing a Unit from the Stack" to remove the desired stack member. • Follow the process in section "Adding a Unit to an Operating Stack" to add a new member to the stack with the following exceptions: - Insert the new member in the same position in the stack as the one removed. - Preconfiguration described in step "Preconfigure the new unit, if desired." of that procedure is not required. Second, if you replace a stack member with another unit of a different model number, use the following process: • Follow the process in section "Removing a Unit from the Stack" to remove the desired stack member. • Remove the now-absent stack member from the configuration by issuing the command no member command. • Add the new stack unit to the stack using the process described in section "Adding a Unit to an Operating Stack". The unit can be inserted into the same position as the unit just removed, or the unit can be inserted at the bottom of the stack. In either case, make sure all stack cables are connected with the exception of the cable at the position where the new unit is to be inserted to insure that the stack does not get divided into two separate stacks, causing the election of a new master. Renumber Stack Members This example is provided as CLI commands and a Web interface procedure. CLI: Renumbering Stack Members 1. If particular numbering is required, it is recommended that stack members be assigned specific numbers when they are first installed and configured in the stack, if possible. 2. If the desired stack unit number for a particular unit is unused, a unit can be renumbered simply by using the switch renumber CLI command. This command is found in global config mode. 3. If the newunit-id has been preconfigured, you may need to remove the newunit-id from the configuration before renumbering the unit. 4. If reassignment of multiple existing stack unit numbers is necessary, there are a number of implications in terms of mismatching of configuration. In this case, it is recommended that all units except the master be powered down and added back one at a time using the procedure in Section "Adding a Unit to an Operating Stack". 19-11 v1.0, October 2009 Managing Switch Stacks

  • 1
  • 2
  • 3
  • 4
  • 5
  • 6
  • 7
  • 8
  • 9
  • 10
  • 11
  • 12
  • 13
  • 14
  • 15
  • 16
  • 17
  • 18
  • 19
  • 20
  • 21
  • 22
  • 23
  • 24
  • 25
  • 26
  • 27
  • 28
  • 29
  • 30
  • 31
  • 32
  • 33
  • 34
  • 35
  • 36
  • 37
  • 38
  • 39
  • 40
  • 41
  • 42
  • 43
  • 44
  • 45
  • 46
  • 47
  • 48
  • 49
  • 50
  • 51
  • 52
  • 53
  • 54
  • 55
  • 56
  • 57
  • 58
  • 59
  • 60
  • 61
  • 62
  • 63
  • 64
  • 65
  • 66
  • 67
  • 68
  • 69
  • 70
  • 71
  • 72
  • 73
  • 74
  • 75
  • 76
  • 77
  • 78
  • 79
  • 80
  • 81
  • 82
  • 83
  • 84
  • 85
  • 86
  • 87
  • 88
  • 89
  • 90
  • 91
  • 92
  • 93
  • 94
  • 95
  • 96
  • 97
  • 98
  • 99
  • 100
  • 101
  • 102
  • 103
  • 104
  • 105
  • 106
  • 107
  • 108
  • 109
  • 110
  • 111
  • 112
  • 113
  • 114
  • 115
  • 116
  • 117
  • 118
  • 119
  • 120
  • 121
  • 122
  • 123
  • 124
  • 125
  • 126
  • 127
  • 128
  • 129
  • 130
  • 131
  • 132
  • 133
  • 134
  • 135
  • 136
  • 137
  • 138
  • 139
  • 140
  • 141
  • 142
  • 143
  • 144
  • 145
  • 146
  • 147
  • 148
  • 149
  • 150
  • 151
  • 152
  • 153
  • 154
  • 155
  • 156
  • 157
  • 158
  • 159
  • 160
  • 161
  • 162
  • 163
  • 164
  • 165
  • 166
  • 167
  • 168
  • 169
  • 170
  • 171
  • 172
  • 173
  • 174
  • 175
  • 176
  • 177
  • 178
  • 179
  • 180
  • 181
  • 182
  • 183
  • 184
  • 185
  • 186
  • 187
  • 188
  • 189
  • 190
  • 191
  • 192
  • 193
  • 194
  • 195
  • 196
  • 197
  • 198
  • 199
  • 200
  • 201
  • 202
  • 203
  • 204
  • 205
  • 206
  • 207
  • 208
  • 209
  • 210
  • 211
  • 212
  • 213
  • 214
  • 215
  • 216
  • 217
  • 218
  • 219
  • 220
  • 221
  • 222
  • 223
  • 224
  • 225
  • 226
  • 227
  • 228
  • 229
  • 230
  • 231
  • 232
  • 233
  • 234
  • 235
  • 236
  • 237
  • 238
  • 239
  • 240
  • 241
  • 242
  • 243
  • 244
  • 245
  • 246
  • 247
  • 248
  • 249
  • 250
  • 251
  • 252
  • 253
  • 254
  • 255
  • 256
  • 257
  • 258
  • 259
  • 260
  • 261
  • 262
  • 263
  • 264
  • 265
  • 266
  • 267
  • 268
  • 269
  • 270
  • 271
  • 272
  • 273
  • 274
  • 275
  • 276
  • 277
  • 278
  • 279
  • 280
  • 281
  • 282
  • 283
  • 284
  • 285
  • 286
  • 287
  • 288
  • 289
  • 290
  • 291
  • 292
  • 293
  • 294
  • 295
  • 296
  • 297
  • 298
  • 299
  • 300
  • 301
  • 302
  • 303
  • 304
  • 305
  • 306
  • 307
  • 308
  • 309
  • 310
  • 311
  • 312
  • 313
  • 314
  • 315
  • 316
  • 317
  • 318
  • 319
  • 320
  • 321
  • 322
  • 323
  • 324
  • 325
  • 326
  • 327
  • 328
  • 329
  • 330
  • 331
  • 332
  • 333
  • 334
  • 335
  • 336
  • 337
  • 338
  • 339
  • 340
  • 341
  • 342
  • 343
  • 344
  • 345
  • 346
  • 347
  • 348
  • 349
  • 350
  • 351
  • 352
  • 353
  • 354
  • 355
  • 356
  • 357
  • 358
  • 359
  • 360
  • 361
  • 362
  • 363
  • 364
  • 365
  • 366
  • 367
  • 368
  • 369
  • 370
  • 371
  • 372
  • 373
  • 374
  • 375
  • 376
  • 377
  • 378
  • 379
  • 380
  • 381
  • 382
  • 383
  • 384
  • 385
  • 386
  • 387
  • 388
  • 389
  • 390
  • 391
  • 392
  • 393
  • 394
  • 395
  • 396
  • 397
  • 398
  • 399
  • 400
  • 401
  • 402
  • 403
  • 404
  • 405
  • 406
  • 407
  • 408
  • 409
  • 410
  • 411
  • 412
  • 413
  • 414
  • 415
  • 416
  • 417
  • 418
  • 419
  • 420
  • 421
  • 422
  • 423
  • 424
  • 425
  • 426
  • 427
  • 428
  • 429
  • 430
  • 431
  • 432
  • 433
  • 434
  • 435
  • 436
  • 437
  • 438
  • 439
  • 440
  • 441
  • 442
  • 443
  • 444
  • 445
  • 446
  • 447
  • 448
  • 449
  • 450
  • 451
  • 452
  • 453
  • 454
  • 455
  • 456
  • 457
  • 458
  • 459
  • 460
  • 461
  • 462
  • 463
  • 464
  • 465
  • 466
  • 467
  • 468
  • 469
  • 470
  • 471
  • 472
  • 473
  • 474
  • 475
  • 476
  • 477
  • 478
  • 479
  • 480
  • 481
  • 482
  • 483
  • 484
  • 485
  • 486
  • 487
  • 488
  • 489
  • 490
  • 491
  • 492
  • 493
  • 494
  • 495
  • 496
  • 497
  • 498
  • 499
  • 500
  • 501
  • 502
  • 503
  • 504
  • 505
  • 506
  • 507
  • 508
  • 509
  • 510
  • 511
  • 512
  • 513
  • 514
  • 515
  • 516
  • 517
  • 518
  • 519
  • 520
  • 521
  • 522
  • 523
  • 524
  • 525
  • 526
  • 527
  • 528
  • 529
  • 530
  • 531
  • 532
  • 533
  • 534
  • 535
  • 536
  • 537
  • 538
  • 539
  • 540
  • 541
  • 542
  • 543
  • 544
  • 545
  • 546
  • 547
  • 548
  • 549
  • 550
  • 551
  • 552
  • 553
  • 554
  • 555
  • 556
  • 557
  • 558
  • 559
  • 560
  • 561

NETGEAR Managed Switches Software Administration Manual, Release 8.0
19-11
Managing Switch Stacks
v1.0, October 2009
Replacing a Stack Member with a New Unit
There are two possible situations here. First, if you replace a stack member of a certain model number with
another unit of the same model, follow the process below:
Follow the process in section
“Removing a Unit from the Stack”
to remove the desired stack member.
Follow the process in section
“Adding a Unit to an Operating Stack”
to add a new member to the stack
with the following exceptions:
Insert the new member in the same position in the stack as the one removed.
Preconfiguration described in step
“Preconfigure the new unit, if desired.”
of that
procedure is not required.
Second, if you replace a stack member with another unit of a different model number, use the following
process:
Follow the process in section
“Removing a Unit from the Stack”
to remove the desired stack member.
Remove the now-absent stack member from the configuration by issuing the command
no member
command.
Add the new stack unit to the stack using the process described in section
“Adding a Unit to an
Operating Stack”
. The unit can be inserted into the same position as the unit just removed, or the unit
can be inserted at the bottom of the stack. In either case, make sure all stack cables are connected with
the exception of the cable at the position where the new unit is to be inserted to insure that the stack
does not get divided into two separate stacks, causing the election of a new master.
Renumber Stack Members
This example is provided as CLI commands and a Web interface procedure.
CLI: Renumbering Stack Members
1.
If particular numbering is required, it is recommended that stack members be assigned specific numbers
when they are first installed and configured in the stack, if possible.
2.
If the desired stack unit number for a particular unit is unused, a unit can be renumbered simply by
using the
switch
<oldunit-id>
renumber
<newunit-id> CLI command. This command is found in
global config mode.
3.
If the newunit-id has been preconfigured, you may need to remove the newunit-id from the
configuration before renumbering the unit.
4.
If reassignment of multiple existing stack unit numbers is necessary, there are a number of implications
in terms of mismatching of configuration. In this case, it is recommended that all units except the master
be powered down and added back one at a time using the procedure in Section
“Adding a Unit to an
Operating Stack”
.