Nokia N-GAGE User Guide - Page 34
Video recording, Video capture indicators, Record videos, After recording a video, To stop recording
 |
UPC - 758478517055
View all Nokia N-GAGE manuals
Add to My Manuals
Save this manual to your list of manuals |
Page 34 highlights
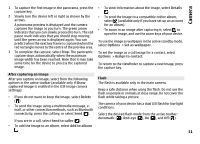
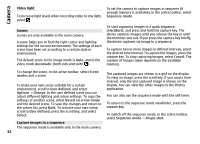
Camera • Optimal lighting is found in situations where there is plenty of diffused, soft light available, for example, on a bright, partially cloudy day or on a sunny day in the shadow of trees. Video recording Video capture indicators The video viewfinder displays the following: Record videos 1 If the camera is in the image mode, select the video mode from the active toolbar. 2 To start recording, press the capture key. The red record icon ( ) is displayed and a tone sounds. 3 To pause recording at any time, press Pause. Select Continue to resume. If you pause recording and do not press any key within one minute, the recording stops. To zoom in or out of the subject, use the zoom key in your device. 4 To stop recording, press the capture key. The video clip is automatically saved in Photos. The maximum length of a video clip is approximately 30 seconds with sharing quality and 90 minutes with other quality settings. To activate the front camera, select Options > Use 1 Capture mode indicator 2 Video stabilisation on indicator secondary camera. To start recording a video, press the scroll key. To zoom in or out, scroll up or down. 3 Audio mute on indicator 4 Active toolbar (not displayed during recording) 5 Battery charge level indicator 6 Video quality indicator. To change this setting, select Options > Settings > Video quality. 7 Video clip file type After recording a video After you record a video clip, select from the following options in the active toolbar (available only if Show captured video is set to On in the video settings): 8 Available recording time. When you are recording, the • To immediately play the video clip you just recorded, current video length indicator also shows the elapsed select Play ( ). and remaining time. 9 The location to which the video clip is saved. • If you do not want to keep the video, select Delete 10 GPS signal indicator ( ). 34 • To send the video clip using a multimedia message, e- mail, or other connection methods, such as Bluetooth
-
 1
1 -
2
-
3
-
4
-
5
-
6
-
7
-
8
-
9
-
10
-
11
-
12
-
13
-
14
-
15
-
16
-
17
-
18
-
19
-
20
-
21
-
22
-
23
-
24
-
25
-
26
-
27
-
28
-
 29
29 -
 30
30 -
 31
31 -
 32
32 -
 33
33 -
 34
34 -
 35
35 -
 36
36 -
 37
37 -
 38
38 -
 39
39 -
40
-
41
-
42
-
43
-
44
-
45
-
46
-
47
-
48
-
49
-
50
-
51
-
52
-
53
-
54
-
55
-
56
-
57
-
58
-
59
-
60
-
61
-
62
-
63
-
64
-
65
-
66
-
67
-
68
-
69
-
70
-
71
-
72
-
73
-
74
-
75
-
76
-
77
-
78
-
79
-
80
-
81
-
82
-
83
-
84
-
85
-
86
-
87
-
88
-
89
-
90
-
91
-
92
-
93
-
94
-
95
-
96
-
97
-
98
-
99
-
100
-
101
-
102
-
103
-
104
-
105
-
106
-
107
-
108
-
109
-
110
-
111
-
112
-
113
-
114
-
115
-
116
-
117
-
118
-
119
-
120
-
121
-
122
-
123
-
124
-
125
-
126
-
127
-
128
-
129
-
130
-
131
-
132
-
133
-
134
-
135
-
136
-
137
-
138
-
139
-
140
-
141
-
142
-
143
-
144
-
145
-
146
-
147
-
148
-
149
-
150
-
151
-
152
-
153
-
154
-
155
-
156
-
157
-
158
-
159
 |
 |
