Onkyo TX SR805 Owner Manual - Page 94
IntelliVolume, A/V Sync, Name Edit, you want to give a custom name. - lip sync
 |
UPC - 751398007606
View all Onkyo TX SR805 manuals
Add to My Manuals
Save this manual to your list of manuals |
Page 94 highlights
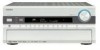
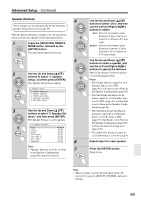
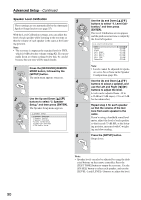
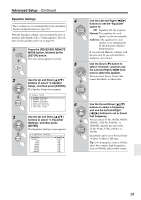
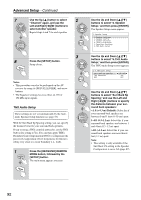
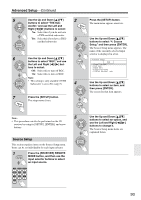
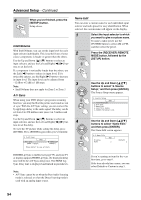
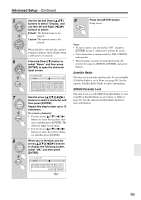
Advanced Setup-Continued 6 SETUP When you've finished, press the [SETUP] button. Setup closes. IntelliVolume With IntelliVolume, you can set the input level for each input selector individually. This is useful if one of your source components is louder or quieter than the others. Use the Up and Down [ ]/[ ] buttons to select an input selector, and use the Left and Right [ ]/[ ] buttons to set the level. If a component is noticeably louder than the others, use the Left [ ] button to reduce its input level. If it's noticeably quieter, use the Right [ ] button to increase its input level. The input level can be adjusted from -12 dB to +12 dB in 1 dB steps. Note: • IntelliVolume does not apply for Zone 2 or Zone 3. A/V Sync When using your DVD player's progressive scanning function, you may find that the picture and sound are out of sync. With the A/V Sync setting, you can correct this by applying a delay to the audio signal. The delay can be set from 0 to 250 milliseconds (msec) in 5 millisecond steps. Use the Up and Down [ ]/[ ] buttons to select an input selector, and use the Left and Right [ ]/[ ] buttons to set the delay. To view the TV picture while setting the delay, press [ENTER]. Press [ENTER] again when you've finished. 4-2.A/V Sync DVD A/V Sync (HDMI LipSync 100msec 60msec) Press Enter to see picture Name Edit You can enter a custom name for each individual input selector and radio preset for easy identification. When selected, the custom name will appear on the display. 1 Select the input selector to which you want to give a custom name. To name a radio preset, use the [TUNER] button to select AM or FM, and then select the preset. 2 RECEIVER Press the [RECEIVER] REMOTE MODE button, followed by the [SETUP] button. SETUP 3 ENTER ENTER Use the Up and Down [ ]/[ ] buttons to select "4. Source Setup," and then press [ENTER]. The Source Setup menu appears. 4.Source Setup DVD 1.IntelliVolume 2.A/V Sync 3.Name Edit 4.Satellite Radio 5.SIRIUS Parental Lock 4 ENTER ENTER Use the Up and Down [ ]/[ ] buttons to select "Name Edit," and then press [ENTER]. The Name Edit screen appears. 4-3.Name Edit DVD Display Name [ Default ] If HDMI Lip Sync is enabled (see page 99), and your TV or display supports HDMI Lip Sync, the displayed delay time will be the A/V Sync delay time. The HDMI Lip Sync delay time is displayed underneath in parentheses. Note: • A/V Sync cannot be set when the Pure Audio listening mode is selected, or when the Direct listening mode is used with an analog input source. If you're naming an item for the very first time, go to step 6. If the item already has a name, you can select Default or Custom in step 5. 94
-
 1
1 -
2
-
3
-
4
-
5
-
6
-
7
-
8
-
9
-
10
-
11
-
12
-
13
-
14
-
15
-
16
-
17
-
18
-
19
-
20
-
21
-
22
-
23
-
24
-
25
-
26
-
27
-
28
-
29
-
30
-
31
-
32
-
33
-
34
-
35
-
36
-
37
-
38
-
39
-
40
-
41
-
42
-
43
-
44
-
45
-
46
-
47
-
48
-
49
-
50
-
51
-
52
-
53
-
54
-
55
-
56
-
57
-
58
-
59
-
60
-
61
-
62
-
63
-
64
-
65
-
66
-
67
-
68
-
69
-
70
-
71
-
72
-
73
-
74
-
75
-
76
-
77
-
78
-
79
-
80
-
81
-
82
-
83
-
84
-
85
-
86
-
87
-
88
-
 89
89 -
 90
90 -
 91
91 -
 92
92 -
 93
93 -
 94
94 -
 95
95 -
 96
96 -
 97
97 -
 98
98 -
 99
99 -
100
-
101
-
102
-
103
-
104
-
105
-
106
-
107
-
108
-
109
-
110
-
111
-
112
-
113
-
114
-
115
-
116
-
117
-
118
-
119
-
120
 |
 |