Pioneer VSX 82TXS Owner's Manual - Page 47
Other connections - ipod cable
 |
UPC - 012562820453
View all Pioneer VSX 82TXS manuals
Add to My Manuals
Save this manual to your list of manuals |
Page 47 highlights
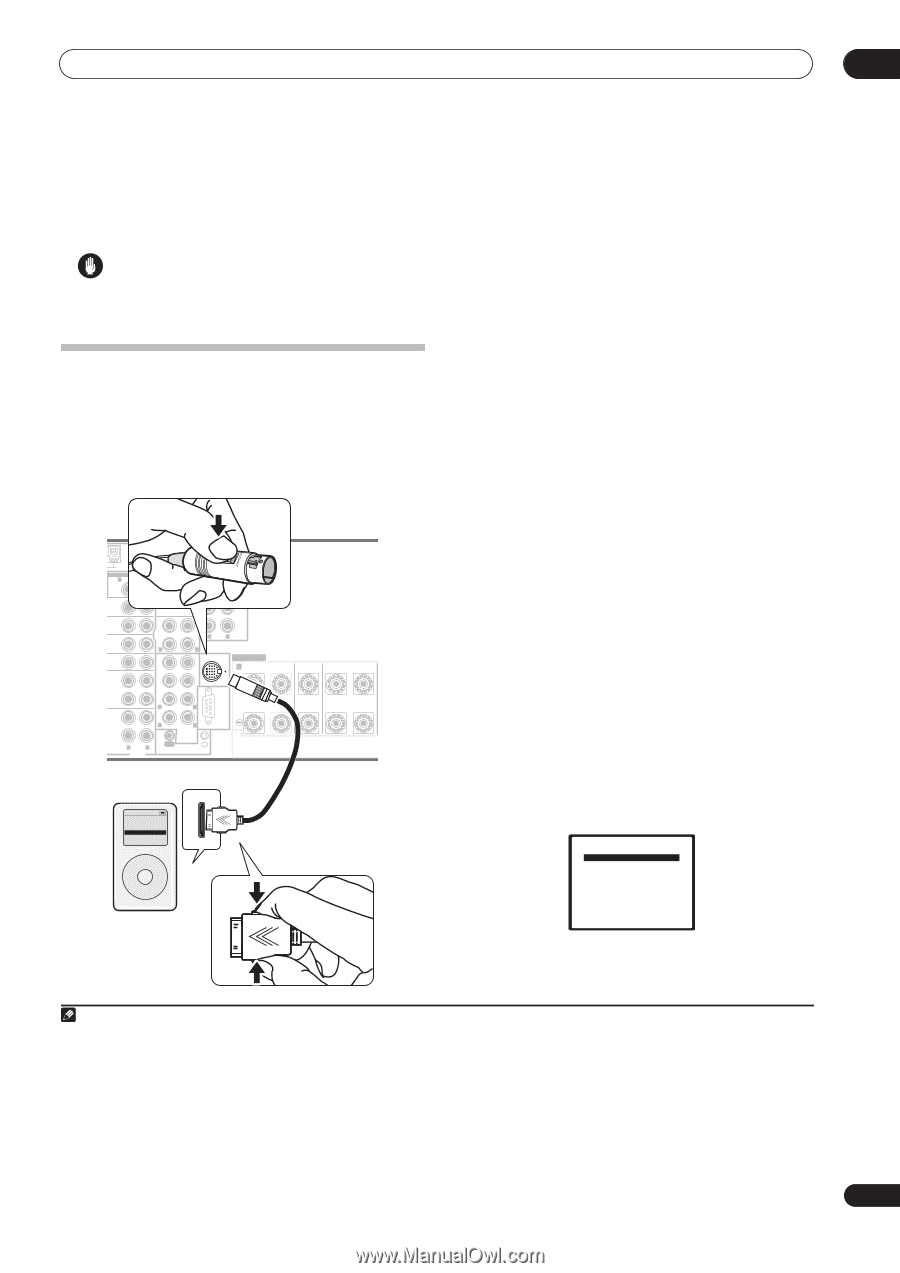
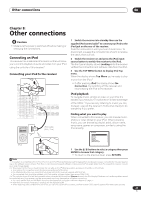
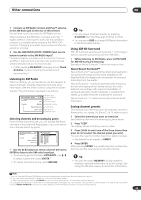
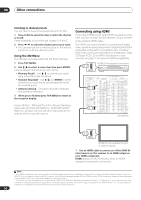
Other connections 08 Chapter 8: Other connections Caution • Make sure the power is switched off before making or changing the connections. Connecting an iPod This receiver has a dedicated iPod terminal that will allow you to control playback of audio and video from your iPod using the controls of this receiver.1 Connecting your iPod to the receiver ANTENNA AUDIO PHONO AM LOOP IN MULTI-ROOM & SOURCE R ROOM2(ZONE2) L CD PRE OUT R L FRONT SUB W. CENTER OUT DVD/ LD IN TV IN SAT IN IN OUT CD-R/ TAPE IN R R L SURROUND SURROUND BACK (Single) L VIDEO / GAME1 IN FR FL iPod SUB W. CENTER SPEAKERS IN A R FRONT L OUT DVR/ VCR 1 IN SURROUND R L OUT DVR/ VCR 2 IN R L AUDIO R SURROUND L BACK RS-232C MULTI CH IN OUT IN CONTROL CENTER R SURROUND L iPod Music > Extras > Settings > Shuffle Songs Backlight MENU iPod cable (5 ft. / 4 oz) iPod 1 Switch the receiver into standby then use the supplied iPod control cable2 to connect your iPod to the iPod jack on the rear of the receiver. Push the connector in until you hear it click home. To disconnect, squeeze the connector (as shown) to release the catch, then pull out. 2 Switch the receiver on and press the iPod input source button to switch the receiver to the iPod. The front panel display shows Loading while the receiver verifies the connection and retrieves data from the iPod. 3 Use the TOP MENU button to display iPod Top menu. When the display shows Top Menu you're ready to play music from the iPod.3 • If after pressing iPod the display shows No Connection, try switching off the receiver and reconnecting the iPod to the receiver. iPod playback To navigate music, photos or video on your iPod it's easiest if you have your TV switched on to take advantage of the OSDs.4 If you are only listening to music you can, however, use just the receiver's front panel display to do everything if you prefer. Finding what you want to play When connected to this receiver, you can browse music, photos or video stored on your iPod. When browsing music, you can browse by playlist, artist, album name, song name, genres or composers, similar to using the iPod directly. iPod Top [ Playlists ] [ Artists ] [ Albums ] [ Songs ] [ Genres ] [ Composers ] [ Shuffle Songs ] 1 Use the / buttons to select a category then press ENTER to browse that category. • To return to the previous level, press RETURN. Note 1 This system is compatible with an iPod, iPod mini and iPod Photo portable device (third generation and above), however, compatibility may vary depending on the software version of your iPod. This receiver does not support software versions prior to iPod update 2004-10-20. For supported versions, consult your local Pioneer dealer. 2 • This product is the Pioneer Control Cable for use with an iPod® (third generation and above), iPod Mini or iPod Photo. • This cable is for connection only to the dock connector port of the iPod. • For detailed instructions on using the iPod, please refer to the manual supplied with the iPod. • The connected iPod should be updated with iPod updater software higher than version 2004-10-20. 3 • The controls of your iPod will be inoperable when connected to this receiver (Pioneer shows in the iPod display). Features such as the equalizer cannot be controlled using this receiver, and we recommend switching the equalizer off before connecting. • You can't use the iPod and XM Radio functions simultaneously using the multi-room feature on page 57. 4 • Note that non-roman characters in playlists will be displayed as #. • When watching video content from your iPod, you can only use the iPod controls, and the receiver OSD doesn't appear (iPod video takes priority). 47 En
-
 1
1 -
2
-
3
-
4
-
5
-
6
-
7
-
8
-
9
-
10
-
11
-
12
-
13
-
14
-
15
-
16
-
17
-
18
-
19
-
20
-
21
-
22
-
23
-
24
-
25
-
26
-
27
-
28
-
29
-
30
-
31
-
32
-
33
-
34
-
35
-
36
-
37
-
38
-
39
-
40
-
41
-
 42
42 -
 43
43 -
 44
44 -
 45
45 -
 46
46 -
 47
47 -
 48
48 -
 49
49 -
 50
50 -
 51
51 -
 52
52 -
53
-
54
-
55
-
56
-
57
-
58
-
59
-
60
-
61
-
62
-
63
-
64
-
65
-
66
-
67
-
68
-
69
-
70
-
71
-
72
-
73
-
74
-
75
-
76
-
77
-
78
-
79
-
80
-
81
-
82
-
83
-
84
-
85
-
86
-
87
-
88
-
89
-
90
-
91
-
92
 |
 |