Pioneer VSX 82TXS Owner's Manual - Page 68
Dimming the display
 |
UPC - 012562820453
View all Pioneer VSX 82TXS manuals
Add to My Manuals
Save this manual to your list of manuals |
Page 68 highlights
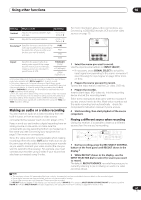
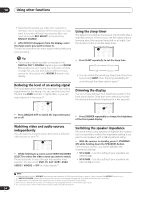
10 Using other functions • Note that the setting you make here is stored in memory, even if you switch off the receiver, so if you want to record a different input source later, you must do so with REC SELECT, or by selecting RECOUT SOURCE. 3 After RECOUT disappears from the display, select the input source you want to listen to. This will be heard from the main system without affecting your recording.1 Using the sleep timer The sleep timer switches the receiver into standby after a specified amount of time so you can fall asleep without worrying about the receiver being left on all night. Use the remote control to set the sleep timer. SLEEP SR+ VIDEO SEL DIMMER ANALOG ATT S.RETRIEVER Tip • If you have a digital recorder connected to the DIGITAL OUT1 (ROOM3) digital output and ROOM 3 is switched on (see Using the multi-room controls on page 59), you can also select a different input source for this output while ROOM 3 shows in the display. Reducing the level of an analog signal The input attenuator lowers the input level of an analog signal when it's too strong. You can use this if you find the that the OVER indicator is lights often, or you can hear distortion in the sound.2 SLEEP SR+ VIDEO SEL DIMMER ANALOG ATT S.RETRIEVER D.ACCESS 10 CLASS SC • Press ANALOG ATT to switch the input attenuator on or off. D ACCESS CLASS • Press SLEEP repeatedly to set the sleep time. 30 min 60 min Off 90 min • You can check the remaining sleep time at any time by pressing SLEEP once. Pressing repeatedly will cycle through the sleep options again.4 Dimming the display You can choose between four brightness levels for the front panel display. Note that when selecting sources, the display automatically brightens for a few seconds. SLEEP SR+ VIDEO SEL DIMMER ANALOG ATT S.RETRIEVER D.ACCESS 0 CLASS • Press DIMMER repeatedly to change the brightness of the front panel display. Watching video and audio sources independently You can listen to a sound source and select a different video source on your TV. SLEEP SR+ VIDEO SEL DIMMER ANALOG ATT S.RETRIEVER D.ACCESS +10 CLASS DISC • While listening to a source, press VIDEO SEL (VIDEO SELECT) to select the video source you want to watch. Press repeatedly to cycle through the possible video sources. You can select DVD, TV, SAT, DVR1, DVR2, VIDEO1, VIDEO2 or OFF (no video signal).3 Switching the speaker impedance We recommend using speakers of 8 Ω with this system, but it is possible to switch the impedance setting if you plan to use speakers with a 6 Ω impedance rating. • With the receiver in standby, press STANDBY/ ON while holding down the SPEAKERS button. Each time you do this, you switch between the impedance settings: • SP 6 OHM - Use this setting if your speakers are rated at 6 Ω. • SP 8 OHM - Use this setting if your speakers are rated at 8 Ω or more. Note 1 • Note that switching the ROOM 2 input source (as explained in Multi-room listening on page 57) also changes the RECOUT input source. • If RECOUT SOURCE is selected, changing the input source likewise changes the input source used for your recording. 2 The attenuator isn't available with digital sources, or when using the Stream Direct modes. 3 Note that this feature will not work with video sources assigned to either of the HDMI video inputs. 4 You can also switch off the sleep timer simply by switching off the receiver. 68 En
-
 1
1 -
2
-
3
-
4
-
5
-
6
-
7
-
8
-
9
-
10
-
11
-
12
-
13
-
14
-
15
-
16
-
17
-
18
-
19
-
20
-
21
-
22
-
23
-
24
-
25
-
26
-
27
-
28
-
29
-
30
-
31
-
32
-
33
-
34
-
35
-
36
-
37
-
38
-
39
-
40
-
41
-
42
-
43
-
44
-
45
-
46
-
47
-
48
-
49
-
50
-
51
-
52
-
53
-
54
-
55
-
56
-
57
-
58
-
59
-
60
-
61
-
62
-
 63
63 -
 64
64 -
 65
65 -
 66
66 -
 67
67 -
 68
68 -
 69
69 -
 70
70 -
 71
71 -
 72
72 -
 73
73 -
74
-
75
-
76
-
77
-
78
-
79
-
80
-
81
-
82
-
83
-
84
-
85
-
86
-
87
-
88
-
89
-
90
-
91
-
92
 |
 |
