Pioneer VSX 82TXS Owner's Manual - Page 50
Other connections, Connecting using HDMI
 |
UPC - 012562820453
View all Pioneer VSX 82TXS manuals
Add to My Manuals
Save this manual to your list of manuals |
Page 50 highlights
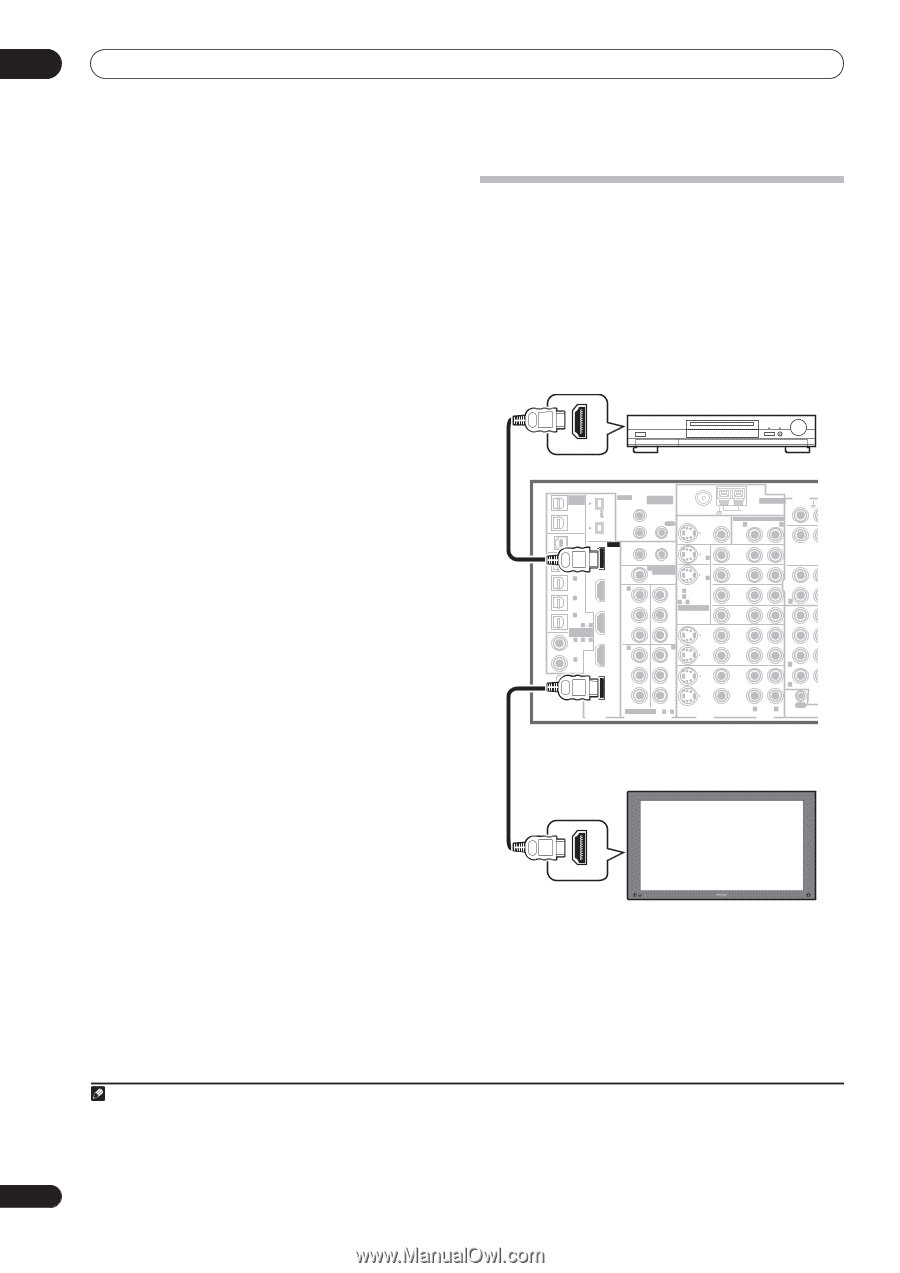
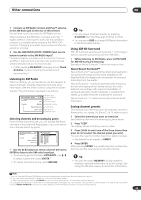
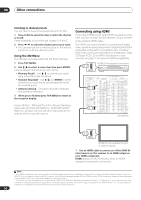
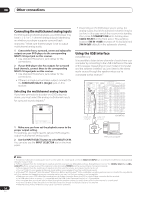
08 Other connections Listening to channel presets You will need to have some presets stored to do this. 1 Press CLASS to select the class in which the channel is stored. Press repeatedly to cycle through classes A, B and C. 2 Press / to select the channel preset you want. • You can also use the number buttons on the remote control to recall the channel preset. Using the XM Menu The XM Menu provides additional XM Radio features. 1 Press TOP MENU. 2 Use / to select a menu item then press ENTER. Choose between the following menu items: • Memory Recall - Use / to browse your saved song information (see Tip above). • Channel Skip/Add - Use / and ENTER to select channels you would like to remove/restore from/to the channel guide. • Antenna Aiming - Check the strength of satellite and terrestrial reception. 3 When you're finished press TOP MENU to return to the reception display. Connect & Play™, XM-Ready® and The Ultimate Playlist are trademarks of XM Satellite Radio Inc. ©2005 XM Satellite Radio Inc. All rights reserved. All other trademarks are the property of their respective owners. Connecting using HDMI If you have a HDMI or DVI (with HDCP) equipped component, you can connect it to this receiver using a commercially available HDMI cable.1 The HDMI connection transfers uncompressed digital video, as well as almost every kind of digital audio that the connected component is compatible with, including DVD-Video, DVD-Audio (see below for limitations), Video CD/Super VCD, CD and MP3. See About the video converter on page 11 for more on HDMI compatibility. HDMI/DVI-equipped component HDMI OUT MULTI-ROOM & SOURCE / REC SEL OUT1 ROOM3 (ZONE3) OUT2 S400 (AUDIO) IR MULTI-ROOM & SOURCE MAIN ROOM(ZONE1) IN1 ROOM2(ZONE2) OUT FM UNBAL 75 Ω MONITOR OUT USB AUDIO IN S400 IN 1 (SAT) IN 2 (DVR/ VCR 1) IN 3 (DVR/ VCR 2) IN2 HDMI 12 V TRIGGER IN1 1 2 IN 1 (DC OUT 12V TOTAL 50 mA MAX) ROOM2 MULTI-ROOM & SOURCE MONITOR IN 2 IN2 (ZONE2) OUT IN 1 OUT IN 1 (DVD/LD) Y Y IN 2 (TV) 12 ASSIGNABLE IN 4 (CD-R) 14 ASSIGNABLE IN 1 1 2 (DVD/ LD) IN 2 (CD) IN3 PB PR IN4 IN 2 Y PB PR IN 3 Y ANTENNA AUDIO PHONO AM LOOP IN MULTI-ROOM & SOURCE R ROOM2(ZONE2) L CD OUT IN DVD/ LD IN TV IN SAT IN VIDEO / GAME1 IN OUT DVR/ VCR 1 IN OUT CD-R/ TAPE IN R FR FL SUB W. C SURROUND R IN XM OUT DIGITAL PB PB PR PR OUT DVR/ VCR 2 IN ASSIGNABLE 1 3 S - VIDEO VIDEO COMPONENT VIDEO VIDEO R L AUDIO R SURROUN BAC MUL IN OUT CONTROL VSX-84TXSi HDMI IN HDMI/DVI-compatible monitor or plasma display 1 Use an HDMI cable to connect on of the HDMI IN interconnects on this receiver to an HDMI output on your HDMI component. HDMI appears on the front panel when an HDMIequipped component is connected. Note 1 • An HDMI connection can only be made with DVI-equipped components compatible with both DVI and High Bandwidth Digital Content Protection (HDCP). If you choose to connect to a DVI connector, you will need a separate adaptor (DVI HDMI) to do so. A DVI connection, however, does not support audio signals. Consult your local audio dealer for more information. • This unit has been designed to be compliant with HDMI (High Definition Multimedia Interface) Version 1.2. Depending on the component you have connected, using a DVI connection may result in unreliable signal transfers. Also, when using a component with HDMI version 1.0, it is not possible to output copy-controlled DVD-Audio CPPM sources from the HDMI connection. 50 En
-
 1
1 -
2
-
3
-
4
-
5
-
6
-
7
-
8
-
9
-
10
-
11
-
12
-
13
-
14
-
15
-
16
-
17
-
18
-
19
-
20
-
21
-
22
-
23
-
24
-
25
-
26
-
27
-
28
-
29
-
30
-
31
-
32
-
33
-
34
-
35
-
36
-
37
-
38
-
39
-
40
-
41
-
42
-
43
-
44
-
 45
45 -
 46
46 -
 47
47 -
 48
48 -
 49
49 -
 50
50 -
 51
51 -
 52
52 -
 53
53 -
 54
54 -
 55
55 -
56
-
57
-
58
-
59
-
60
-
61
-
62
-
63
-
64
-
65
-
66
-
67
-
68
-
69
-
70
-
71
-
72
-
73
-
74
-
75
-
76
-
77
-
78
-
79
-
80
-
81
-
82
-
83
-
84
-
85
-
86
-
87
-
88
-
89
-
90
-
91
-
92
 |
 |