Ricoh 402011 Operating Instructions - Page 25
Setting custom size paper, Bypass Paper Size, User Tools/Counter, Printer Features, Paper Input
 |
UPC - 026649020117
View all Ricoh 402011 manuals
Add to My Manuals
Save this manual to your list of manuals |
Page 25 highlights
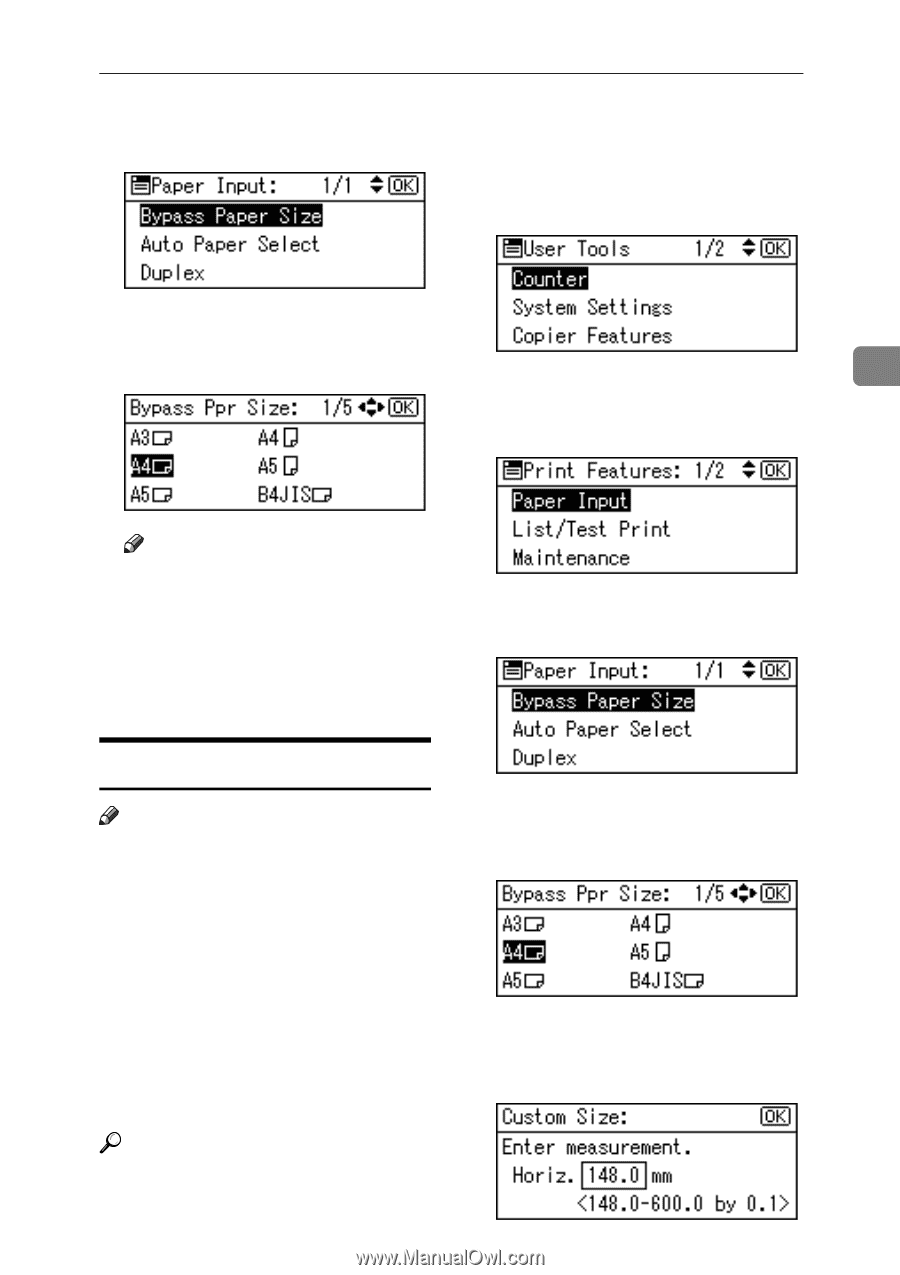
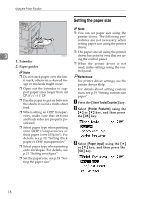
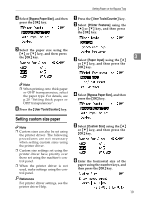
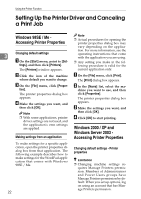
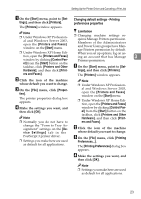
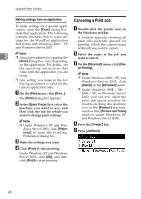
Setting Paper on the Bypass Tray D Select [Bypass Paper Size], and then press the {OK} key. A Press the {User Tools/Counter} key. B Select [Printer Features] using the {U} or {T} key, and then press the {OK} key. E Select the paper size using the {U} or {T} key, and then press the {OK} key. C Select [Paper Input] using the {U} 3 or {T} key, and then press the {OK} key. Note ❒ When printing onto thick paper or OHP transparencies, select the paper type. For details, see p.20 "Setting thick paper or OHP transparencies". F Press the {User Tools/Counter} key. D Select [Bypass Paper Size], and then press the {OK} key. Setting custom size paper Note ❒ Custom sizes can also be set using the printer driver. The following procedures are not necessary when setting custom sizes using the printer driver. ❒ Custom size settings set using the printer driver have priority over those set using the machine's control panel. ❒ When the printer driver is not used, make settings using the control panel. Reference For printer driver settings, see the printer driver Help. E Select [Custom Size] using the {U} or {T} key, and then press the {OK} key. F Enter the horizontal size of the paper using the number keys, and then press the {OK} key. 19
-
 1
1 -
2
-
3
-
4
-
5
-
6
-
7
-
8
-
9
-
10
-
11
-
12
-
13
-
14
-
15
-
16
-
17
-
18
-
19
-
 20
20 -
 21
21 -
 22
22 -
 23
23 -
 24
24 -
 25
25 -
 26
26 -
 27
27 -
 28
28 -
 29
29 -
 30
30 -
31
-
32
-
33
-
34
-
35
-
36
-
37
-
38
-
39
-
40
-
41
-
42
-
43
-
44
-
45
-
46
-
47
-
48
-
49
-
50
-
51
-
52
-
53
-
54
-
55
-
56
 |
 |