Ricoh 402011 Operating Instructions - Page 38
Scanning Originals
 |
UPC - 026649020117
View all Ricoh 402011 manuals
Add to My Manuals
Save this manual to your list of manuals |
Page 38 highlights
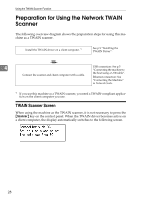
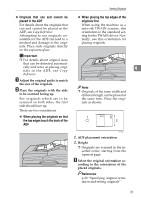
Using the TWAIN Scanner Function Scanning Originals 4 32 This section explains how to scan originals using the TWAIN scanner function. This describes how to scan originals with Imaging under Windows 2000. A Start Imaging, and then select the scanner driver. B On the [Start] menu, point to [Pro- gram], point to [Accessories], and then click [Imaging]. C Click [Select Device...] on the [File] menu. If the scanner is already selected, no scanner settings are necessary. Proceed to step E. D Select the name of the machine you want to use in the list, and then click [OK]. E Place the original in the scanner. Reference p.29 "Placing Originals" F Click [Acquire Image...] on the [File] menu. The TWAIN Driver dialog box appears. G Select the connection method. If you are using Network TWAIN, enter the IP address in the box under [Select Device]. If you are using USB TWAIN, click the [USB] check box. H Click [OK]. Main Setting window appears. I Click [Preview] or [Scan] to pre- view or scan image. Click [Scan] to return to Imaging. J Save the scan file in Imaging. K On the [File] menu, click [Save]. L Enter the file name, select the folder in which you want to save the file, and then click [Save]. For details about the scanning function, click [Help] on the Main Setting dialog box.
-
 1
1 -
2
-
3
-
4
-
5
-
6
-
7
-
8
-
9
-
10
-
11
-
12
-
13
-
14
-
15
-
16
-
17
-
18
-
19
-
20
-
21
-
22
-
23
-
24
-
25
-
26
-
27
-
28
-
29
-
30
-
31
-
32
-
 33
33 -
 34
34 -
 35
35 -
 36
36 -
 37
37 -
 38
38 -
 39
39 -
 40
40 -
 41
41 -
 42
42 -
 43
43 -
44
-
45
-
46
-
47
-
48
-
49
-
50
-
51
-
52
-
53
-
54
-
55
-
56
 |
 |
