Samsung SPH-M380 User Manual (user Manual) (ver.f7) (English(north America)) - Page 113
Storing Pictures, Setting Storage Options, Sending Pictures From Messaging
 |
View all Samsung SPH-M380 manuals
Add to My Manuals
Save this manual to your list of manuals |
Page 113 highlights
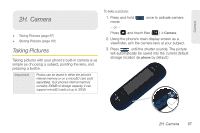
Camera 4. Prepare the selected image for use (only resize or rotate are available), then touch once you are complete. Storing Pictures Your phone's picture storage area is called My Photos. ⅷ My Photos (consists of files stored within the phone and microSD's CAMERA folder). Setting Storage Options Even if a microSD card is detected, all pictures are automatically stored within the phone's CAMERA folder on the card. To use the larger storage capacity of an internal microSD card, the storage destination must be set differently. 1. Press and hold to activate camera mode. - or - Press and touch Fun ( Fun ) > Camera. 2. Assign the storage location by touching > Storage. 3. Select the location Phone or Memory card. Sending Pictures From Messaging 1. Press and touch Main ( Main ) > Messaging. 2. Touch to compose a new picture message. 3. Select the contact entry method you prefer by touching an associated option: Ⅲ Recent List to select a recipient from a list of recently sent messages. Ⅲ Contacts to select a recipient from your Contacts (qualifying Contacts entries must contain a wireless phone number or an email address). Ⅲ Manual Entry to manually enter a recipient by choosing either: ● Enter phone number to use the onscreen dialpad to enter a wireless phone number. Touch Done to continue. ● Enter email address to use the keyboard to enter the recipient's email address. Touch Done to continue. Note: The Recipient entry must be either a mobile number or email address to continue using this feature. 4. Touch > Picture. 2H. Camera 101
-
 1
1 -
2
-
3
-
4
-
5
-
6
-
7
-
8
-
9
-
10
-
11
-
12
-
13
-
14
-
15
-
16
-
17
-
18
-
19
-
20
-
21
-
22
-
23
-
24
-
25
-
26
-
27
-
28
-
29
-
30
-
31
-
32
-
33
-
34
-
35
-
36
-
37
-
38
-
39
-
40
-
41
-
42
-
43
-
44
-
45
-
46
-
47
-
48
-
49
-
50
-
51
-
52
-
53
-
54
-
55
-
56
-
57
-
58
-
59
-
60
-
61
-
62
-
63
-
64
-
65
-
66
-
67
-
68
-
69
-
70
-
71
-
72
-
73
-
74
-
75
-
76
-
77
-
78
-
79
-
80
-
81
-
82
-
83
-
84
-
85
-
86
-
87
-
88
-
89
-
90
-
91
-
92
-
93
-
94
-
95
-
96
-
97
-
98
-
99
-
100
-
101
-
102
-
103
-
104
-
105
-
106
-
107
-
 108
108 -
 109
109 -
 110
110 -
 111
111 -
 112
112 -
 113
113 -
 114
114 -
 115
115 -
 116
116 -
 117
117 -
 118
118 -
119
-
120
-
121
-
122
-
123
-
124
-
125
-
126
-
127
-
128
-
129
-
130
-
131
-
132
-
133
-
134
-
135
-
136
-
137
-
138
-
139
-
140
-
141
-
142
-
143
-
144
-
145
-
146
-
147
-
148
-
149
-
150
-
151
-
152
-
153
-
154
-
155
-
156
-
157
-
158
-
159
-
160
-
161
-
162
-
163
-
164
-
165
-
166
-
167
-
168
-
169
-
170
-
171
-
172
-
173
-
174
-
175
-
176
-
177
-
178
-
179
-
180
-
181
-
182
-
183
-
184
-
185
-
186
-
187
-
188
-
189
-
190
-
191
-
192
 |
 |
