Singer 6699 I STARLET Instruction Manual - Page 60
Manual Buttonhole
 |
View all Singer 6699 I STARLET manuals
Add to My Manuals
Save this manual to your list of manuals |
Page 60 highlights
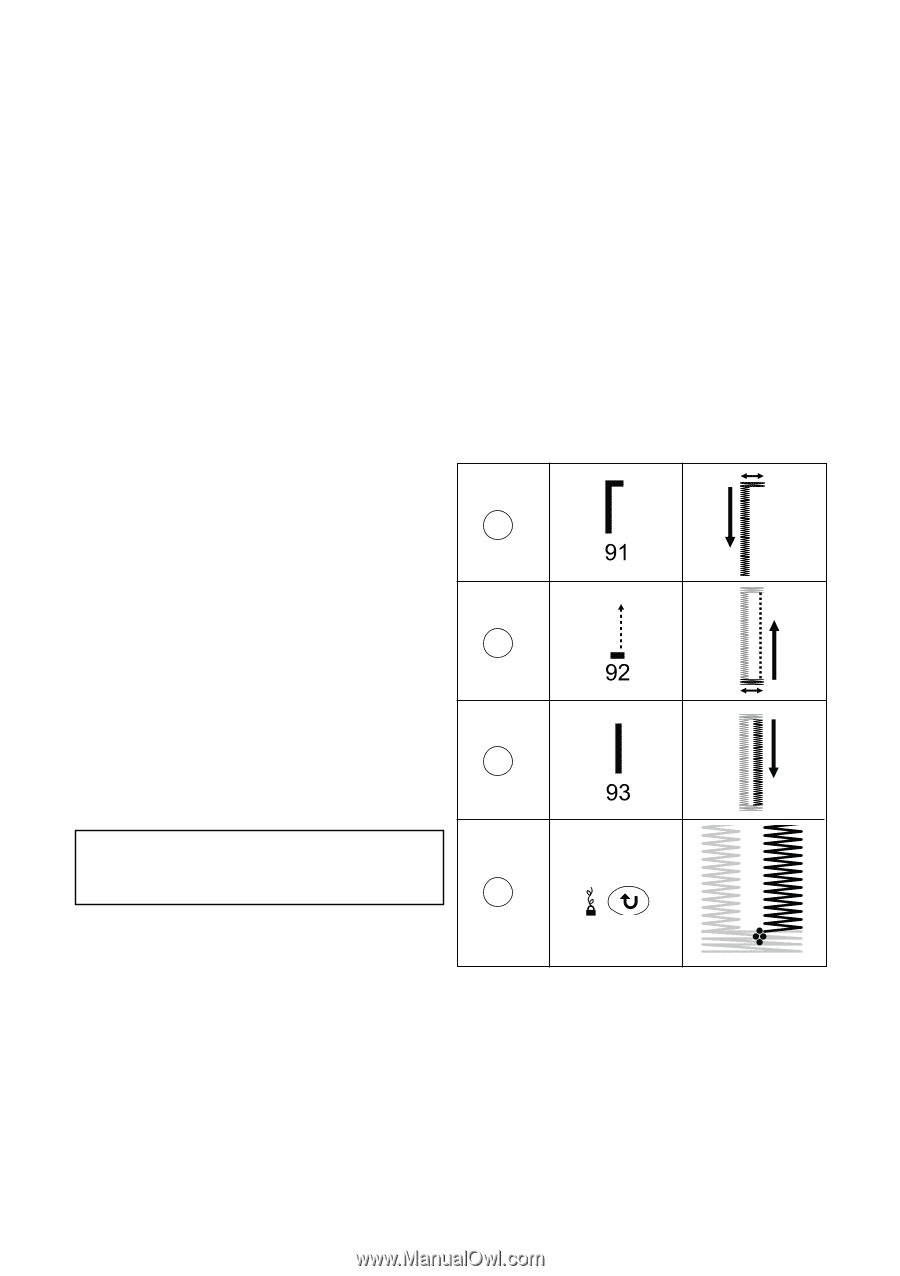
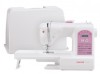
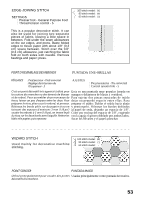
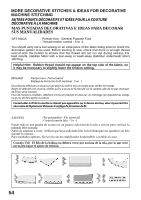
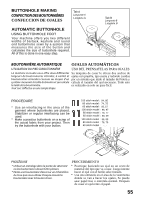
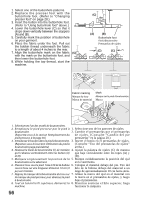
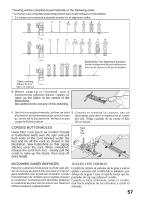
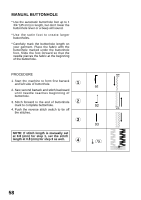
MANUAL BUTTONHOLE * Use the automatic buttonhole foot up to 1 3/4 "(45 mm) in length, but don't lower the buttonhole lever or a beep will sound. * Use the satin foot to create larger buttonholes. * Carefully mark the buttonhole length on your garment. Place the fabric with the buttonhole marked under the buttonhole foot. Slide the foot forward so that the needle pierces the fabric at the beginning of the buttonhole. PROCEDURE 1. Start the machine to form first bartack and left side of buttonhole. 1 2. Sew second bartack and stitch backward until needle reaches beginning of buttonhole. 3. Stitch forward to the end of buttonhole 2 mark to complete buttonhole. 4. Push the reverse stitch switch to tie off the stitches. 3 NOTE: If stitch length is manually set at 0.8 (mm) for step 1, set the stitch length at 0.8 (mm) for step 3 as well. 4 58
-
 1
1 -
2
-
3
-
4
-
5
-
6
-
7
-
8
-
9
-
10
-
11
-
12
-
13
-
14
-
15
-
16
-
17
-
18
-
19
-
20
-
21
-
22
-
23
-
24
-
25
-
26
-
27
-
28
-
29
-
30
-
31
-
32
-
33
-
34
-
35
-
36
-
37
-
38
-
39
-
40
-
41
-
42
-
43
-
44
-
45
-
46
-
47
-
48
-
49
-
50
-
51
-
52
-
53
-
54
-
 55
55 -
 56
56 -
 57
57 -
 58
58 -
 59
59 -
 60
60 -
 61
61 -
 62
62 -
 63
63 -
 64
64 -
 65
65 -
66
-
67
-
68
-
69
-
70
-
71
-
72
-
73
-
74
-
75
-
76
 |
 |