Sony Ericsson Xperia X2 User Guide - Page 44
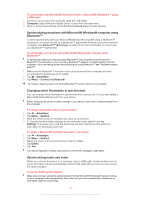
Changing which information is synchronized, ActiveSync, Schedule, Peak times, Options, Settings
 |
View all Sony Ericsson Xperia X2 manuals
Add to My Manuals
Save this manual to your list of manuals |
Page 44 highlights
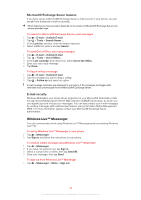
Direct Push, where all changes and new items are immediately pushed from your phone to a computer and from the computer to your phone. With scheduled synchronizations you can set a regular schedule for synchronizing Microsoft® Outlook® e-mails and other information. You can set how often to synchronize during peak times (which usually refer to your working hours) when the e-mail volume is high, as well as during off-peak times when the e-mail volume is low. To set up scheduled synchronizations with a Microsoft® Exchange Server 1 Tap > ActiveSync. 2 Tap Menu > Schedule. 3 In the Peak times and Off-peak times drop-down lists, select the time intervals you want. 4 Tap OK. To set the days and hours that make up your peak and off-peak times, tap Peak times at the bottom of the screen. Changing which information is synchronized You can change which information to synchronize from your phone. You can also delete a Microsoft® Outlook® account from your phone. Before changing the synchronization settings in your phone, make sure it is disconnected from the computer. To change which information is synchronized 1 Tap > ActiveSync. 2 Tap Menu > Options. 3 Mark the check boxes for the items you want to synchronize. 4 To change synchronization settings for an information type, select it and tap Settings. This allows you to set the download size limit, specify the time period of information to download, and more. To delete a Microsoft® Outlook® account in your phone 1 Tap > ActiveSync. 2 Tap Menu > Options. 3 Select the name of the account that you want to delete. 4 Tap Delete. 5 Tap Yes. You may be required to restart your phone in order for the changes to take effect. 44 This is an Internet version of this publication. © Print only for private use.
-
 1
1 -
2
-
3
-
4
-
5
-
6
-
7
-
8
-
9
-
10
-
11
-
12
-
13
-
14
-
15
-
16
-
17
-
18
-
19
-
20
-
21
-
22
-
23
-
24
-
25
-
26
-
27
-
28
-
29
-
30
-
31
-
32
-
33
-
34
-
35
-
36
-
37
-
38
-
 39
39 -
 40
40 -
 41
41 -
 42
42 -
 43
43 -
 44
44 -
 45
45 -
 46
46 -
 47
47 -
 48
48 -
 49
49 -
50
-
51
-
52
-
53
-
54
-
55
-
56
-
57
-
58
-
59
-
60
-
61
-
62
-
63
-
64
-
65
-
66
-
67
-
68
-
69
-
70
-
71
-
72
-
73
-
74
-
75
-
76
-
77
-
78
-
79
-
80
-
81
-
82
-
83
-
84
-
85
-
86
-
87
-
88
-
89
-
90
 |
 |