Sony Ericsson Xperia X2 User Guide - Page 76
Video camera settings, To select video camera settings
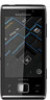 |
View all Sony Ericsson Xperia X2 manuals
Add to My Manuals
Save this manual to your list of manuals |
Page 76 highlights
To select video camera settings 1 Activate the camera and tap . 2 Tap to display the settings bar. 3 Tap to view more settings. Video camera settings Auto/Manual Auto When Auto is on, Scenes, Focus, Exposure time and White balance are set to Auto. Manual When Manual is on, you can select all settings manually. Scenes Use Scenes to quickly set up the camera for common situations using pre-programmed scenes. Auto When you select Auto mode in the camera settings bar, Scenes is set to automatically adjust settings for a video. You can only use the Auto scene by selecting Auto mode. The Auto scene is not available in Manual mode. Custom When you select Custom, you can adjust all settings in the camera. You have to select Manual in the camera settings bar to use Custom. Night mode When turned on, light sensitivity is increased. Use in poorly lit environments. Videos of fast-moving objects may get blurred. Hold your hand steady, or use a support. Focus Focus determines which part of a video should be sharp. Auto The camera automatically focuses on the selected subject. Macro Auto focus for extreme close-up videos. Infinite Use when recording videos at a distance. Focus is set on subjects far away. Subjects close to the camera may be blurred. Light Select whether you want to use the light when you record a video. On Turn on the light to improve close-up videos in poorly lit environments. Off The light is always turned off regardless of lighting conditions. Note: Sometimes a video gets better without the light, even if lighting conditions are poor. To record a good-quality video without using the light requires a steady hand. You can also use a support and the self-timer to avoid a blurred video. Shoot mode You can set the camera to take full-length video clips, or short video clips that are suitable for multimedia messages. Normal Use Normal to record full-length videos. Picture message Use Picture message to record videos suitable for sending in multimedia messages (MMS). The recording time of this video format is limited to fit in a multimedia message. 76 This is an Internet version of this publication. © Print only for private use.
-
 1
1 -
2
-
3
-
4
-
5
-
6
-
7
-
8
-
9
-
10
-
11
-
12
-
13
-
14
-
15
-
16
-
17
-
18
-
19
-
20
-
21
-
22
-
23
-
24
-
25
-
26
-
27
-
28
-
29
-
30
-
31
-
32
-
33
-
34
-
35
-
36
-
37
-
38
-
39
-
40
-
41
-
42
-
43
-
44
-
45
-
46
-
47
-
48
-
49
-
50
-
51
-
52
-
53
-
54
-
55
-
56
-
57
-
58
-
59
-
60
-
61
-
62
-
63
-
64
-
65
-
66
-
67
-
68
-
69
-
70
-
 71
71 -
 72
72 -
 73
73 -
 74
74 -
 75
75 -
 76
76 -
 77
77 -
 78
78 -
 79
79 -
 80
80 -
 81
81 -
82
-
83
-
84
-
85
-
86
-
87
-
88
-
89
-
90
 |
 |
