Sony MZ-DH10P Operating Instructions - Page 27
Shooting/Viewing Still Images, Turn the jog dial to select Enter
 |
UPC - 027242661127
View all Sony MZ-DH10P manuals
Add to My Manuals
Save this manual to your list of manuals |
Page 27 highlights
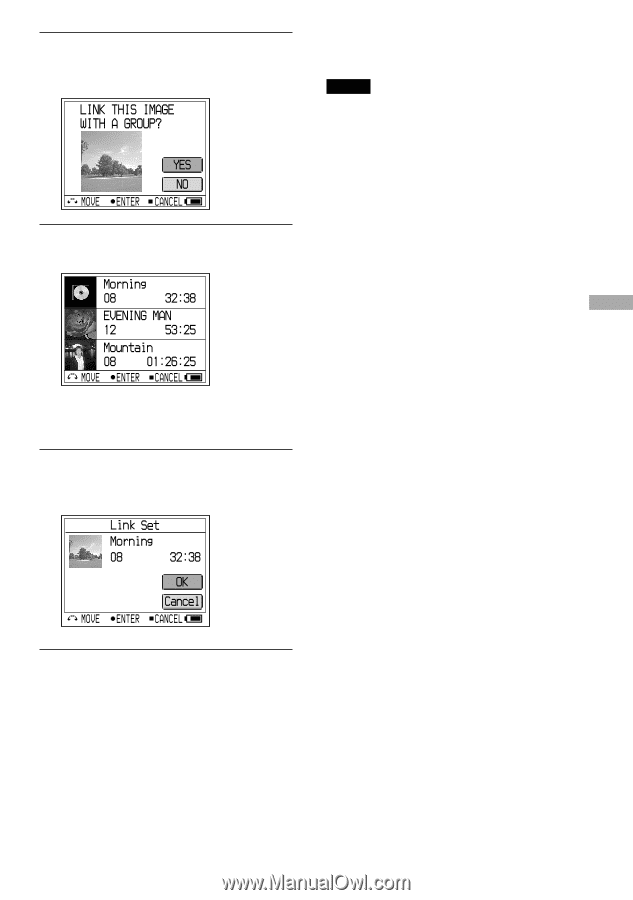
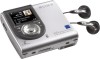
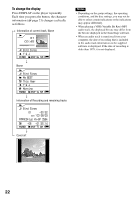
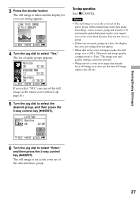
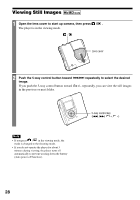
3 Press the shutter button The still image is taken and the display for cover art setting appears. 4 Turn the jog dial to select "Yes." The list of audio groups appears. To stop operation Press /CANCEL. Notes • The still image is set as the cover art of the music group. When transferring audio data using SonicStage, select a music group and transfer it. If you transfer individual music tracks, you cannot set a cover art to them because they are not set as a group. • If there are no music groups in a disc, the display for cover art setting does not appear. • When shot in the cover art image mode, the still image size is 200 200 pixels and image quality (compression) is "Fine." The image size and quality settings cannot be selected. • When you set a cover art to music that already has a still image as a cover art, the new still image replaces the old one. If you select "NO," you can set the still image as the music cover art later ( page 41). 5 Turn the jog dial to select the desired group, and then press the 5-way control key (/ENT). Shooting/Viewing Still Images 6 Turn the jog dial to select "Enter," and then press the 5-way control key (/ENT). The still image is set as the cover art of the selected music group. 27
-
 1
1 -
2
-
3
-
4
-
5
-
6
-
7
-
8
-
9
-
10
-
11
-
12
-
13
-
14
-
15
-
16
-
17
-
18
-
19
-
20
-
21
-
 22
22 -
 23
23 -
 24
24 -
 25
25 -
 26
26 -
 27
27 -
 28
28 -
 29
29 -
 30
30 -
 31
31 -
 32
32 -
33
-
34
-
35
-
36
-
37
-
38
-
39
-
40
-
41
-
42
-
43
-
44
-
45
-
46
-
47
-
48
-
49
-
50
-
51
-
52
-
53
-
54
-
55
-
56
-
57
-
58
-
59
-
60
-
61
-
62
-
63
-
64
-
65
-
66
-
67
-
68
-
69
-
70
-
71
-
72
-
73
-
74
-
75
-
76
-
77
-
78
-
79
-
80
-
81
-
82
-
83
-
84
-
85
-
86
-
87
-
88
-
89
-
90
-
91
-
92
-
93
-
94
-
95
-
96
-
97
-
98
-
99
 |
 |