TRENDnet TEW-453APB User Guide - Page 51
IP Address Screen, enter the server's address for the IP address. Click
 |
UPC - 710931502732
View all TRENDnet TEW-453APB manuals
Add to My Manuals
Save this manual to your list of manuals |
Page 51 highlights
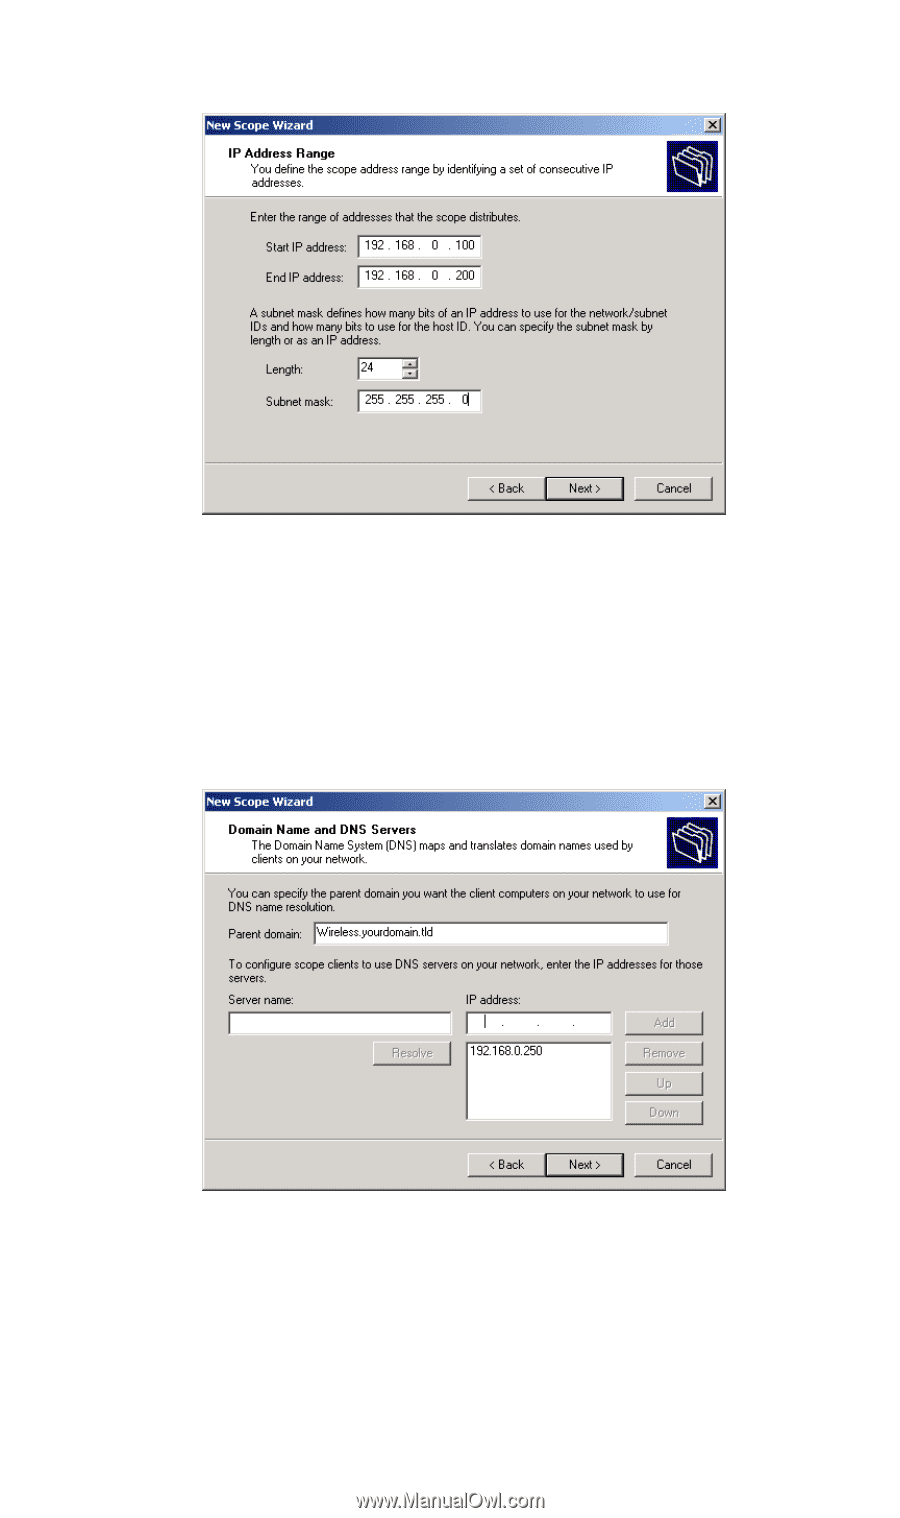
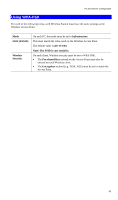
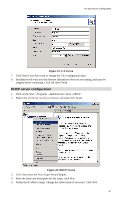
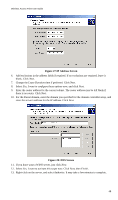
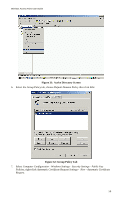
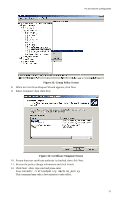
Wireless Access Point User Guide Figure 27:IP Address Screen 6. Add exclusions in the address fields if required. If no exclusions are required, leave it blank. Click Next. 7. Change the Lease Duration time if preferred. Click Next. 8. Select Yes, I want to configure these options now, and click Next. 9. Enter the router address for the current subnet. The router address may be left blank if there is no router. Click Next. 10. For the Parent domain, enter the domain you specified for the domain controller setup, and enter the server's address for the IP address. Click Next. Figure 28: DNS Screen 11. If you don't want a WINS server, just click Next. 12. Select Yes, I want to activate this scope now. Click Next, then Finish. 13. Right-click on the server, and select Authorize. It may take a few minutes to complete. 48
-
 1
1 -
2
-
3
-
4
-
5
-
6
-
7
-
8
-
9
-
10
-
11
-
12
-
13
-
14
-
15
-
16
-
17
-
18
-
19
-
20
-
21
-
22
-
23
-
24
-
25
-
26
-
27
-
28
-
29
-
30
-
31
-
32
-
33
-
34
-
35
-
36
-
37
-
38
-
39
-
40
-
41
-
42
-
43
-
44
-
45
-
 46
46 -
 47
47 -
 48
48 -
 49
49 -
 50
50 -
 51
51 -
 52
52 -
 53
53 -
 54
54 -
 55
55 -
 56
56 -
57
-
58
-
59
-
60
-
61
-
62
-
63
-
64
-
65
-
66
-
67
-
68
-
69
-
70
-
71
-
72
-
73
-
74
-
75
-
76
-
77
-
78
-
79
-
80
-
81
-
82
-
83
-
84
-
85
-
86
-
87
-
88
-
89
-
90
-
91
-
92
-
93
-
94
-
95
-
96
-
97
-
98
-
99
-
100
-
101
-
102
-
103
-
104
-
105
-
106
-
107
-
108
-
109
-
110
-
111
-
112
-
113
-
114
-
115
 |
 |