Brother International Innov-ís 2800D Users Manual - English - Page 53
Selecting a Stitch Pattern
 |
View all Brother International Innov-ís 2800D manuals
Add to My Manuals
Save this manual to your list of manuals |
Page 53 highlights
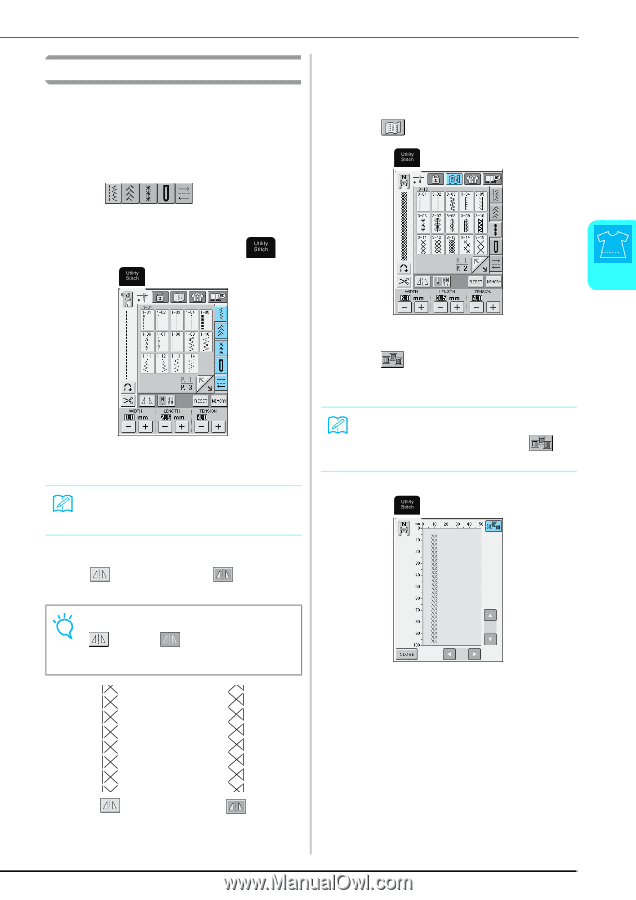
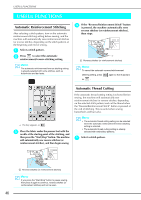
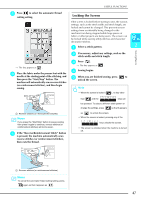
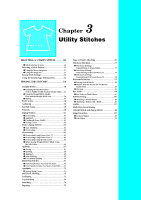
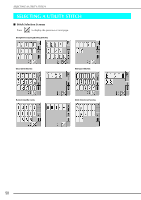
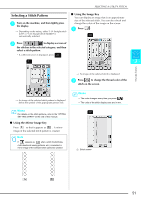
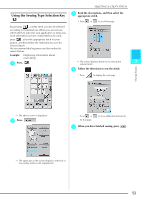
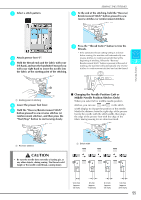
SELECTING A UTILITY STITCH Selecting a Stitch Pattern a Turn on the machine, and then lightly press the display. → Depending on the setting, either "1-01 Straight stitch (Left)" or "1-03 Straight stitch (Middle)" is automatically selected. ■ Using the Image Key You can display an image that is an approximate size of the selected stitch. You can also check and change the colors of the image on the screen. a Press . b Press to display a screen of the stitches in the selected category, and then select a stitch pattern. * If a different screen is displayed, press . 3 Utility Stitches → An image of the selected stitch is displayed. b Press to change the thread color of the stitch on the screen. → An image of the selected stitch pattern is displayed below the symbol of the appropriate presser foot. Memo For details on the stitch patterns, refer to the "STITCH SETTING CHART" at the end of this manual. ■ Using the Mirror Image Key Press so that it appears as . A mirror image of the selected stitch pattern is created. Note If appears as after a stitch (buttonholes, multi-directional sewing patterns, etc.) is selected, a mirror image of the selected stitch cannot be created. Memo • The color changes every time you press . • The units of the stitch display area are in mm. a Stitch screen 51
-
 1
1 -
2
-
3
-
4
-
5
-
6
-
7
-
8
-
9
-
10
-
11
-
12
-
13
-
14
-
15
-
16
-
17
-
18
-
19
-
20
-
21
-
22
-
23
-
24
-
25
-
26
-
27
-
28
-
29
-
30
-
31
-
32
-
33
-
34
-
35
-
36
-
37
-
38
-
39
-
40
-
41
-
42
-
43
-
44
-
45
-
46
-
47
-
 48
48 -
 49
49 -
 50
50 -
 51
51 -
 52
52 -
 53
53 -
 54
54 -
 55
55 -
 56
56 -
 57
57 -
 58
58 -
59
-
60
-
61
-
62
-
63
-
64
-
65
-
66
-
67
-
68
-
69
-
70
-
71
-
72
-
73
-
74
-
75
-
76
-
77
-
78
-
79
-
80
-
81
-
82
-
83
-
84
-
85
-
86
-
87
-
88
-
89
-
90
-
91
-
92
-
93
-
94
-
95
-
96
-
97
-
98
-
99
-
100
-
101
-
102
-
103
-
104
-
105
-
106
-
107
-
108
-
109
-
110
-
111
-
112
-
113
-
114
-
115
-
116
-
117
-
118
-
119
-
120
-
121
-
122
-
123
-
124
-
125
-
126
-
127
-
128
-
129
-
130
-
131
-
132
-
133
-
134
-
135
-
136
-
137
-
138
-
139
-
140
-
141
-
142
-
143
-
144
-
145
-
146
-
147
-
148
-
149
-
150
-
151
-
152
-
153
-
154
-
155
-
156
-
157
-
158
-
159
-
160
-
161
-
162
-
163
-
164
-
165
-
166
-
167
-
168
-
169
-
170
-
171
-
172
-
173
-
174
-
175
-
176
-
177
-
178
-
179
-
180
-
181
-
182
-
183
-
184
-
185
-
186
-
187
-
188
-
189
-
190
-
191
-
192
-
193
-
194
-
195
-
196
-
197
-
198
-
199
-
200
-
201
-
202
-
203
-
204
-
205
-
206
-
207
-
208
-
209
-
210
-
211
-
212
-
213
-
214
-
215
-
216
-
217
-
218
-
219
-
220
-
221
-
222
-
223
-
224
 |
 |