Brother International Innov-ís 2800D Users Manual - English - Page 89
Eyelets
 |
View all Brother International Innov-ís 2800D manuals
Add to My Manuals
Save this manual to your list of manuals |
Page 89 highlights
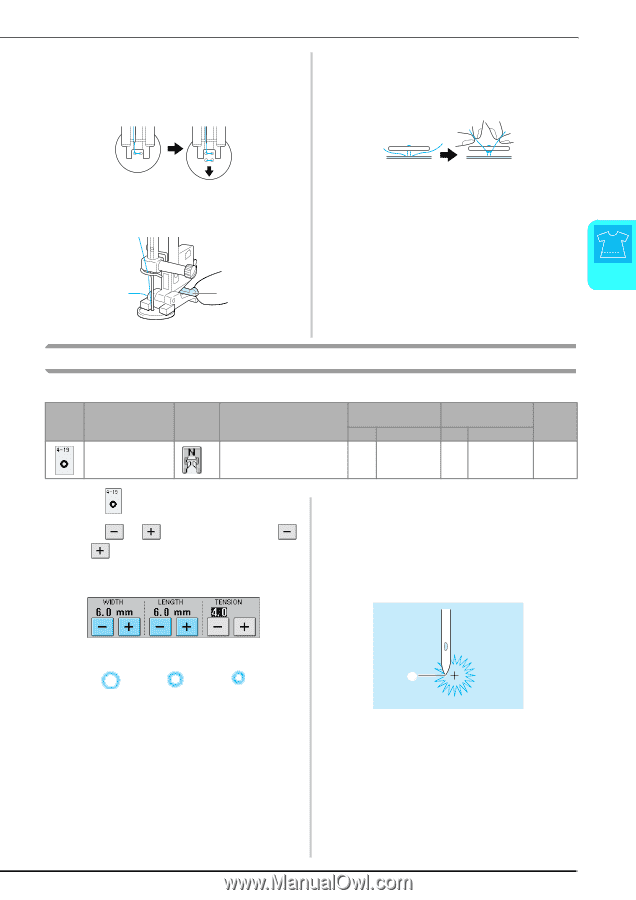
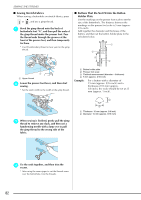
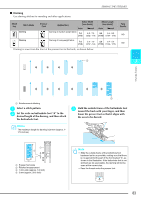
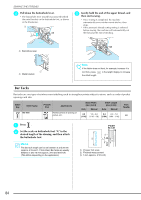
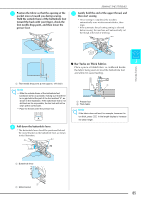
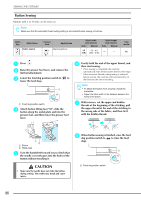
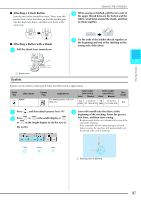
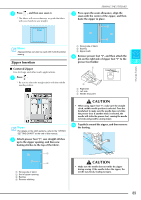
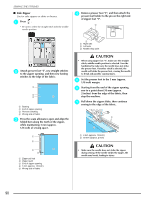
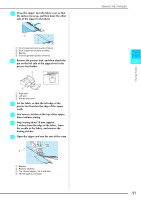
■ Attaching a 4-Hole Button Sew the two holes toward the front. Then, raise the presser foot, move the fabric so that the needle goes into the back two holes, and then sew them in the same way. SEWING THE STITCHES b When sewing is finished, pull the two ends of the upper thread between the button and the fabric, wind them around the shank, and then tie them together. ■ Attaching a Button with a Shank a Pull the shank lever toward you. c Tie the ends of the bobbin thread together at the beginning and end of the stitching on the wrong side of the fabric 3 a Utility Stitches a Shank lever Eyelets Eyelets can be used for making belt holes and other similar applications. Stitch Key Stitch Name Eyelet Presser Foot Applications For making eyelets, holes on belts, etc. Stitch width [mm (inch.)] Auto. Manual Stitch length [mm (inch.)] Auto. Manual Twin needle 7.0 7.0 6.0 5.0 7.0 7.0 6.0 5.0 (1/4) (1/4 15/64 3/16) (1/4) (1/4 15/64 3/16) NO a Press , and then attach presser foot "N". b Press or in the width display or or in the length display to set the size of the eyelet. c Lower the needle into the fabric at the beginning of the stitching, lower the presser foot lever, and then start sewing. * Reinforcement stitches are automatically sewn at the end of the stitching. * If the automatic thread cutting setting is selected before sewing, the machine will automatically cut the thread at the end of stitching. 7 mm 6 mm 5 mm a a Starting point of stitching 87
-
 1
1 -
2
-
3
-
4
-
5
-
6
-
7
-
8
-
9
-
10
-
11
-
12
-
13
-
14
-
15
-
16
-
17
-
18
-
19
-
20
-
21
-
22
-
23
-
24
-
25
-
26
-
27
-
28
-
29
-
30
-
31
-
32
-
33
-
34
-
35
-
36
-
37
-
38
-
39
-
40
-
41
-
42
-
43
-
44
-
45
-
46
-
47
-
48
-
49
-
50
-
51
-
52
-
53
-
54
-
55
-
56
-
57
-
58
-
59
-
60
-
61
-
62
-
63
-
64
-
65
-
66
-
67
-
68
-
69
-
70
-
71
-
72
-
73
-
74
-
75
-
76
-
77
-
78
-
79
-
80
-
81
-
82
-
83
-
 84
84 -
 85
85 -
 86
86 -
 87
87 -
 88
88 -
 89
89 -
 90
90 -
 91
91 -
 92
92 -
 93
93 -
 94
94 -
95
-
96
-
97
-
98
-
99
-
100
-
101
-
102
-
103
-
104
-
105
-
106
-
107
-
108
-
109
-
110
-
111
-
112
-
113
-
114
-
115
-
116
-
117
-
118
-
119
-
120
-
121
-
122
-
123
-
124
-
125
-
126
-
127
-
128
-
129
-
130
-
131
-
132
-
133
-
134
-
135
-
136
-
137
-
138
-
139
-
140
-
141
-
142
-
143
-
144
-
145
-
146
-
147
-
148
-
149
-
150
-
151
-
152
-
153
-
154
-
155
-
156
-
157
-
158
-
159
-
160
-
161
-
162
-
163
-
164
-
165
-
166
-
167
-
168
-
169
-
170
-
171
-
172
-
173
-
174
-
175
-
176
-
177
-
178
-
179
-
180
-
181
-
182
-
183
-
184
-
185
-
186
-
187
-
188
-
189
-
190
-
191
-
192
-
193
-
194
-
195
-
196
-
197
-
198
-
199
-
200
-
201
-
202
-
203
-
204
-
205
-
206
-
207
-
208
-
209
-
210
-
211
-
212
-
213
-
214
-
215
-
216
-
217
-
218
-
219
-
220
-
221
-
222
-
223
-
224
 |
 |