Brother International S-7200B Service Manual - Page 46
Motor and timing belt, REPLACING PARTS, < Timing belt removal >, < Motor removal >
 |
View all Brother International S-7200B manuals
Add to My Manuals
Save this manual to your list of manuals |
Page 46 highlights
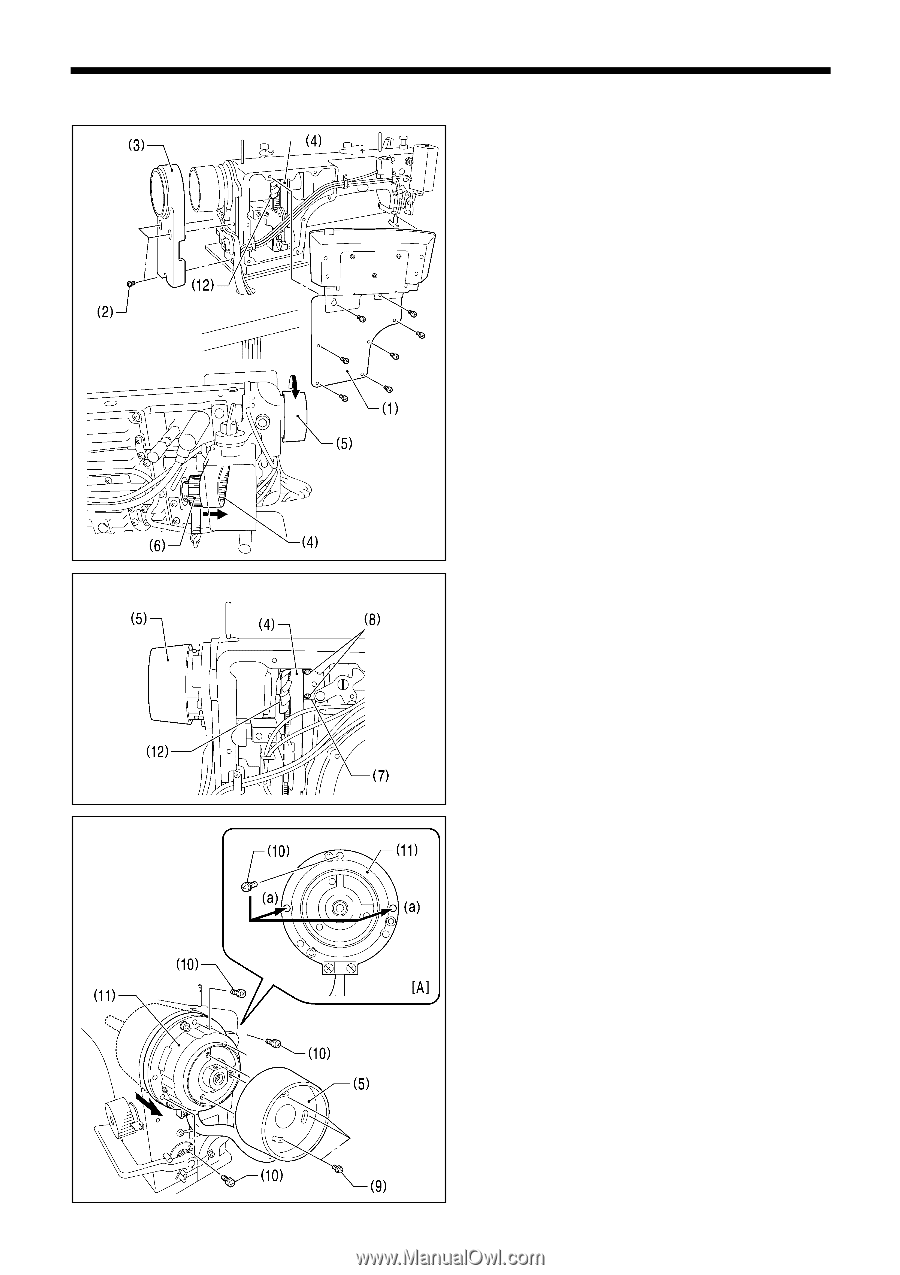
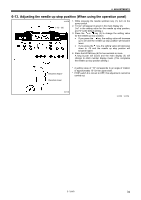
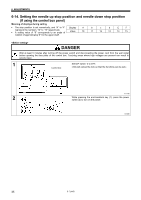
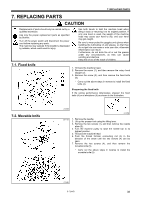
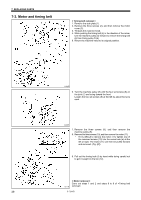
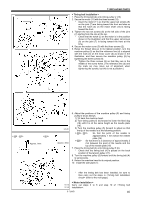
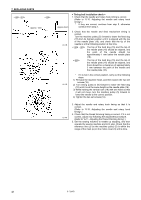
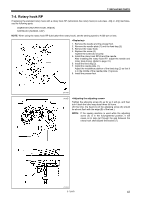
7. REPLACING PARTS 7-3. Motor and timing belt < Timing belt removal > 1. Remove the side plate (1). 2. Remove the three screws (2), and then remove the motor cover (3). 3. Tilt back the machine head. 4. While pushing the timing belt (4) in the direction of the arrow, turn the machine pulley (5) forward to remove the timing belt (4) from timing pulley D (6). 5. Return the machine head to its original position. 1209B 6. Turn the machine pulley (5) until the four set screws (8) on the joint (7) are facing toward the front. Loosen the two set screws (8) at the left by about five turns each. 1210B 7. Remove the three screws (9), and then remove the machine pulley (5). 8. Remove the three screws (10), and then remove the motor (11). * If it is difficult to remove the motor (11), tighten one of the removed screws (10) into the screw hole (a) at the left or right. The motor (11) can then be pulled forward and removed. (Fig. [A]) 9. Pull out the timing belt (4) by hand while being careful not to get it caught on the fan (12). 1211B < Motor removal > Carry out steps 1 and 2 and steps 6 to 8 of . 39 S-7200B
-
 1
1 -
2
-
3
-
4
-
5
-
6
-
7
-
8
-
9
-
10
-
11
-
12
-
13
-
14
-
15
-
16
-
17
-
18
-
19
-
20
-
21
-
22
-
23
-
24
-
25
-
26
-
27
-
28
-
29
-
30
-
31
-
32
-
33
-
34
-
35
-
36
-
37
-
38
-
39
-
40
-
 41
41 -
 42
42 -
 43
43 -
 44
44 -
 45
45 -
 46
46 -
 47
47 -
 48
48 -
 49
49 -
 50
50 -
 51
51 -
52
-
53
-
54
-
55
-
56
-
57
-
58
-
59
-
60
-
61
-
62
-
63
-
64
-
65
-
66
-
67
-
68
-
69
-
70
-
71
-
72
-
73
-
74
-
75
-
76
-
77
-
78
-
79
-
80
-
81
-
82
-
83
-
84
 |
 |