Canon imageCLASS D420 imageCLASS D480 Basic Operation Guide - Page 179
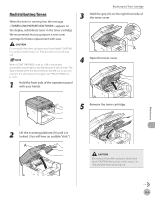
properly set in the machine., Hold the grip A on the right front side
 |
View all Canon imageCLASS D420 manuals
Add to My Manuals
Save this manual to your list of manuals |
Page 179 highlights
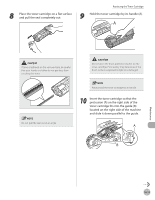
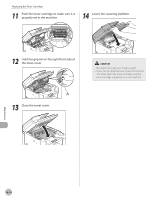
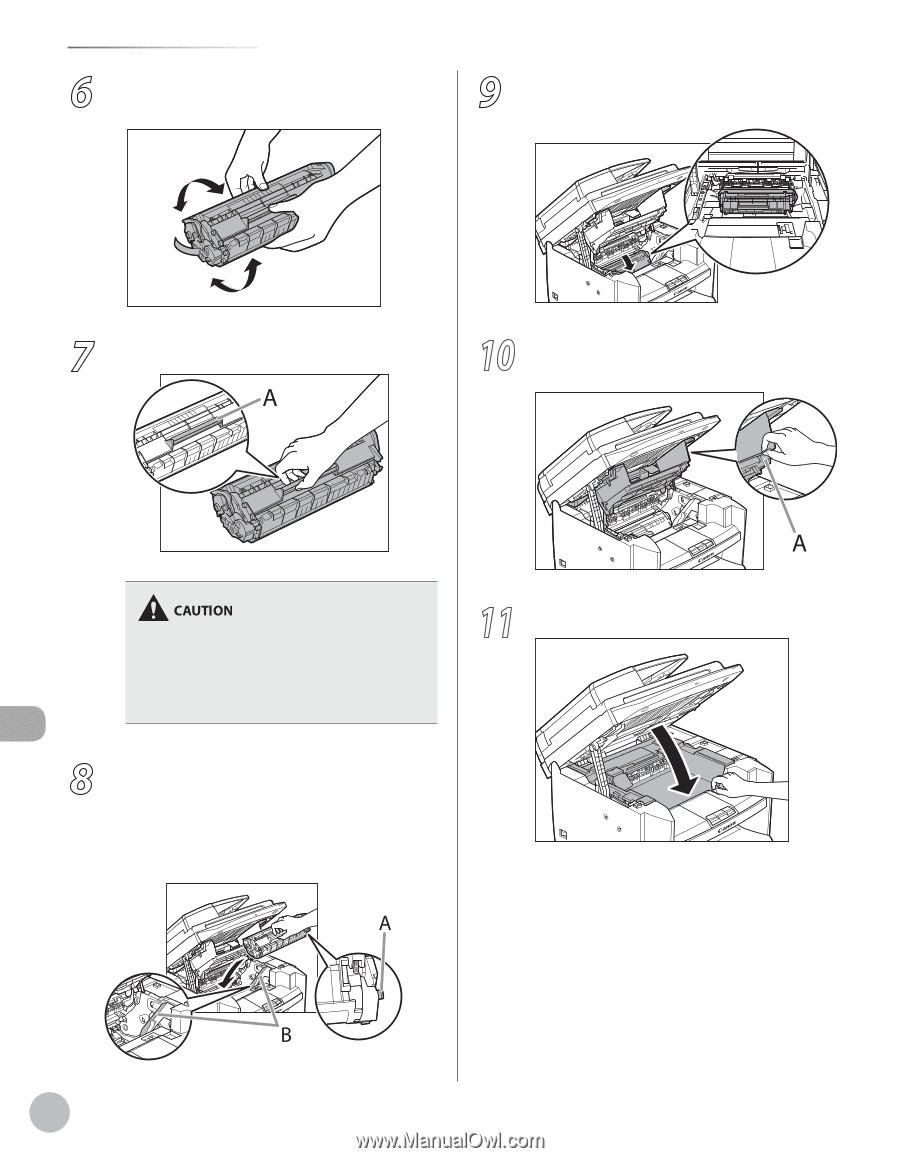
Replacing the Toner Cartridge 6 Gently rock the toner cartridge several times to evenly distribute toner inside. 9 Push the toner cartridge to make sure it is properly set in the machine. 7 Hold the toner cartridge by its handle (A). 10 Hold the grip (A) on the right front side of the toner cover. - Do not open the drum protective shutter on the toner cartridge. Print quality may deteriorate if the drum surface is exposed to light or is damaged. - Always hold the toner cartridge by its handle. 8 Insert the toner cartridge so that the protrusion (A) on the right side of the toner cartridge fits into the guide (B) located on the right side of the machine and slide it down parallel to the guide. 11 Close the toner cover. Maintenance 10-10
-
 1
1 -
2
-
3
-
4
-
5
-
6
-
7
-
8
-
9
-
10
-
11
-
12
-
13
-
14
-
15
-
16
-
17
-
18
-
19
-
20
-
21
-
22
-
23
-
24
-
25
-
26
-
27
-
28
-
29
-
30
-
31
-
32
-
33
-
34
-
35
-
36
-
37
-
38
-
39
-
40
-
41
-
42
-
43
-
44
-
45
-
46
-
47
-
48
-
49
-
50
-
51
-
52
-
53
-
54
-
55
-
56
-
57
-
58
-
59
-
60
-
61
-
62
-
63
-
64
-
65
-
66
-
67
-
68
-
69
-
70
-
71
-
72
-
73
-
74
-
75
-
76
-
77
-
78
-
79
-
80
-
81
-
82
-
83
-
84
-
85
-
86
-
87
-
88
-
89
-
90
-
91
-
92
-
93
-
94
-
95
-
96
-
97
-
98
-
99
-
100
-
101
-
102
-
103
-
104
-
105
-
106
-
107
-
108
-
109
-
110
-
111
-
112
-
113
-
114
-
115
-
116
-
117
-
118
-
119
-
120
-
121
-
122
-
123
-
124
-
125
-
126
-
127
-
128
-
129
-
130
-
131
-
132
-
133
-
134
-
135
-
136
-
137
-
138
-
139
-
140
-
141
-
142
-
143
-
144
-
145
-
146
-
147
-
148
-
149
-
150
-
151
-
152
-
153
-
154
-
155
-
156
-
157
-
158
-
159
-
160
-
161
-
162
-
163
-
164
-
165
-
166
-
167
-
168
-
169
-
170
-
171
-
172
-
173
-
 174
174 -
 175
175 -
 176
176 -
 177
177 -
 178
178 -
 179
179 -
 180
180 -
 181
181 -
 182
182 -
 183
183 -
 184
184 -
185
-
186
-
187
-
188
-
189
-
190
-
191
-
192
-
193
-
194
-
195
-
196
-
197
-
198
-
199
-
200
-
201
-
202
-
203
-
204
-
205
-
206
-
207
-
208
-
209
-
210
-
211
-
212
-
213
-
214
-
215
-
216
-
217
-
218
-
219
-
220
-
221
-
222
-
223
-
224
-
225
-
226
-
227
-
228
-
229
-
230
-
231
-
232
-
233
-
234
-
235
-
236
 |
 |
10-10
Maintenance
Replacing the Toner Cartridge
6
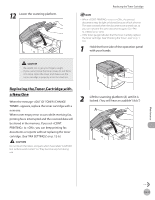
Gently rock the toner cartridge several
times to evenly distribute toner inside.
7
Hold the toner cartridge by its handle (A).
Do not open the drum protective shutter on
the toner cartridge. Print quality may
deteriorate if the drum surface is exposed to
light or is damaged.
Always hold the toner cartridge by its handle.
–
–
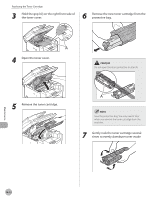
8
Insert the toner cartridge so that the
protrusion (A) on the right side of the
toner cartridge fits into the guide (B)
located on the right side of the machine
and slide it down parallel to the guide.
9
Push the toner cartridge to make sure it is
properly set in the machine.
10
Hold the grip (A) on the right front side of
the toner cover.
11
Close the toner cover.