Casio WK-6500 User Guide - Page 29
Modifying Auto Accompaniment, Patterns, Using One-Touch Presets - keyboard case
 |
View all Casio WK-6500 manuals
Add to My Manuals
Save this manual to your list of manuals |
Page 29 highlights
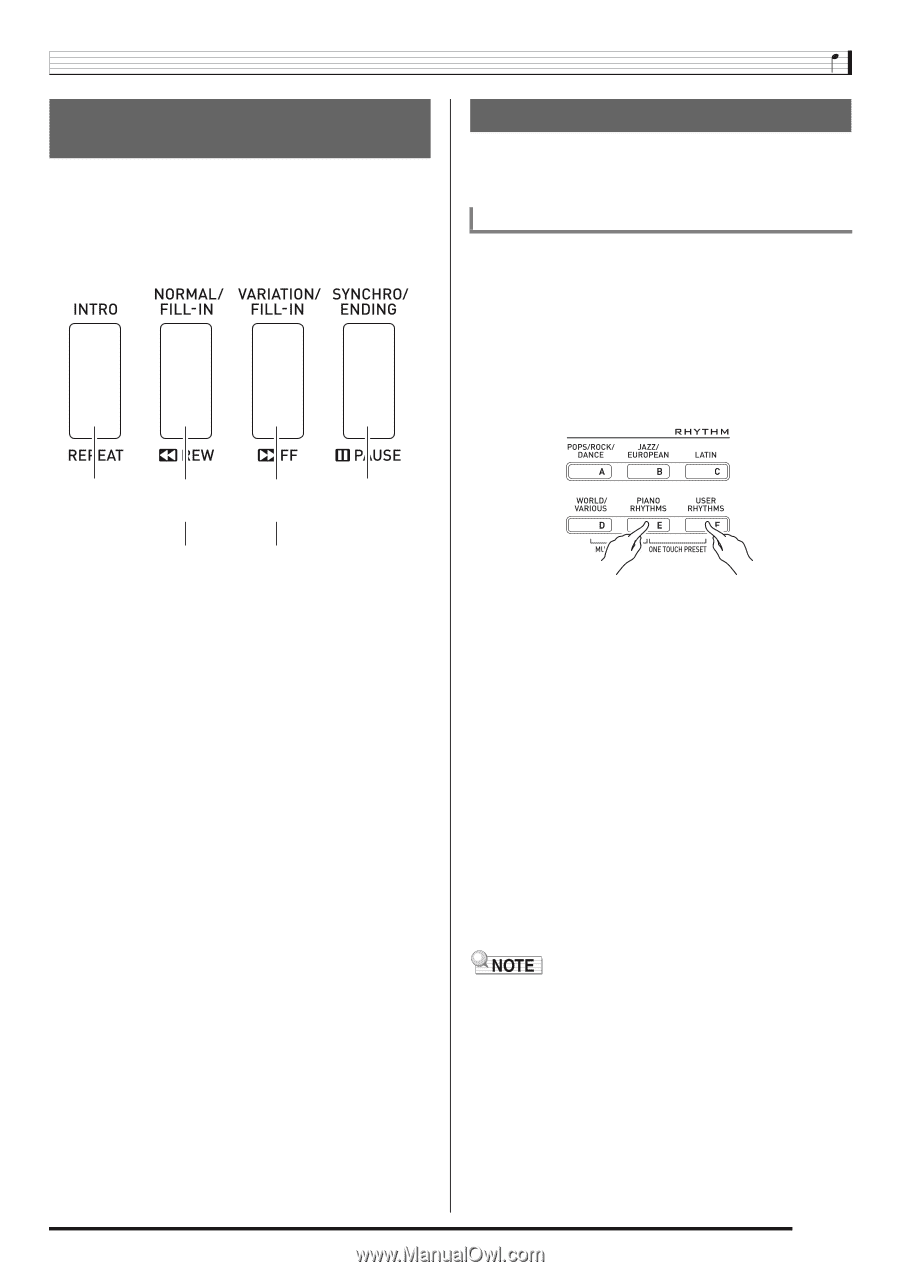
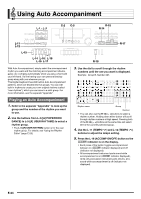
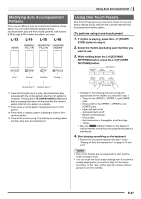
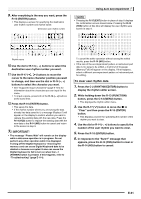
Modifying Auto Accompaniment Patterns There are six different Auto Accompaniment patterns, shown below. You can switch between patterns during accompaniment play and even modify patterns. Use buttons L-13 through L-16 to select the pattern you want. L-13 L-14 L-15 L-16 Using Auto Accompaniment Using One-Touch Presets One-Touch Preset gives you one-touch access to tone and tempo settings that go well with the currently selected Auto Accompaniment rhythm pattern. To perform using a one-touch preset 1. If rhythm is playing, press the L-17 (START/ STOP) button to stop it. 2. Select the rhythm (excluding user rhythms) you want to use. 3. While holding down the L-8 ([E] PIANO RHYTHMS) button, press the L-9 ([F] USER RHYTHMS) button. Intro *1 Normal Variation Ending *4 Normal fill-in *2 Variation fill-in *3 *1 Press at the beginning of a song. Accompaniment play proceeds with the normal pattern after the intro pattern is complete. Pressing the L-15 (VARIATION/FILL-IN) button before pressing this button will proceed with the variation pattern after the intro pattern is complete. *2 Press while a normal pattern is playing to insert a fill-in pattern. *3 Press while a variation pattern is playing to insert a fill-in variation pattern. *4 Press at the end of a song. This will play an ending pattern and then stop Auto Accompaniment. • Settings for the following items are configured appropriately for the rhythm you selected in step 1. - Tones for the UPPER 1, UPPER 2, and LOWER parts - Octave shift for the UPPER 1, UPPER 2, and LOWER parts - Layer and split on/off - Accompaniment on/off - Reverb on/off and type - Chorus type - Auto harmonize or Arpeggiator on/off and type - Tempo • Also, the F indicator flashes on the display to indicate that the normal Auto Accompaniment pattern is standing by. 4. Start playing something on the keyboard. • Perform the procedure starting from step 7 under "Playing an Auto Accompaniment" on page E-24 and E-27. • One-Touch Presets are not supported for user rhythms (F:001 through F:010). • You can recall one-touch preset settings even if a rhythm is already playing when you perform step 3 of the above procedure. In this case, rhythm play will continue without going into synchro standby. E-27
-
 1
1 -
2
-
3
-
4
-
5
-
6
-
7
-
8
-
9
-
10
-
11
-
12
-
13
-
14
-
15
-
16
-
17
-
18
-
19
-
20
-
21
-
22
-
23
-
 24
24 -
 25
25 -
 26
26 -
 27
27 -
 28
28 -
 29
29 -
 30
30 -
 31
31 -
 32
32 -
 33
33 -
 34
34 -
35
-
36
-
37
-
38
-
39
-
40
-
41
-
42
-
43
-
44
-
45
-
46
-
47
-
48
-
49
-
50
-
51
-
52
-
53
-
54
-
55
-
56
-
57
-
58
-
59
-
60
-
61
-
62
-
63
-
64
-
65
-
66
-
67
-
68
-
69
-
70
-
71
-
72
-
73
-
74
-
75
-
76
-
77
-
78
-
79
-
80
-
81
-
82
-
83
-
84
-
85
-
86
-
87
-
88
-
89
-
90
-
91
-
92
-
93
-
94
-
95
-
96
-
97
-
98
-
99
-
100
-
101
-
102
-
103
-
104
-
105
-
106
-
107
-
108
-
109
-
110
-
111
-
112
-
113
-
114
-
115
-
116
-
117
-
118
-
119
-
120
-
121
-
122
-
123
-
124
-
125
-
126
-
127
-
128
-
129
-
130
-
131
-
132
 |
 |