Casio WK-6500 User Guide - Page 40
Press the R-14 YES button.
 |
View all Casio WK-6500 manuals
Add to My Manuals
Save this manual to your list of manuals |
Page 40 highlights
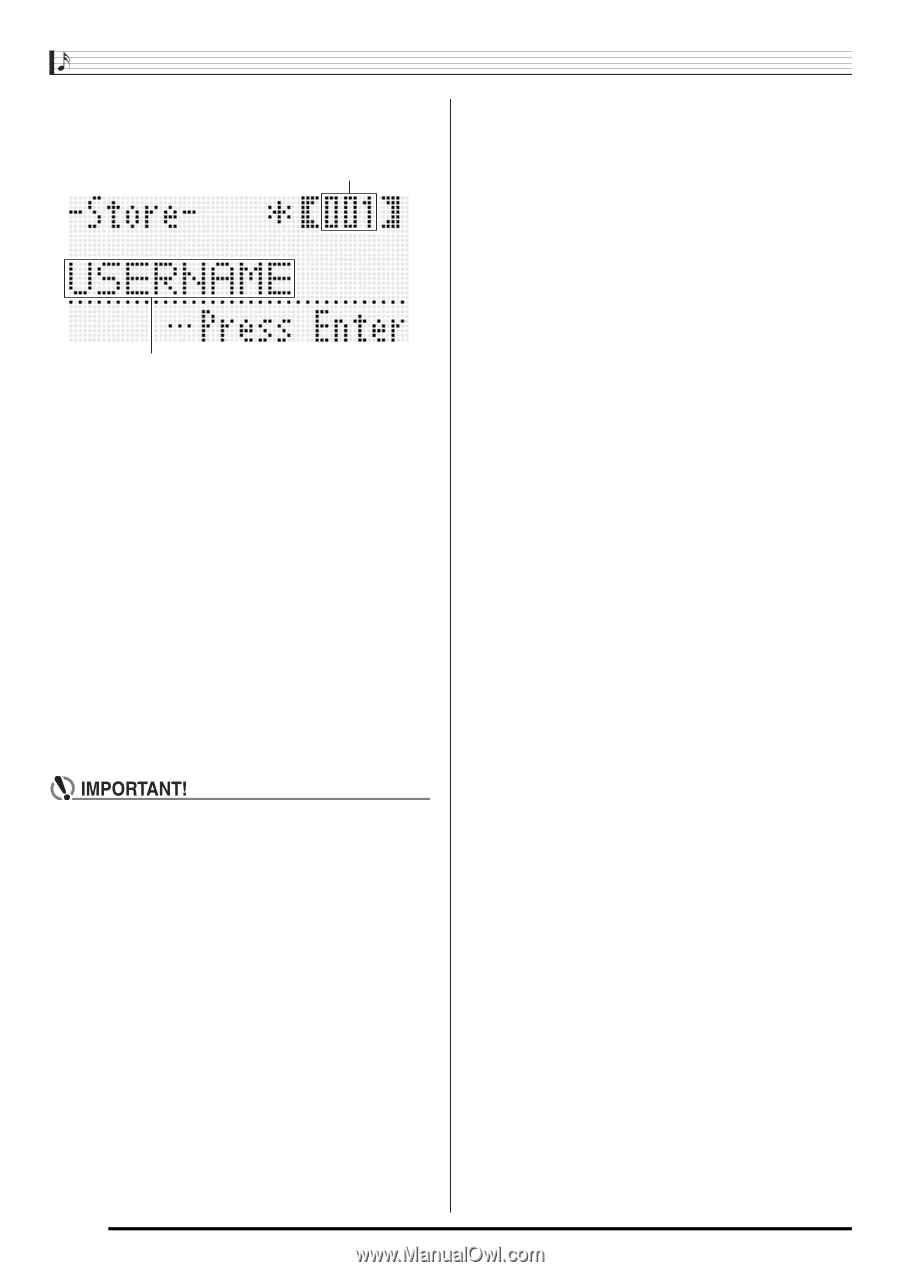
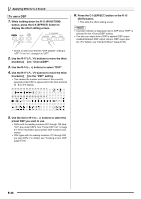
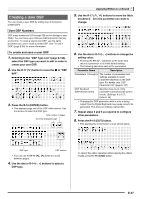
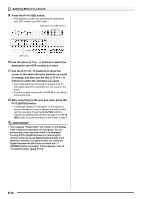
Applying Effects to a Sound 9. Press the R-14 (YES) button. • This displays a screen for specifying the destination user DSP number and DSP name. Destination user DSP number DSP name 10. Use the dial or R-14 (-, +) buttons to select the destination user DSP number you want. 11. Use the R-17 (u, i) buttons to move the cursor to the name character position you want to change, and then use the dial or R-14 (-, +) buttons to select the character you want. • See "Supported Input Characters" (page E-124) for information about the characters you can input for the name. • To input a space, press both of the R-14 (-, +) buttons at the same time. 12. After everything is the way you want, press the R-16 (ENTER) button. • A message (Replace?) will appear on the display to confirm whether you want to replace the existing data with the new data. Press the R-14 (YES) button to replace the existing data with the new data or the R-14 (NO) button to cancel and return to the screen in step 9. • The message "Please Wait" will remain on the display while a data save operation is in progress. Do not perform any other operation while it is displayed. Turning off the Digital Keyboard or removing the memory card can cause Digital Keyboard data to be deleted or become corrupted. It also can cause the Digital Keyboard to fail to turn on when the L-1 (POWER) button is pressed. If this happens, refer to "Troubleshooting" (page E-114). E-38
-
 1
1 -
2
-
3
-
4
-
5
-
6
-
7
-
8
-
9
-
10
-
11
-
12
-
13
-
14
-
15
-
16
-
17
-
18
-
19
-
20
-
21
-
22
-
23
-
24
-
25
-
26
-
27
-
28
-
29
-
30
-
31
-
32
-
33
-
34
-
 35
35 -
 36
36 -
 37
37 -
 38
38 -
 39
39 -
 40
40 -
 41
41 -
 42
42 -
 43
43 -
 44
44 -
 45
45 -
46
-
47
-
48
-
49
-
50
-
51
-
52
-
53
-
54
-
55
-
56
-
57
-
58
-
59
-
60
-
61
-
62
-
63
-
64
-
65
-
66
-
67
-
68
-
69
-
70
-
71
-
72
-
73
-
74
-
75
-
76
-
77
-
78
-
79
-
80
-
81
-
82
-
83
-
84
-
85
-
86
-
87
-
88
-
89
-
90
-
91
-
92
-
93
-
94
-
95
-
96
-
97
-
98
-
99
-
100
-
101
-
102
-
103
-
104
-
105
-
106
-
107
-
108
-
109
-
110
-
111
-
112
-
113
-
114
-
115
-
116
-
117
-
118
-
119
-
120
-
121
-
122
-
123
-
124
-
125
-
126
-
127
-
128
-
129
-
130
-
131
-
132
 |
 |