Casio WK-6500 User Guide - Page 39
Creating a User DSP
 |
View all Casio WK-6500 manuals
Add to My Manuals
Save this manual to your list of manuals |
Page 39 highlights
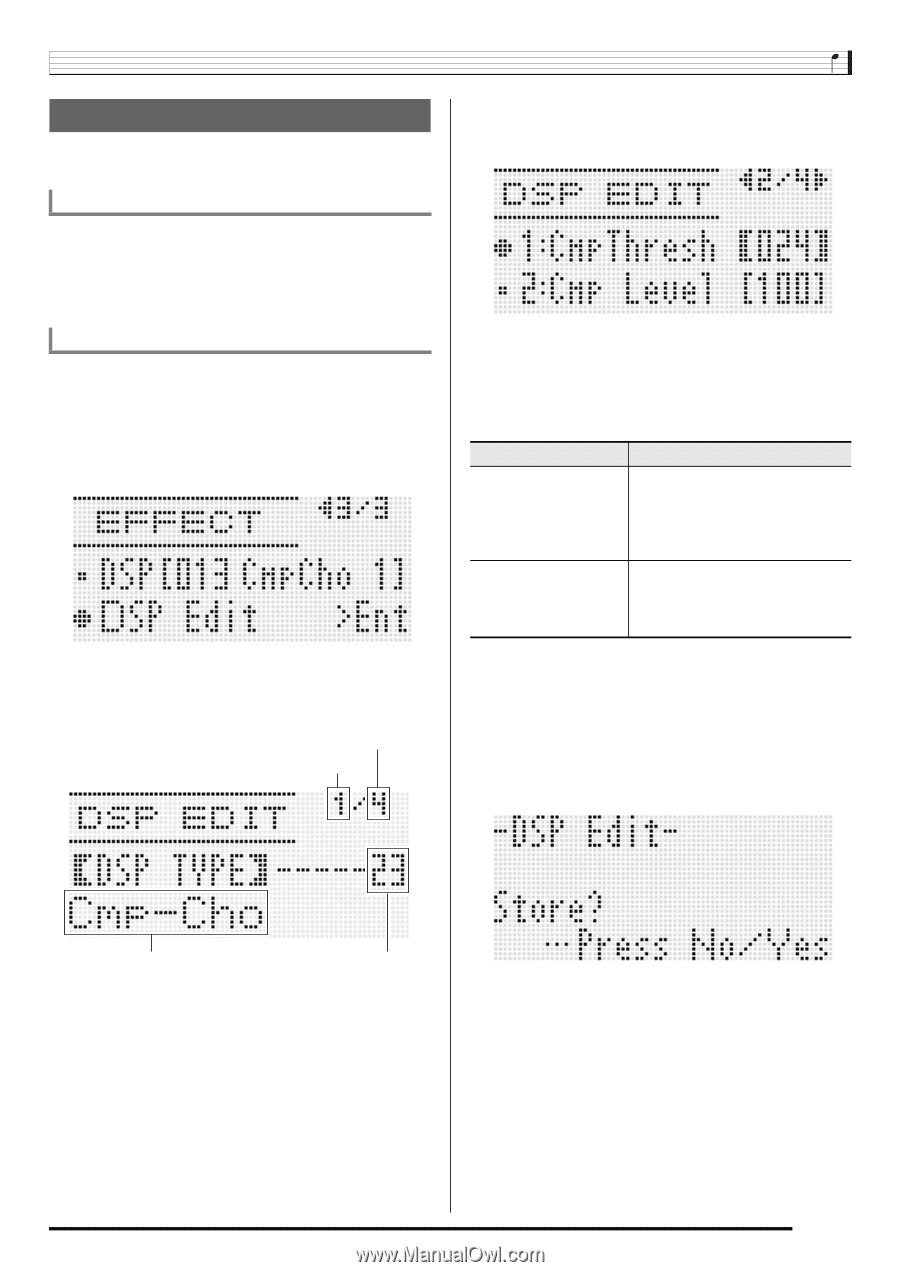
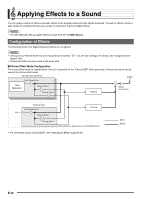
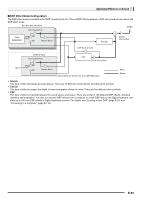
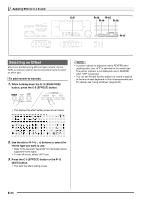
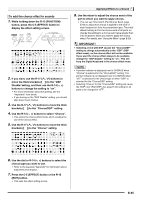
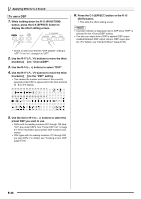
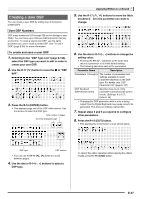
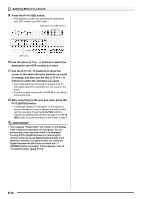
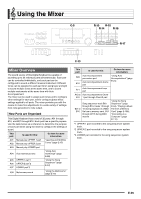
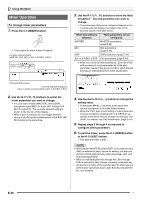
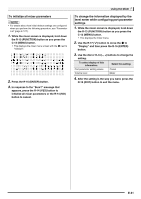
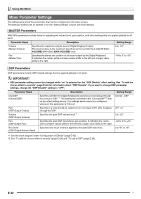
Creating a User DSP You can create a user DSP by editing one of the built-in preset DSPs. User DSP Numbers DSP areas numbered 101 through 200 are for storage of user DSPs. You can have up to 100 user DSPs stored in memory at one time. To recall a stored user DSP, use the same procedure you use to recall a preset DSP. See "To use a DSP" (page E-36) for more information. To create and save a user DSP 1. Referring to the "DSP Type List" (page E-120), select the DSP type you want to edit in order to create your user DSP. 2. Use the R-17 (y) button to move the 0 to "DSP Edit". 3. Press the R-16 (ENTER) button. • This displays page one of the DSP editor screen. Use this screen to select the DSP type. Total number of pages Currently displayed page Applying Effects to a Sound 5. Use the R-17 (t, y) buttons to move the thick brackets (%) to the parameter you want to change. 6. Use the dial or R-14 (-, +) buttons to change the setting value. • Pressing the R-14 (-, +) buttons at the same time returns a parameter to its initial default setting. • The following describes each of the parameters. Parameter Name Description Parameters 1 through 8 The number of parameters and settings available for each parameter depends on the DSP type. For details, see "DSP Parameter List" (page E-121). DSP RevSend (DSP Reverb Send) Specifies how much of the post-DSP sound should be sent to reverb. (Settings: 0 to 127 ; Default: 40) • Changing the DSP parameter while a note is being output from the Digital Keyboard may cause noise to be generated. This does not indicate malfunction. 7. Repeat steps 5 and 6 as required to configure other parameters. 8. Press the R-15 (EXIT) button. • This displays the confirmation screen shown below. DSP type DSP number • You can use the R-17 (u, i) buttons to scroll between pages. 4. Use the dial or R-14 (-, +) buttons to select a DSP type. To cancel the editor operation without saving the edited results, press the R-14 (NO) button. E-37
-
 1
1 -
2
-
3
-
4
-
5
-
6
-
7
-
8
-
9
-
10
-
11
-
12
-
13
-
14
-
15
-
16
-
17
-
18
-
19
-
20
-
21
-
22
-
23
-
24
-
25
-
26
-
27
-
28
-
29
-
30
-
31
-
32
-
33
-
 34
34 -
 35
35 -
 36
36 -
 37
37 -
 38
38 -
 39
39 -
 40
40 -
 41
41 -
 42
42 -
 43
43 -
 44
44 -
45
-
46
-
47
-
48
-
49
-
50
-
51
-
52
-
53
-
54
-
55
-
56
-
57
-
58
-
59
-
60
-
61
-
62
-
63
-
64
-
65
-
66
-
67
-
68
-
69
-
70
-
71
-
72
-
73
-
74
-
75
-
76
-
77
-
78
-
79
-
80
-
81
-
82
-
83
-
84
-
85
-
86
-
87
-
88
-
89
-
90
-
91
-
92
-
93
-
94
-
95
-
96
-
97
-
98
-
99
-
100
-
101
-
102
-
103
-
104
-
105
-
106
-
107
-
108
-
109
-
110
-
111
-
112
-
113
-
114
-
115
-
116
-
117
-
118
-
119
-
120
-
121
-
122
-
123
-
124
-
125
-
126
-
127
-
128
-
129
-
130
-
131
-
132
 |
 |