Casio WK-6500 User Guide - Page 53
DANCE to L-9 [F] USER RHYTHMS to select - case
 |
View all Casio WK-6500 manuals
Add to My Manuals
Save this manual to your list of manuals |
Page 53 highlights
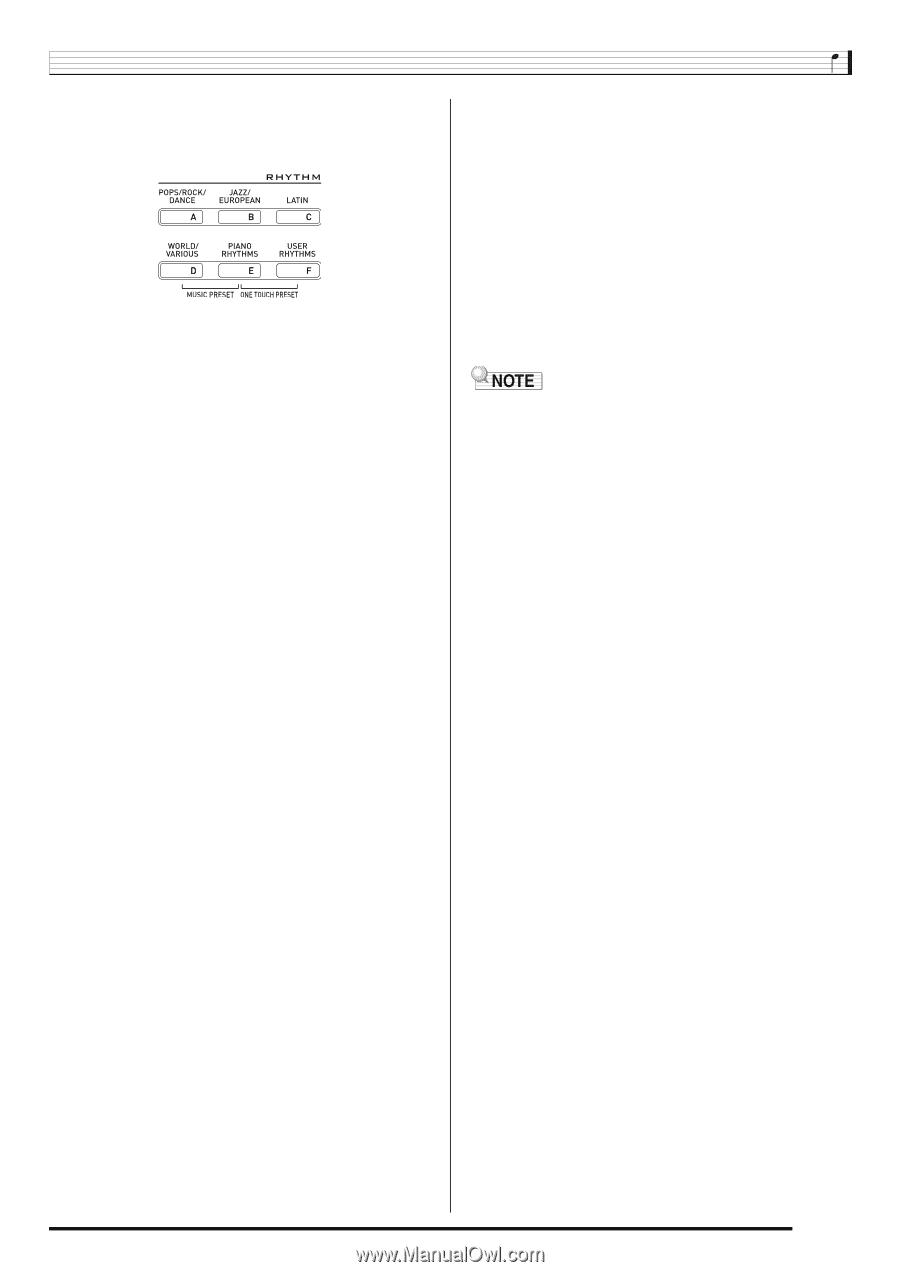
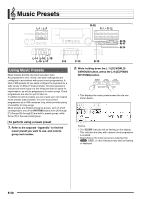
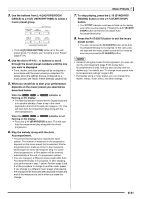
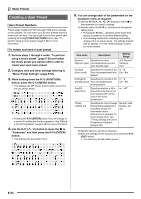
3. Use the buttons from L-4 ([A] POPS/ROCK/ DANCE) to L-9 ([F] USER RHYTHMS) to select a music preset group. • The L-9 ([F] USER RHYTMS) button is for the user preset group. For details, see "Creating a User Preset" (page E-54). 4. Use the dial or R-14 (-, +) buttons to scroll through the music preset numbers until the one you want is displayed. • Tone, rhythm, and other settings will be configured in accordance with the music preset you selected. For details about the settings that are configured by a music preset, see "Music Preset Settings" (page E-52). 5. What you should do to start your performance depends on the music preset you selected as described below. When the F, E, or H indicator is flashing on the display: 3 The flashing indicator means that the Digital Keyboard is in synchro standby. Press a key in the chord keyboard to the left of the split point (page E-17). This will start Auto Accompaniment play along with the chord progression. When the F, E, or H indicator is not flashing on the display: 3 Press the L-17 (START/STOP) button. This will start Auto Accompaniment play along with the chord progression. 6. Play the melody along with the Auto Accompaniment. • The preset chord progression repeats the same pattern. The number of measures in the progression depends on the music preset that is selected. Shorter progressions are made up of two to four measures, while longer are 30 to 40 measures long. For some chord progressions, a fill-in pattern will be inserted automatically at the end of a progression pattern. • You can change to a different music preset while Auto Accompaniment play is in progress, or after stopping your performance in step 7, below. Perform steps 3 and 4 of this procedure to change to another music preset. If you change to a different music preset while playing, the change will be executed after playback reaches the end of the measure you are in when you make the change. Music Presets 7. To stop playing, press the L-16 (SYNCHRO/ ENDING) button or the L-17 (START/STOP) button. • The D indicator continues to flash on the display even after you stop playing. Pressing the L-17 (START/ STOP) button at this time will restart Auto Accompaniment play. 8. Press the R-15 (EXIT) button to exit the music preset screen. • You also can press the R-15 (EXIT) button while Auto Accompaniment play is in progress. In this case, play will stop and the music preset screen will be exited as soon as you press the R-15 (EXIT) button. • Instead of using the preset chord progression, you also can use the chord keyboard (page E-26) to play Auto Accompaniment chords, and you also can play with the rhythm only. For details, see "To change music preset Auto Accompaniment settings" (page E-53). • During play using a music preset, you can change tone, rhythm, tempo, mixer, effect, and other settings. E-51
-
 1
1 -
2
-
3
-
4
-
5
-
6
-
7
-
8
-
9
-
10
-
11
-
12
-
13
-
14
-
15
-
16
-
17
-
18
-
19
-
20
-
21
-
22
-
23
-
24
-
25
-
26
-
27
-
28
-
29
-
30
-
31
-
32
-
33
-
34
-
35
-
36
-
37
-
38
-
39
-
40
-
41
-
42
-
43
-
44
-
45
-
46
-
47
-
 48
48 -
 49
49 -
 50
50 -
 51
51 -
 52
52 -
 53
53 -
 54
54 -
 55
55 -
 56
56 -
 57
57 -
 58
58 -
59
-
60
-
61
-
62
-
63
-
64
-
65
-
66
-
67
-
68
-
69
-
70
-
71
-
72
-
73
-
74
-
75
-
76
-
77
-
78
-
79
-
80
-
81
-
82
-
83
-
84
-
85
-
86
-
87
-
88
-
89
-
90
-
91
-
92
-
93
-
94
-
95
-
96
-
97
-
98
-
99
-
100
-
101
-
102
-
103
-
104
-
105
-
106
-
107
-
108
-
109
-
110
-
111
-
112
-
113
-
114
-
115
-
116
-
117
-
118
-
119
-
120
-
121
-
122
-
123
-
124
-
125
-
126
-
127
-
128
-
129
-
130
-
131
-
132
 |
 |