Casio WK-6500 User Guide - Page 48
Creating a User Tone
 |
View all Casio WK-6500 manuals
Add to My Manuals
Save this manual to your list of manuals |
Page 48 highlights
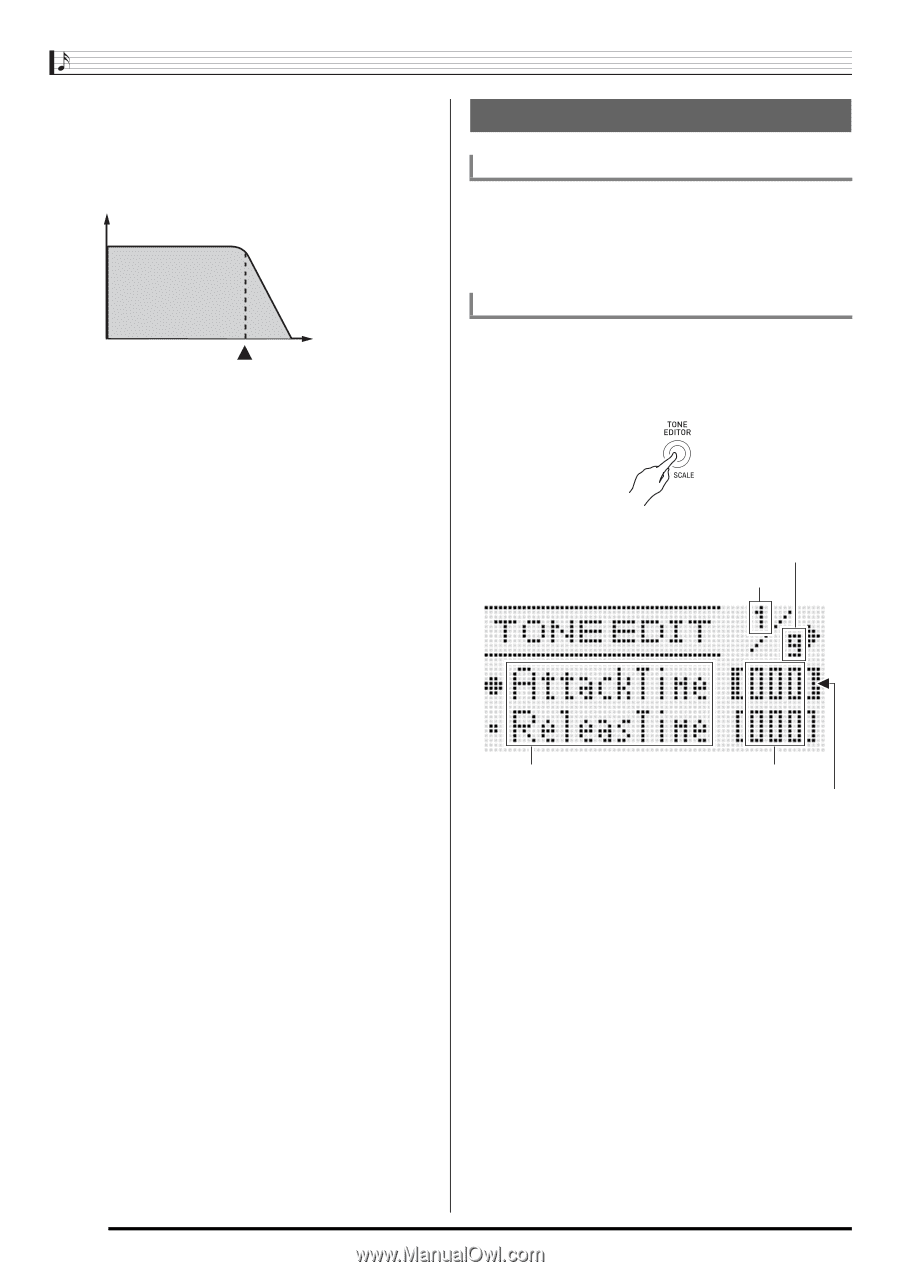
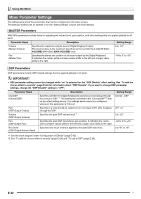
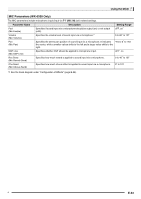
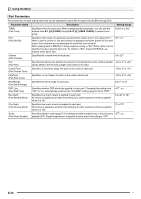
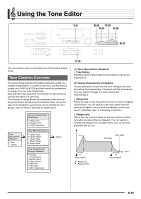
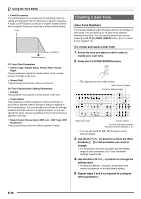
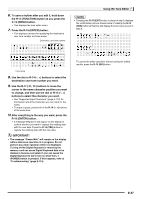
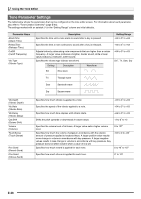
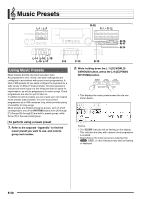
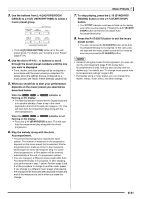
Using the Tone Editor • Cutoff Frequency The cutoff frequency is a parameter for adjusting timbre by cutting any frequency that is higher than a specific frequency. A larger cutoff frequency produces a brighter (harder) timbre, while a smaller frequency produces a darker (softer) timbre. Level Cutoff frequency Frequency (3) Tone Pitch Parameters • Vibrato Type, Vibrato Delay, Vibrato Rate, Vibrato Depth These parameters adjust the vibrato effect, which causes periodic changes in the tone. • Octave Shift This parameter controls the octave of all tones. (4) Tone Characteristic Setting Parameters • Volume This parameter controls the overall volume of the tone. • Touch Sense This parameter controls changes in volume and timbre in accordance with the relative amount of pressure applied to the keyboard keys. You can specify more volume for stronger pressure and less volume or a lighter pressure, or you can specify the same volume regardless of how much pressure is applied to the keys. • Reverb Send, Chorus Send, DSP Line , DSP Type, DSP Parameters These parameters control the effects applied to tones. Creating a User Tone User Tone Numbers Tone areas numbered L:001 through L:010 are for storage of user tones. You can have up to 10 user tones stored in memory at one time. You can recall a stored user tone by pressing the R-12 ([L] USER TONES) button. See "To select a tone" (page E-14). To create and save a user tone 1. Select the tone you want to edit in order to create your user tone. 2. Press the C-6 (TONE EDITOR) button. • This displays the tone editor screen. Total number of pages Currently displayed page Parameter name Current setting Currently selected parameter (Enclosed by thick brackets %). • You can use the R-17 (u, i) buttons to scroll between pages. 3. Use the R-17 (t, y) buttons to move the thick brackets (%) to the parameter you want to change. • For information about the operation and the setting range of each parameter, see "Tone Parameter Settings" (page E-48). 4. Use the dial or R-14 (-, +) buttons to change the setting value. • Pressing the R-14 (-, +) buttons at the same time returns a parameter to its initial default setting. 5. Repeat steps 3 and 4 as required to configure other parameters. E-46
-
 1
1 -
2
-
3
-
4
-
5
-
6
-
7
-
8
-
9
-
10
-
11
-
12
-
13
-
14
-
15
-
16
-
17
-
18
-
19
-
20
-
21
-
22
-
23
-
24
-
25
-
26
-
27
-
28
-
29
-
30
-
31
-
32
-
33
-
34
-
35
-
36
-
37
-
38
-
39
-
40
-
41
-
42
-
 43
43 -
 44
44 -
 45
45 -
 46
46 -
 47
47 -
 48
48 -
 49
49 -
 50
50 -
 51
51 -
 52
52 -
 53
53 -
54
-
55
-
56
-
57
-
58
-
59
-
60
-
61
-
62
-
63
-
64
-
65
-
66
-
67
-
68
-
69
-
70
-
71
-
72
-
73
-
74
-
75
-
76
-
77
-
78
-
79
-
80
-
81
-
82
-
83
-
84
-
85
-
86
-
87
-
88
-
89
-
90
-
91
-
92
-
93
-
94
-
95
-
96
-
97
-
98
-
99
-
100
-
101
-
102
-
103
-
104
-
105
-
106
-
107
-
108
-
109
-
110
-
111
-
112
-
113
-
114
-
115
-
116
-
117
-
118
-
119
-
120
-
121
-
122
-
123
-
124
-
125
-
126
-
127
-
128
-
129
-
130
-
131
-
132
 |
 |