Casio WK-6500 User Guide - Page 93
Deleting Pitch Bender Events
 |
View all Casio WK-6500 manuals
Add to My Manuals
Save this manual to your list of manuals |
Page 93 highlights
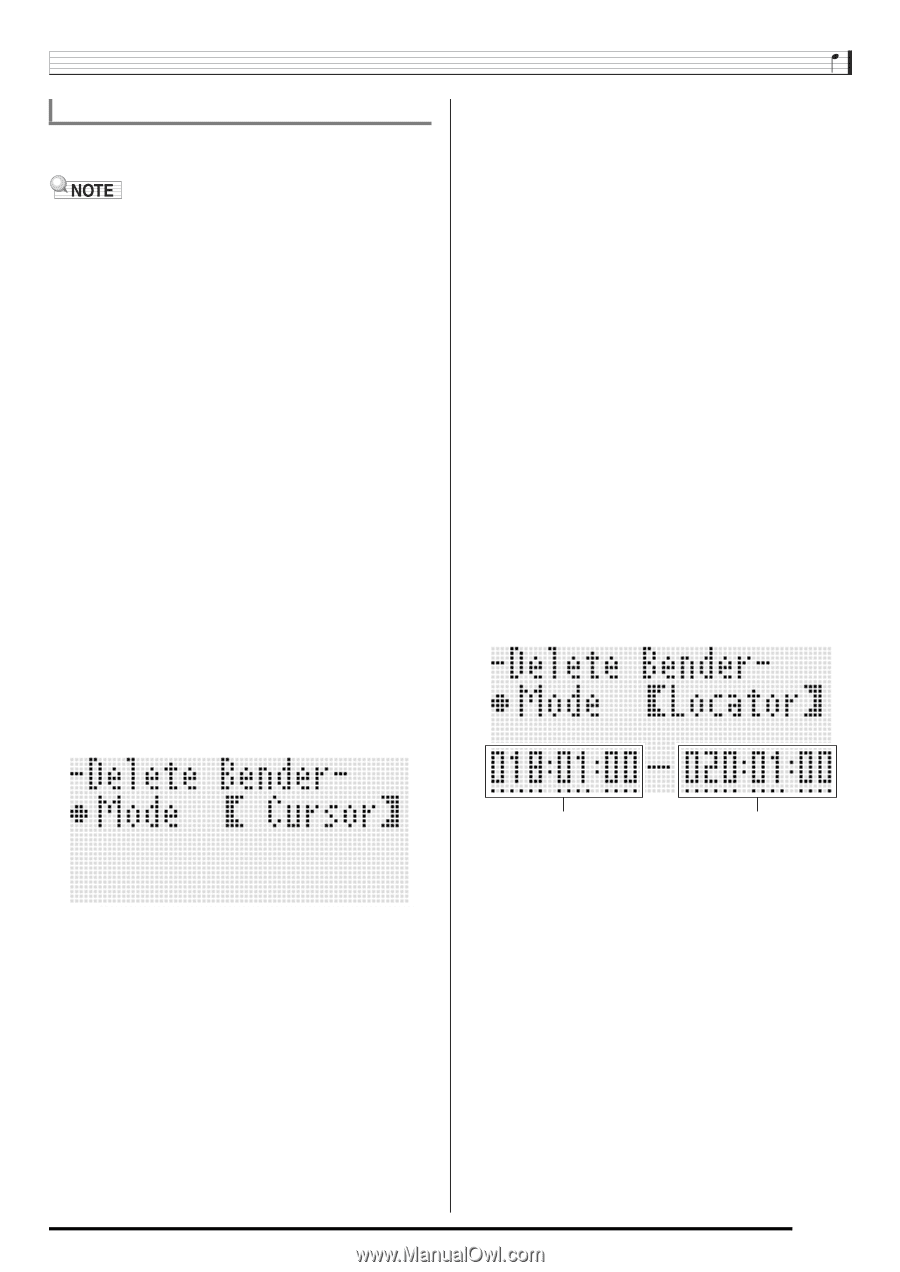
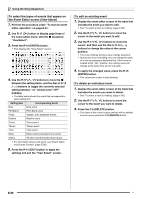
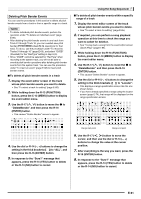
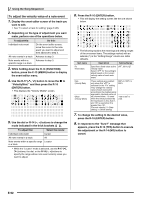
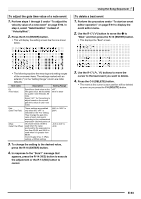
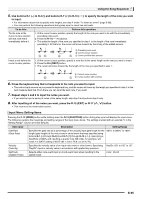
Deleting Pitch Bender Events You can use the procedures in this section to delete all pitch bender events from a track or from a specific range in a track. • To delete individual pitch bender events, perform the operation under "To delete an individual event" (page E-86). • After deleting the pitch bender events in one track from Track 01 through Track 16, you can overdub new pitch bender (PITCH BEND wheel (S-1)) operations for that track. To do so, use the procedure under "To record to Tracks 01 through 16" (page E-69), and select "OVDB" (Overdub) for the "RecType" setting in step 6-(3). • Since "OVDB" cannot be selected for "RecType" when recording to the system track, you will not be able to overdub pitch bender operations after deleting pitch bender events from the system track. You can use the procedure under "To insert an event" (page E-88) to insert pitch bender events. ■ To delete all pitch bender events in a track 1. Display the event editor screen of the track whose pitch bender events you want to delete. • See "To select a track for editing" (page E-85). 2. While holding down the R-13 (FUNCTION) button, press the C-13 (MENU) button to display the event editor menu. 3. Use the R-17 (t, y) button to move the 0 to "DeleteBender" and then press the R-16 (ENTER) button. • This causes "Delete Bender" screen to appear. Using the Song Sequencer ■ To delete all pitch bender events within a specific range of a track 1. Display the event editor screen of the track whose pitch bender events you want to delete. • See "To select a track for editing" (page E-85). 2. If required, you can perform a song playback operation at this time to check the range you want to select for deletion. • See "To play back a song from the event editor screen (Quick Play)" (page E-85). 3. While holding down the R-13 (FUNCTION) button, press the C-13 (MENU) button to display the event editor menu. 4. Use the R-17 (t, y) button to move the 0 to "DeleteBender" and then press the R-16 (ENTER) button. • This causes "Delete Bender" screen to appear. 5. Use the dial or R-14 (-, +) buttons to change the setting in the thick brackets (%) to "Locator". • This displays a range specification screen like the one shown below. • If you have already specified a range using the locator screen (page E-74), that range will be displayed on the range specification screen. 4. Use the dial or R-14 (-, +) buttons to change the setting in the thick brackets (%) to "ALL", and then press the R-16 (ENTER) button. 5. In response to the "Sure?" message that appears, press the R-14 (YES) button to delete or the R-14 (NO) button to cancel. Range start point Range end point 6. Use the R-17 (u, i) button to move the cursor, and then use the dial or R-14 (-, +) buttons to change the value at the cursor position. 7. After everything is the way you want, press the R-16 (ENTER) button. 8. In response to the "Sure?" message that appears, press the R-14 (YES) button to delete or the R-14 (NO) button to cancel. E-91
-
 1
1 -
2
-
3
-
4
-
5
-
6
-
7
-
8
-
9
-
10
-
11
-
12
-
13
-
14
-
15
-
16
-
17
-
18
-
19
-
20
-
21
-
22
-
23
-
24
-
25
-
26
-
27
-
28
-
29
-
30
-
31
-
32
-
33
-
34
-
35
-
36
-
37
-
38
-
39
-
40
-
41
-
42
-
43
-
44
-
45
-
46
-
47
-
48
-
49
-
50
-
51
-
52
-
53
-
54
-
55
-
56
-
57
-
58
-
59
-
60
-
61
-
62
-
63
-
64
-
65
-
66
-
67
-
68
-
69
-
70
-
71
-
72
-
73
-
74
-
75
-
76
-
77
-
78
-
79
-
80
-
81
-
82
-
83
-
84
-
85
-
86
-
87
-
 88
88 -
 89
89 -
 90
90 -
 91
91 -
 92
92 -
 93
93 -
 94
94 -
 95
95 -
 96
96 -
 97
97 -
 98
98 -
99
-
100
-
101
-
102
-
103
-
104
-
105
-
106
-
107
-
108
-
109
-
110
-
111
-
112
-
113
-
114
-
115
-
116
-
117
-
118
-
119
-
120
-
121
-
122
-
123
-
124
-
125
-
126
-
127
-
128
-
129
-
130
-
131
-
132
 |
 |