Compaq Armada E700 Armada E700 - Page 109
€€Fan Assembly
 |
View all Compaq Armada E700 manuals
Add to My Manuals
Save this manual to your list of manuals |
Page 109 highlights
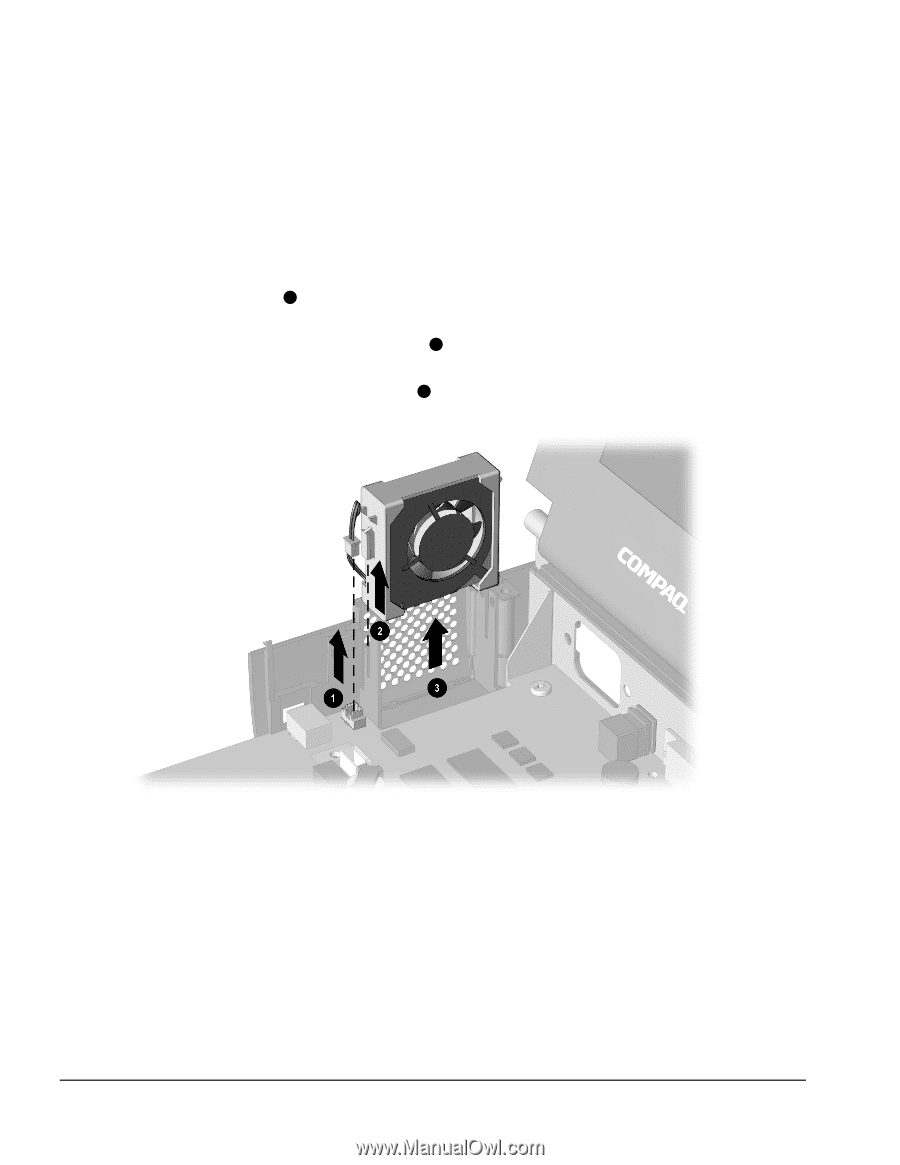
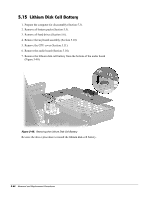
5.13 Fan Assembly 1. Prepare the computer for disassembly (Section 5.3). 2. Remove all battery packs (Section 5.5). 3. Remove all hard drives (Section 5.6). 4. Remove the keyboard assembly (Section 5.10). 5. Remove the CPU cover (Section 5.11). 6. Disconnect the cable 1 connecting the fan assembly to the system board (Figure 5-38). 7. Release the fan assembly from the brackets 2 that secure either side of the assembly by pulling the brackets apart. 8. Lift the fan assembly out of the computer 3 . Figure 5-38. Removing the Fan Assembly Reverse the above procedure to install the fan assembly. When installing it, make sure the alignment tabs on the sides of the rubber mounting sleeve slide into the slots on the fan mounting rails on the computer base assembly. IMPORTANT: When installing the fan, make sure it is oriented with the airflow arrow (located on the side of the fan) pointing to the outside of the computer. 5-42 Removal and Replacement Procedures
-
 1
1 -
2
-
3
-
4
-
5
-
6
-
7
-
8
-
9
-
10
-
11
-
12
-
13
-
14
-
15
-
16
-
17
-
18
-
19
-
20
-
21
-
22
-
23
-
24
-
25
-
26
-
27
-
28
-
29
-
30
-
31
-
32
-
33
-
34
-
35
-
36
-
37
-
38
-
39
-
40
-
41
-
42
-
43
-
44
-
45
-
46
-
47
-
48
-
49
-
50
-
51
-
52
-
53
-
54
-
55
-
56
-
57
-
58
-
59
-
60
-
61
-
62
-
63
-
64
-
65
-
66
-
67
-
68
-
69
-
70
-
71
-
72
-
73
-
74
-
75
-
76
-
77
-
78
-
79
-
80
-
81
-
82
-
83
-
84
-
85
-
86
-
87
-
88
-
89
-
90
-
91
-
92
-
93
-
94
-
95
-
96
-
97
-
98
-
99
-
100
-
101
-
102
-
103
-
 104
104 -
 105
105 -
 106
106 -
 107
107 -
 108
108 -
 109
109 -
 110
110 -
 111
111 -
 112
112 -
 113
113 -
 114
114 -
115
-
116
-
117
-
118
-
119
-
120
-
121
-
122
-
123
-
124
-
125
-
126
-
127
-
128
-
129
-
130
-
131
-
132
-
133
-
134
-
135
-
136
-
137
-
138
-
139
-
140
-
141
-
142
-
143
-
144
-
145
-
146
-
147
-
148
-
149
-
150
-
151
-
152
-
153
 |
 |