Compaq Armada E700 Armada E700 - Page 30
Troubleshooting
 |
View all Compaq Armada E700 manuals
Add to My Manuals
Save this manual to your list of manuals |
Page 30 highlights
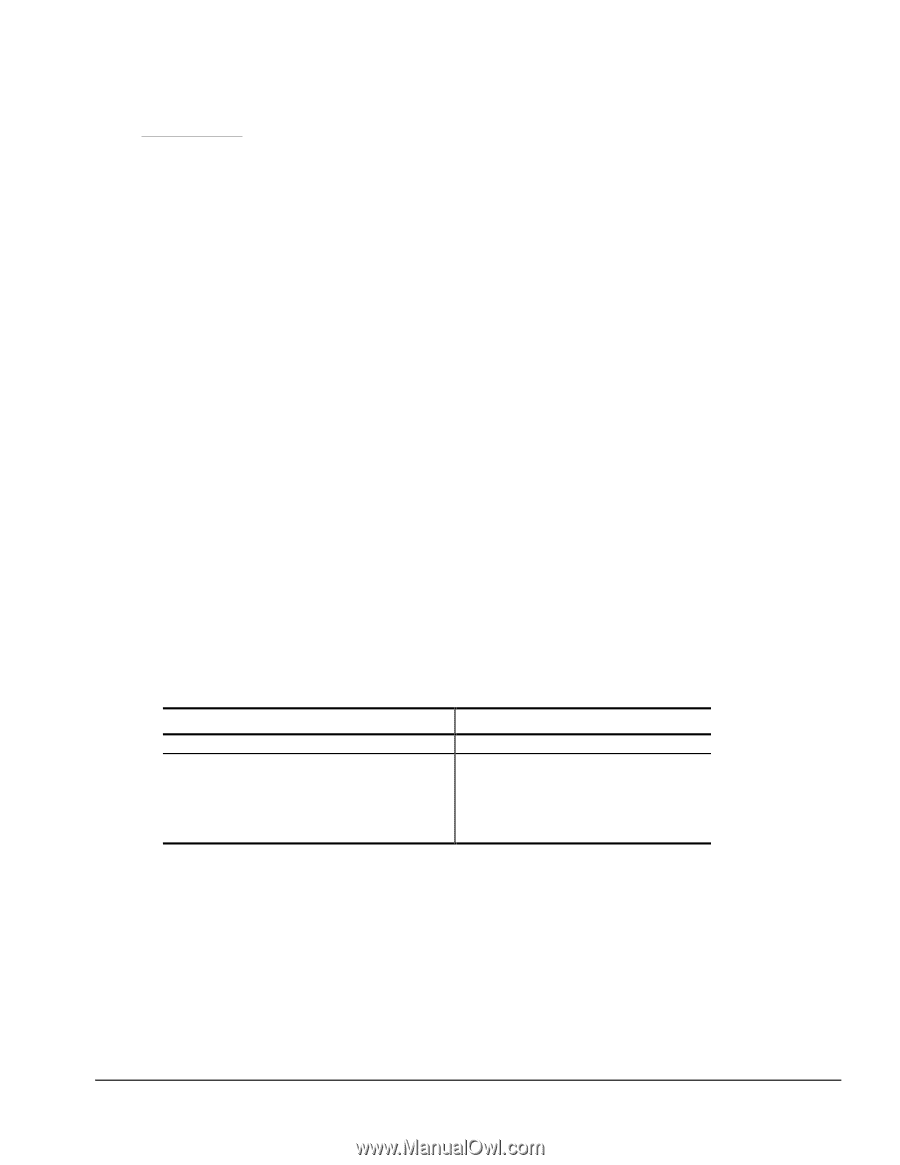
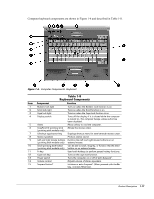
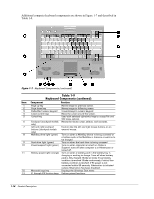
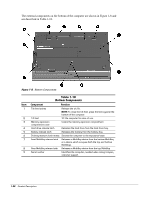
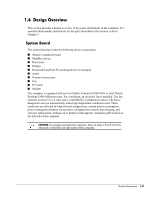
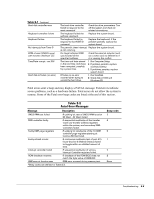
2 chapter TROUBLESHOOTING Follow these basic steps when beginning the troubleshooting process: 1. Complete the preliminary steps listed in Section 2.1. 2. Run the Power-On Self-Test (POST) as described in Section 2.2. 3. Run Computer Setup as described in Section 2.4. 4. If you are unable to run POST or if the problem persists after running POST, perform the recommended actions described in the diagnostic tables in Section 2.4. Follow these guidelines when troubleshooting: I Complete the recommended actions in the order in which they are given. I Repeat POST after each recommended action until the problem is resolved and the error message does not return. I When the problem is resolved, stop performing the troubleshooting steps and do not complete the remaining recommended actions. I Refer to Chapter 5 for recommended removal and replacement procedures. I If the problem is intermittent, check the computer several times to verify that the problem is solved. The following table describes the troubleshooting actions: If You Want To: Then Run: Check for POST error messages Perform any of the following: I Check the system configuration I Set the system power management parameters I Return the system to its original configuration I Check system configuration of installed devices POST Computer Setup Troubleshooting 2-1
-
 1
1 -
2
-
3
-
4
-
5
-
6
-
7
-
8
-
9
-
10
-
11
-
12
-
13
-
14
-
15
-
16
-
17
-
18
-
19
-
20
-
21
-
22
-
23
-
24
-
 25
25 -
 26
26 -
 27
27 -
 28
28 -
 29
29 -
 30
30 -
 31
31 -
 32
32 -
 33
33 -
 34
34 -
 35
35 -
36
-
37
-
38
-
39
-
40
-
41
-
42
-
43
-
44
-
45
-
46
-
47
-
48
-
49
-
50
-
51
-
52
-
53
-
54
-
55
-
56
-
57
-
58
-
59
-
60
-
61
-
62
-
63
-
64
-
65
-
66
-
67
-
68
-
69
-
70
-
71
-
72
-
73
-
74
-
75
-
76
-
77
-
78
-
79
-
80
-
81
-
82
-
83
-
84
-
85
-
86
-
87
-
88
-
89
-
90
-
91
-
92
-
93
-
94
-
95
-
96
-
97
-
98
-
99
-
100
-
101
-
102
-
103
-
104
-
105
-
106
-
107
-
108
-
109
-
110
-
111
-
112
-
113
-
114
-
115
-
116
-
117
-
118
-
119
-
120
-
121
-
122
-
123
-
124
-
125
-
126
-
127
-
128
-
129
-
130
-
131
-
132
-
133
-
134
-
135
-
136
-
137
-
138
-
139
-
140
-
141
-
142
-
143
-
144
-
145
-
146
-
147
-
148
-
149
-
150
-
151
-
152
-
153
 |
 |