Dell PowerStore 5000X EMC PowerStore Installation and Service Guide - Page 12
Discover your system, Verify the operation of the new part, Install a 25-drive expansion enclosure
 |
View all Dell PowerStore 5000X manuals
Add to My Manuals
Save this manual to your list of manuals |
Page 12 highlights
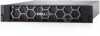
Figure 3. Inserting the power cable 2. Connect the other end of the power cable to the power distribution unit (PDU) on the rack. Figure 4. Connecting to the PDU After you connect the power cables, the base enclosure automatically starts up. Discover your system Once you have completed installing your base enclosure and optional expansion enclosures, discover your newly installed enclosure, and then create a cluster. You can proceed in one of the following ways: • Direct connection - This is the recommended procedure and requires that you are physically present in the data center or lab where the base enclosure is installed. • Remote connection - Use this procedure if you do not have access to the base enclosure. Verify the operation of the new part Steps 1. From PowerStore Manager, select Hardware. 2. Select the appliance where you installed the new part. 3. From the Hardware card, select the view of the system where the part was installed. The status of the part should read Healthy. If the status is Faulted, wait a few minutes and refresh PowerStore Manager. If the status does not change, ensure the part is correctly seated, or call support. Install a 25-drive expansion enclosure Take the following actions to install a 25-drive expansion enclosure into the system during the initial system installation. NOTE: During the initial system installation, do not power on the system until you have finished cabling all of the 25drive expansion enclosures. 12 Install a new base enclosure and optional expansion enclosure
-
 1
1 -
2
-
3
-
4
-
5
-
6
-
 7
7 -
 8
8 -
 9
9 -
 10
10 -
 11
11 -
 12
12 -
 13
13 -
 14
14 -
 15
15 -
 16
16 -
 17
17 -
18
-
19
-
20
-
21
-
22
-
23
-
24
-
25
-
26
-
27
-
28
-
29
-
30
-
31
-
32
-
33
-
34
-
35
-
36
-
37
-
38
-
39
-
40
-
41
-
42
-
43
-
44
-
45
-
46
-
47
-
48
-
49
-
50
-
51
-
52
-
53
-
54
-
55
-
56
-
57
-
58
-
59
-
60
-
61
-
62
-
63
-
64
-
65
-
66
-
67
-
68
-
69
-
70
-
71
-
72
-
73
-
74
-
75
-
76
-
77
-
78
-
79
-
80
-
81
-
82
-
83
-
84
-
85
-
86
-
87
-
88
-
89
-
90
-
91
-
92
-
93
-
94
-
95
-
96
-
97
-
98
-
99
-
100
-
101
-
102
-
103
-
104
-
105
-
106
-
107
-
108
-
109
-
110
-
111
-
112
-
113
-
114
-
115
-
116
-
117
-
118
-
119
-
120
-
121
-
122
-
123
-
124
-
125
-
126
-
127
-
128
-
129
 |
 |
