Dell PowerStore 5000X EMC PowerStore Installation and Service Guide - Page 31
Install a 2.5\, next drive into position.
 |
View all Dell PowerStore 5000X manuals
Add to My Manuals
Save this manual to your list of manuals |
Page 31 highlights
Figure 23. Removing a drive filler module Install a 2.5" drive About this task NOTE: If you are installing multiple drives in a system that is powered up, wait at least 10 seconds before sliding the next drive into position. Steps 1. Align the drive with the guides in the slot. 2. With the latch fully opened, gently push the drive into the slot. The latch begins to rotate downward when it meets the enclosure. 3. Push the orange button until the drive is fully seated in the slot. 4. Push the latch down until it locks into place. Base enclosure service procedures 31
-
 1
1 -
2
-
3
-
4
-
5
-
6
-
7
-
8
-
9
-
10
-
11
-
12
-
13
-
14
-
15
-
16
-
17
-
18
-
19
-
20
-
21
-
22
-
23
-
24
-
25
-
 26
26 -
 27
27 -
 28
28 -
 29
29 -
 30
30 -
 31
31 -
 32
32 -
 33
33 -
 34
34 -
 35
35 -
 36
36 -
37
-
38
-
39
-
40
-
41
-
42
-
43
-
44
-
45
-
46
-
47
-
48
-
49
-
50
-
51
-
52
-
53
-
54
-
55
-
56
-
57
-
58
-
59
-
60
-
61
-
62
-
63
-
64
-
65
-
66
-
67
-
68
-
69
-
70
-
71
-
72
-
73
-
74
-
75
-
76
-
77
-
78
-
79
-
80
-
81
-
82
-
83
-
84
-
85
-
86
-
87
-
88
-
89
-
90
-
91
-
92
-
93
-
94
-
95
-
96
-
97
-
98
-
99
-
100
-
101
-
102
-
103
-
104
-
105
-
106
-
107
-
108
-
109
-
110
-
111
-
112
-
113
-
114
-
115
-
116
-
117
-
118
-
119
-
120
-
121
-
122
-
123
-
124
-
125
-
126
-
127
-
128
-
129
 |
 |

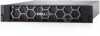
Figure 23. Removing a drive filler module
Install a 2.5" drive
About this task
NOTE:
If you are installing multiple drives in a system that is powered up, wait at least 10 seconds before sliding the
next drive into position.
Steps
1.
Align the drive with the guides in the slot.
2.
With the latch fully opened, gently push the drive into the slot.
The latch begins to rotate downward when it meets the enclosure.
3.
Push the orange button until the drive is fully seated in the slot.
4.
Push the latch down until it locks into place.
Base enclosure service procedures
31