Dell PowerStore 5000X EMC PowerStore Installation and Service Guide - Page 9
Install a new base enclosure and optional expansion enclosure, Install a new base enclosure
 |
View all Dell PowerStore 5000X manuals
Add to My Manuals
Save this manual to your list of manuals |
Page 9 highlights
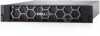
1 Install a new base enclosure and optional expansion enclosure Follow these procedures to add a new base enclosure and an optional 25-drive expansion enclosure to the system. For a detailed overview of these components, see the PowerStore Hardware Information Guide. NOTE: Review the information in Safety precautions for handling replaceable units on page 106 before handling parts. Topics: • Install a new base enclosure • Install a 25-drive expansion enclosure • Add a 25-drive expansion enclosure Install a new base enclosure Take the following actions to install a new base enclosure into a rack. Choose where to install the base enclosure Before installing the new base enclosure, determine the placement of the new base enclosure within the rack. Steps 1. Install the base enclosure in the lowest available 2U space, leaving 2U of space at the bottom of the rack for serviceability. Most cabinets mark 1U increments with horizontal lines or small holes in the channels. 2. If this is the second base enclosure to be installed in the rack, install it directly into the 2U space above the first base enclosure. NOTE: For additional rack space considerations, refer to the PowerStore Planning Guide. 3. Considering these recommendations, choose a 2U space in the cabinet for the base enclosure. Unpack the base enclosure The base enclosure is a 2U component with 25 2.5" drive slots. Verify that you have received all of the base enclosure components in the shipping package. NOTE: Before installing the base enclosure, ensure that the hardware has acclimated to the operating environment as described in Hardware acclimation times on page 107. Verify shipping package contents Confirm that you received all necessary equipment needed to install the new base enclosure. • Base enclosure - 2U component with 25 2.5" drive slots • Tool-less rail kit • Power cords • SAS cable • SAS cable label sheet • Bezel Install a new base enclosure and optional expansion enclosure 9
-
 1
1 -
2
-
3
-
 4
4 -
 5
5 -
 6
6 -
 7
7 -
 8
8 -
 9
9 -
 10
10 -
 11
11 -
 12
12 -
 13
13 -
 14
14 -
15
-
16
-
17
-
18
-
19
-
20
-
21
-
22
-
23
-
24
-
25
-
26
-
27
-
28
-
29
-
30
-
31
-
32
-
33
-
34
-
35
-
36
-
37
-
38
-
39
-
40
-
41
-
42
-
43
-
44
-
45
-
46
-
47
-
48
-
49
-
50
-
51
-
52
-
53
-
54
-
55
-
56
-
57
-
58
-
59
-
60
-
61
-
62
-
63
-
64
-
65
-
66
-
67
-
68
-
69
-
70
-
71
-
72
-
73
-
74
-
75
-
76
-
77
-
78
-
79
-
80
-
81
-
82
-
83
-
84
-
85
-
86
-
87
-
88
-
89
-
90
-
91
-
92
-
93
-
94
-
95
-
96
-
97
-
98
-
99
-
100
-
101
-
102
-
103
-
104
-
105
-
106
-
107
-
108
-
109
-
110
-
111
-
112
-
113
-
114
-
115
-
116
-
117
-
118
-
119
-
120
-
121
-
122
-
123
-
124
-
125
-
126
-
127
-
128
-
129
 |
 |
