Dell PowerStore 5000X EMC PowerStore Installation and Service Guide - Page 84
Transfer parts from the faulted node to the replacement node
 |
View all Dell PowerStore 5000X manuals
Add to My Manuals
Save this manual to your list of manuals |
Page 84 highlights
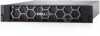
Figure 108. Removing the top cover Transfer parts from the faulted node to the replacement node Transfer the following components from the faulted node to the corresponding locations in the replacement node. To help ensure the correct placement in the enclosure, transfer only one component at a time. • Transfer the power supply. • Transfer the I/O modules and fillers. • Transfer the embedded module without removing the 4-port card. • Transfer the internal M.2 boot modules without removing them from the adapters. • Transfer DIMMs. NOTE: Move DIMMs one at a time from the faulted node to the same slot on the replacement node. • Transfer internal fans. • Transfer the internal battery backup module. Transfer the internal battery backup module Transfer the internal battery backup module from the faulted node to the replacement node. Remove the internal battery backup module Steps 1. Lift the gray padding away from the internal battery backup module. 2. Remove the clip around the internal battery backup module by pulling the tab on the left side. 3. Disconnect the internal battery backup module cable from the motherboard. 84 Base enclosure service procedures
-
 1
1 -
2
-
3
-
4
-
5
-
6
-
7
-
8
-
9
-
10
-
11
-
12
-
13
-
14
-
15
-
16
-
17
-
18
-
19
-
20
-
21
-
22
-
23
-
24
-
25
-
26
-
27
-
28
-
29
-
30
-
31
-
32
-
33
-
34
-
35
-
36
-
37
-
38
-
39
-
40
-
41
-
42
-
43
-
44
-
45
-
46
-
47
-
48
-
49
-
50
-
51
-
52
-
53
-
54
-
55
-
56
-
57
-
58
-
59
-
60
-
61
-
62
-
63
-
64
-
65
-
66
-
67
-
68
-
69
-
70
-
71
-
72
-
73
-
74
-
75
-
76
-
77
-
78
-
 79
79 -
 80
80 -
 81
81 -
 82
82 -
 83
83 -
 84
84 -
 85
85 -
 86
86 -
 87
87 -
 88
88 -
 89
89 -
90
-
91
-
92
-
93
-
94
-
95
-
96
-
97
-
98
-
99
-
100
-
101
-
102
-
103
-
104
-
105
-
106
-
107
-
108
-
109
-
110
-
111
-
112
-
113
-
114
-
115
-
116
-
117
-
118
-
119
-
120
-
121
-
122
-
123
-
124
-
125
-
126
-
127
-
128
-
129
 |
 |
