Dell PowerStore 5000X EMC PowerStore Installation and Service Guide - Page 13
Summary of tasks for installing an expansion enclosure, Verify shipping package contents
 |
View all Dell PowerStore 5000X manuals
Add to My Manuals
Save this manual to your list of manuals |
Page 13 highlights
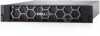
Summary of tasks for installing an expansion enclosure To install an expansion enclosure, complete the tasks below in the order in which they appear. This document provides instructions for completing each task. 1. Verify the contents of the shipping package. 2. Choose the space in the cabinet for the new expansion enclosure. 3. Remove the filler panels that cover the cabinet space for the new expansion enclosure. 4. Install the rails for the new expansion enclosure in the cabinet. 5. Install the expansion enclosure on the rails. 6. If the new expansion enclosure shipped without its drives installed, install the drives in the expansion enclosure. 7. Install the front bezel on the new expansion enclosure. 8. Attach the expansion (back-end) cables to the new expansion enclosure. 9. Attach the power cables to the new expansion enclosure. 10. Verify the operation of the new expansion enclosure. Verify shipping package contents Confirm that you received all the equipment that is required to install the new 25-drive expansion enclosure. Verify that you received the following: Component Expansion enclosure (25-drive) Quantity 1 Rail kit, including 1 Snap-in rails (2) Screws (3 per rail) Power cords (2), either Black and gray C13/C14 Black and gray C13/C20 Bezel for expansion enclosure (with key) Mini-SAS HD cables (1 m or 2 m copper) to loop back the last expansion enclosure to the node CL5583 2 1 2 Install a new base enclosure and optional expansion enclosure 13
-
 1
1 -
2
-
3
-
4
-
5
-
6
-
7
-
 8
8 -
 9
9 -
 10
10 -
 11
11 -
 12
12 -
 13
13 -
 14
14 -
 15
15 -
 16
16 -
 17
17 -
 18
18 -
19
-
20
-
21
-
22
-
23
-
24
-
25
-
26
-
27
-
28
-
29
-
30
-
31
-
32
-
33
-
34
-
35
-
36
-
37
-
38
-
39
-
40
-
41
-
42
-
43
-
44
-
45
-
46
-
47
-
48
-
49
-
50
-
51
-
52
-
53
-
54
-
55
-
56
-
57
-
58
-
59
-
60
-
61
-
62
-
63
-
64
-
65
-
66
-
67
-
68
-
69
-
70
-
71
-
72
-
73
-
74
-
75
-
76
-
77
-
78
-
79
-
80
-
81
-
82
-
83
-
84
-
85
-
86
-
87
-
88
-
89
-
90
-
91
-
92
-
93
-
94
-
95
-
96
-
97
-
98
-
99
-
100
-
101
-
102
-
103
-
104
-
105
-
106
-
107
-
108
-
109
-
110
-
111
-
112
-
113
-
114
-
115
-
116
-
117
-
118
-
119
-
120
-
121
-
122
-
123
-
124
-
125
-
126
-
127
-
128
-
129
 |
 |
