Dell PowerStore 5000X EMC PowerStore Installation and Service Guide - Page 18
Cable the base enclosure to the expansion enclosure, Connect expansion enclosure power cables
 |
View all Dell PowerStore 5000X manuals
Add to My Manuals
Save this manual to your list of manuals |
Page 18 highlights
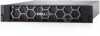
Cable the base enclosure to the expansion enclosure Follow these guidelines to cable base enclosure to an expansion enclosure. Prerequisites Apply cable labels at each end of the following cables: • Node to first expansion enclosure • Node to last expansion enclosure • Expansion enclosure to expansion enclosure if you are installing more than one Steps 1. Cable SAS port B from each node on the base enclosure to the link control card (LCC) on the first expansion enclosure in the stack: a. Connect node A, SAS port B to LCC A, port A on the expansion enclosure. b. Connect node B, SAS port B to LCC B, port A on the expansion enclosure. 2. Cable SAS port A from each node on the base enclosure to the LCCs on the last expansion enclosure in the stack: a. Connect node A, SAS port A to LCC B, port B on the last expansion enclosure. b. Connect node B, SAS port A to LCC A, port B on the last expansion enclosure. 3. If you are installing more than one expansion enclosure, cable expansion enclosure to expansion enclosure: a. Connect LCC A, port B on the first expansion enclosure to LCC A, port A on the next expansion enclosure. b. Connect LCC B, port B on the first expansion enclosure to LCC B, port A on the next expansion enclosure. Expansion enclosure 0 B A Node B A Figure 10. Cabling the base enclosure to one expansion enclosure NOTE: For additional cabling diagrams, refer to the Cable Label Worksheet. Connect expansion enclosure power cables Steps 1. Connect the power cable to the power/cooling module: 18 Install a new base enclosure and optional expansion enclosure
-
 1
1 -
2
-
3
-
4
-
5
-
6
-
7
-
8
-
9
-
10
-
11
-
12
-
 13
13 -
 14
14 -
 15
15 -
 16
16 -
 17
17 -
 18
18 -
 19
19 -
 20
20 -
 21
21 -
 22
22 -
 23
23 -
24
-
25
-
26
-
27
-
28
-
29
-
30
-
31
-
32
-
33
-
34
-
35
-
36
-
37
-
38
-
39
-
40
-
41
-
42
-
43
-
44
-
45
-
46
-
47
-
48
-
49
-
50
-
51
-
52
-
53
-
54
-
55
-
56
-
57
-
58
-
59
-
60
-
61
-
62
-
63
-
64
-
65
-
66
-
67
-
68
-
69
-
70
-
71
-
72
-
73
-
74
-
75
-
76
-
77
-
78
-
79
-
80
-
81
-
82
-
83
-
84
-
85
-
86
-
87
-
88
-
89
-
90
-
91
-
92
-
93
-
94
-
95
-
96
-
97
-
98
-
99
-
100
-
101
-
102
-
103
-
104
-
105
-
106
-
107
-
108
-
109
-
110
-
111
-
112
-
113
-
114
-
115
-
116
-
117
-
118
-
119
-
120
-
121
-
122
-
123
-
124
-
125
-
126
-
127
-
128
-
129
 |
 |
