Epson Expression 1680 Special Edition User Manual (w/EPSON Scan software) - Page 15
Choose an Image Type, window. Click
 |
View all Epson Expression 1680 Special Edition manuals
Add to My Manuals
Save this manual to your list of manuals |
Page 15 highlights
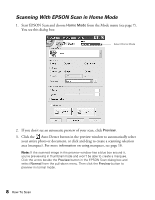
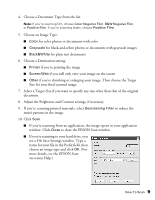
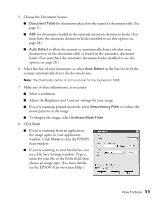
4. Choose a Document Type from the list. Note: If you're scanning film, choose Color Negative Film, B&W Negative Film, or Positive Film. If you're scanning slides, choose Positive Film. 5. Choose an Image Type: ■ Color for color photos or documents with color ■ Grayscale for black-and-white photos or documents with grayscale images ■ Black&White for plain text documents 6. Choose a Destination setting: ■ Printer if you're printing the image ■ Screen/Web if you will only view your image on the screen ■ Other if you're shrinking or enlarging your image. Then choose the Target Size for your final scanned image. 7. Select a Target Size if you want to specify any size other than that of the original document. 8. Adjust the Brightness and Contrast settings, if necessary. 9. If you're scanning printed materials, select Descreening Filter to reduce the moiré patterns in the image. 10. Click Scan. ■ If you're scanning from an application, the image opens in your application window. Click Close to close the EPSON Scan window. ■ If you're scanning to your hard drive, you see a File Save Settings window. Type a name for your file in the Prefix field, then choose an image type and click OK. (For more details, see the EPSON Scan on-screen Help.) How To Scan 9
-
 1
1 -
2
-
3
-
4
-
5
-
6
-
7
-
8
-
9
-
 10
10 -
 11
11 -
 12
12 -
 13
13 -
 14
14 -
 15
15 -
 16
16 -
 17
17 -
 18
18 -
 19
19 -
 20
20 -
21
-
22
-
23
-
24
-
25
-
26
-
27
-
28
-
29
-
30
-
31
-
32
-
33
-
34
-
35
-
36
-
37
-
38
-
39
-
40
-
41
-
42
-
43
-
44
-
45
-
46
-
47
-
48
-
49
-
50
-
51
-
52
-
53
-
54
-
55
-
56
-
57
-
58
-
59
-
60
-
61
-
62
-
63
-
64
-
65
-
66
-
67
-
68
-
69
-
70
-
71
-
72
 |
 |