Epson Expression 1680 Special Edition User Manual (w/EPSON Scan software) - Page 27
Removing the Shipping Screw, Installing the Transparency Unit, grasping the back of the document
 |
View all Epson Expression 1680 Special Edition manuals
Add to My Manuals
Save this manual to your list of manuals |
Page 27 highlights
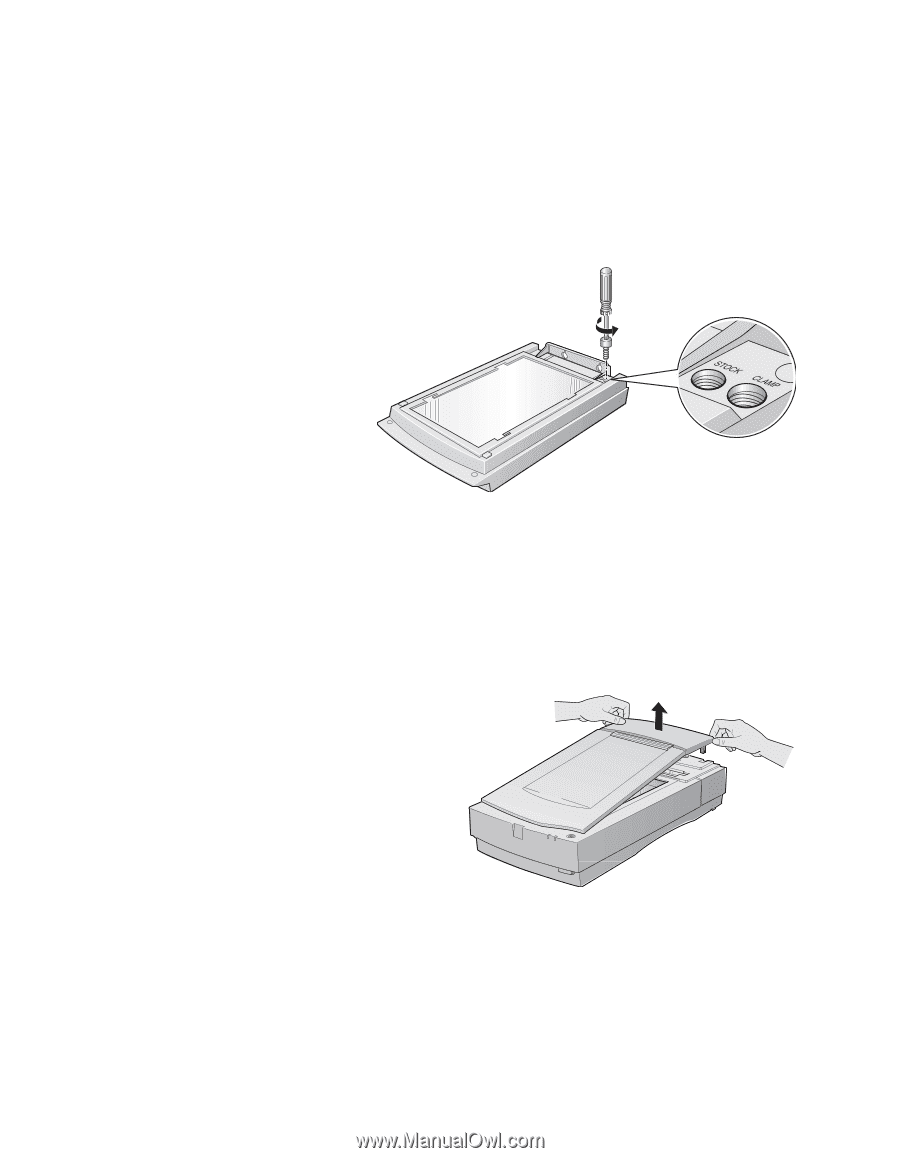
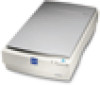
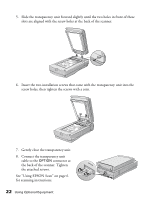
Removing the Shipping Screw To prevent damage during shipping, a shipping screw is attached to the transparency unit to secure its lamp assembly. You must remove this screw before using the transparency unit. 1. Turn the transparency unit so the glass side faces up. 2. Use a Phillips (cross head) screwdriver to remove the shipping screw from the hole labeled CLAMP, as shown at right. 3. Install the screw in the storage hole labeled STOCK. Caution: Before transporting the transparency unit, follow the procedures on page 36 to protect it from damage. Installing the Transparency Unit 1. Make sure the scanner is turned off. 2. Remove the document cover by grasping the back of the document cover and easing the cover up. 3. Make sure the document table is clean and dust free. 4. Position the slots on the transparency unit's mounting bracket over the heads of the two mounting screws located at the back of the scanner. Using Optional Equipment 21
-
 1
1 -
2
-
3
-
4
-
5
-
6
-
7
-
8
-
9
-
10
-
11
-
12
-
13
-
14
-
15
-
16
-
17
-
18
-
19
-
20
-
21
-
 22
22 -
 23
23 -
 24
24 -
 25
25 -
 26
26 -
 27
27 -
 28
28 -
 29
29 -
 30
30 -
 31
31 -
 32
32 -
33
-
34
-
35
-
36
-
37
-
38
-
39
-
40
-
41
-
42
-
43
-
44
-
45
-
46
-
47
-
48
-
49
-
50
-
51
-
52
-
53
-
54
-
55
-
56
-
57
-
58
-
59
-
60
-
61
-
62
-
63
-
64
-
65
-
66
-
67
-
68
-
69
-
70
-
71
-
72
 |
 |