HP 3700 HP Color LaserJet 3550 and 3700 series - User Guide - Page 128
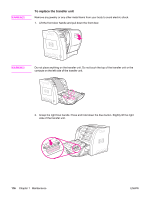
To replace the transfer unit, WARNING
 |
UPC - 808736551106
View all HP 3700 manuals
Add to My Manuals
Save this manual to your list of manuals |
Page 128 highlights
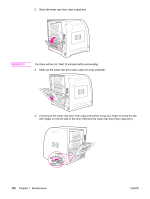
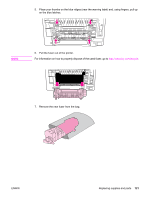
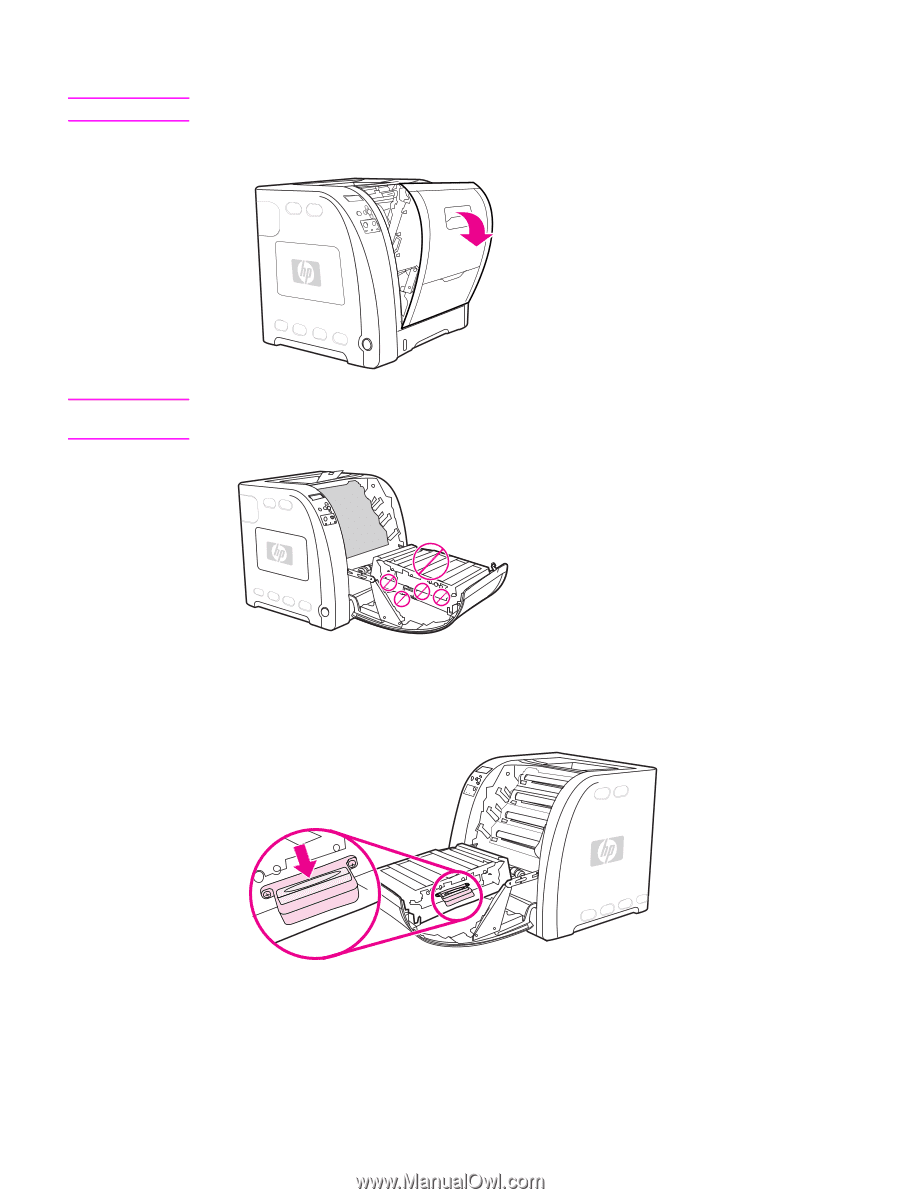
WARNING! To replace the transfer unit Remove any jewelry or any other metal items from your body to avoid electric shock. 1. Lift the front door handle and pull down the front door. WARNING! Do not place anything on the transfer unit. Do not touch the top of the transfer unit or the contacts on the left side of the transfer unit. 2. Grasp the right blue handle. Press and hold down the blue button. Slightly lift the right side of the transfer unit. 116 Chapter 7 Maintenance ENWW
-
 1
1 -
2
-
3
-
4
-
5
-
6
-
7
-
8
-
9
-
10
-
11
-
12
-
13
-
14
-
15
-
16
-
17
-
18
-
19
-
20
-
21
-
22
-
23
-
24
-
25
-
26
-
27
-
28
-
29
-
30
-
31
-
32
-
33
-
34
-
35
-
36
-
37
-
38
-
39
-
40
-
41
-
42
-
43
-
44
-
45
-
46
-
47
-
48
-
49
-
50
-
51
-
52
-
53
-
54
-
55
-
56
-
57
-
58
-
59
-
60
-
61
-
62
-
63
-
64
-
65
-
66
-
67
-
68
-
69
-
70
-
71
-
72
-
73
-
74
-
75
-
76
-
77
-
78
-
79
-
80
-
81
-
82
-
83
-
84
-
85
-
86
-
87
-
88
-
89
-
90
-
91
-
92
-
93
-
94
-
95
-
96
-
97
-
98
-
99
-
100
-
101
-
102
-
103
-
104
-
105
-
106
-
107
-
108
-
109
-
110
-
111
-
112
-
113
-
114
-
115
-
116
-
117
-
118
-
119
-
120
-
121
-
122
-
 123
123 -
 124
124 -
 125
125 -
 126
126 -
 127
127 -
 128
128 -
 129
129 -
 130
130 -
 131
131 -
 132
132 -
 133
133 -
134
-
135
-
136
-
137
-
138
-
139
-
140
-
141
-
142
-
143
-
144
-
145
-
146
-
147
-
148
-
149
-
150
-
151
-
152
-
153
-
154
-
155
-
156
-
157
-
158
-
159
-
160
-
161
-
162
-
163
-
164
-
165
-
166
-
167
-
168
-
169
-
170
-
171
-
172
-
173
-
174
-
175
-
176
-
177
-
178
-
179
-
180
-
181
-
182
-
183
-
184
-
185
-
186
-
187
-
188
-
189
-
190
-
191
-
192
-
193
-
194
-
195
-
196
-
197
-
198
-
199
-
200
-
201
-
202
-
203
-
204
-
205
-
206
-
207
-
208
-
209
-
210
-
211
-
212
-
213
-
214
-
215
-
216
-
217
-
218
-
219
-
220
-
221
-
222
-
223
-
224
-
225
-
226
-
227
-
228
-
229
-
230
-
231
-
232
-
233
-
234
-
235
-
236
-
237
-
238
-
239
-
240
-
241
-
242
-
243
-
244
-
245
-
246
-
247
-
248
-
249
-
250
 |
 |
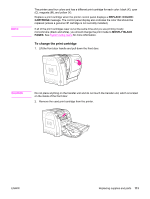
To replace the transfer unit
WARNING!
Remove any jewelry or any other metal items from your body to avoid electric shock.
1.
Lift the front door handle and pull down the front door.
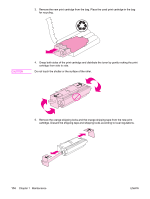
WARNING!
Do not place anything on the transfer unit. Do not touch the top of the transfer unit or the
contacts on the left side of the transfer unit.
2.
Grasp the right blue handle. Press and hold down the blue button. Slightly lift the right
side of the transfer unit.
116
Chapter 7
Maintenance
ENWW