HP 450c HP DesignJet 430, 450C, and 455CA Printer - User's Guide - Page 155
If there are blotchy areas uneven fill density
 |
View all HP 450c manuals
Add to My Manuals
Save this manual to your list of manuals |
Page 155 highlights
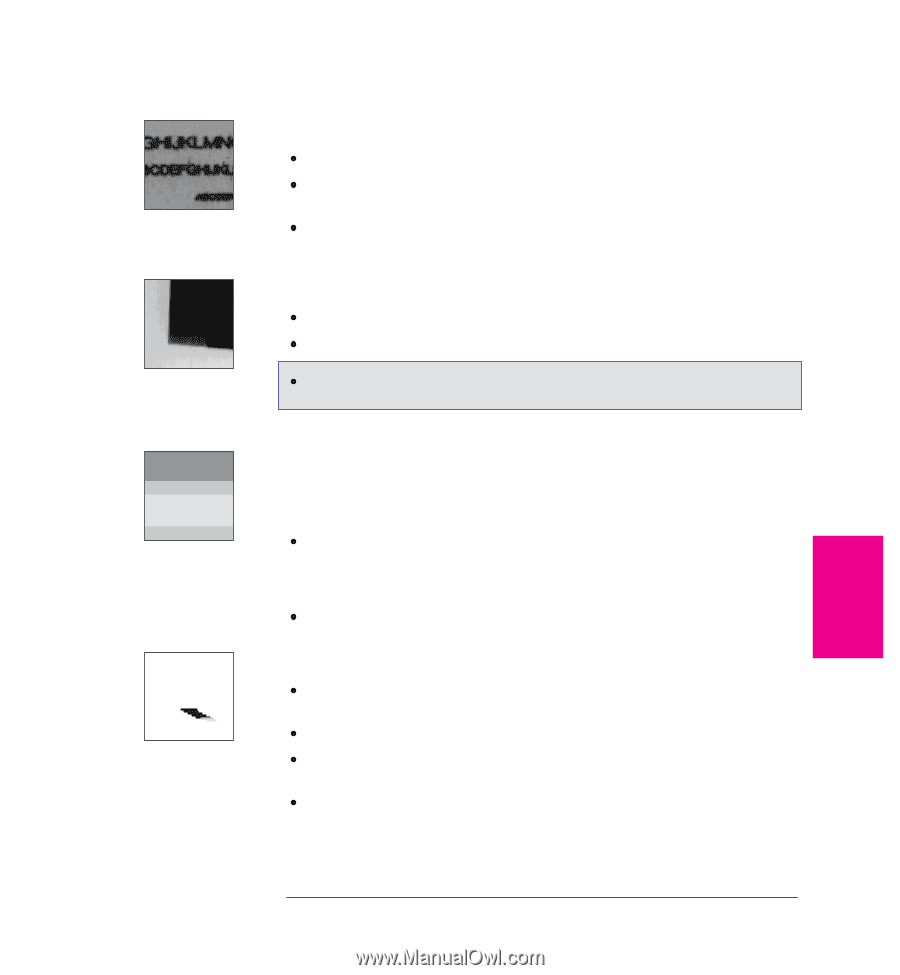
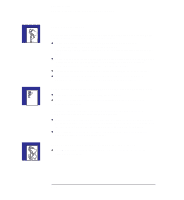
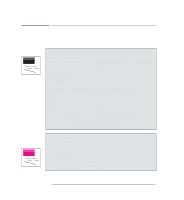
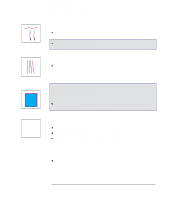
Troubleshooting Solving print quality problems If there are blurred lines (ink "bleeds" from lines) Try a higher Print Quality level. Use better quality media. HP media is recommended and details are given on page 10-19. The printer may be operating in an area where the temperature and humidity are too high. For environmental specifications, see page 10-5. If there are blotchy areas (uneven fill density) Use a different Media Type setting. If you are not already doing so, try using Hewlett-Packard media. 450C/455CA If you are printing in color, see the table on page 2-5 for a note about which print-quality/media-type combinations are not recommended. A If there is other pronounced banding in area fills Some banding is normal, especially in dark or dense area fills. If banding is more pronounced than expected however, try the following: If the banding is in a black or gray area, then, in the Setup Sheet, reduce the Pen Settings/Grayscale %. At the same time, make sure that Pen Settings are set to "Use settings from tables below," so that your software's settings are overridden. Alternatively, replace the print cartridges (see page 7-2). If ink smears after you remove a print Be sure the ink is dry before you remove the sheet. For recommended ink-drying times, see page 2-25. When loading media, select the appropriate Media Type on the front panel. The printer may be operating in an area where the temperature and humidity are too high. For environmental specifications, see page 10-5. Handle media by the edges. If possible, wear gloves when you handle film. Skin oils can interact with ink and cause it to smear. TROUBLE- 9 SHOOTING 9-15
-
 1
1 -
2
-
3
-
4
-
5
-
6
-
7
-
8
-
9
-
10
-
11
-
12
-
13
-
14
-
15
-
16
-
17
-
18
-
19
-
20
-
21
-
22
-
23
-
24
-
25
-
26
-
27
-
28
-
29
-
30
-
31
-
32
-
33
-
34
-
35
-
36
-
37
-
38
-
39
-
40
-
41
-
42
-
43
-
44
-
45
-
46
-
47
-
48
-
49
-
50
-
51
-
52
-
53
-
54
-
55
-
56
-
57
-
58
-
59
-
60
-
61
-
62
-
63
-
64
-
65
-
66
-
67
-
68
-
69
-
70
-
71
-
72
-
73
-
74
-
75
-
76
-
77
-
78
-
79
-
80
-
81
-
82
-
83
-
84
-
85
-
86
-
87
-
88
-
89
-
90
-
91
-
92
-
93
-
94
-
95
-
96
-
97
-
98
-
99
-
100
-
101
-
102
-
103
-
104
-
105
-
106
-
107
-
108
-
109
-
110
-
111
-
112
-
113
-
114
-
115
-
116
-
117
-
118
-
119
-
120
-
121
-
122
-
123
-
124
-
125
-
126
-
127
-
128
-
129
-
130
-
131
-
132
-
133
-
134
-
135
-
136
-
137
-
138
-
139
-
140
-
141
-
142
-
143
-
144
-
145
-
146
-
147
-
148
-
149
-
 150
150 -
 151
151 -
 152
152 -
 153
153 -
 154
154 -
 155
155 -
 156
156 -
 157
157 -
 158
158 -
 159
159 -
 160
160 -
161
-
162
-
163
-
164
-
165
-
166
-
167
-
168
-
169
-
170
-
171
-
172
-
173
-
174
-
175
-
176
-
177
-
178
-
179
-
180
-
181
-
182
-
183
-
184
-
185
-
186
-
187
-
188
-
189
-
190
-
191
-
192
-
193
-
194
-
195
-
196
 |
 |