HP 450c HP DesignJet 430, 450C, and 455CA Printer - User's Guide - Page 26
Open the cover using the small handle at the center front. - carriage
 |
View all HP 450c manuals
Add to My Manuals
Save this manual to your list of manuals |
Page 26 highlights
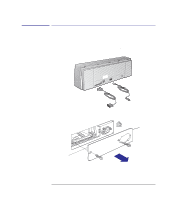
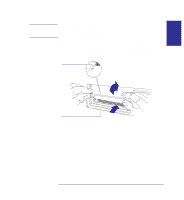
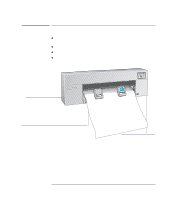
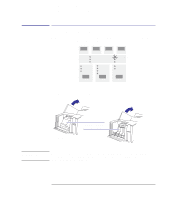
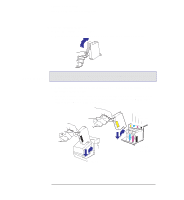
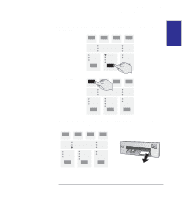
Setting up your printer Task 5: Load the print cartridge(s) Task 5: Load the print cartridge(s) 1 Make sure that, on the front panel, the Cartridges light is flashing. If other lights are on, look up their meaning in Chapter 8. CARTRIDGES 2 Open the cover using the small handle at the center front. If necessary, wait for the cartridge carriage to move to the service station (the area on the left of the printer). 430 Cartridge carriage in service station 450C/ 455CA WARNING Don't touch the plastic strip that runs the length of the printer behind the cartridge carriage. Keep hair, jewelry, clothing, and foreign objects away from the printer mechanisms. 1-10
-
 1
1 -
2
-
3
-
4
-
5
-
6
-
7
-
8
-
9
-
10
-
11
-
12
-
13
-
14
-
15
-
16
-
17
-
18
-
19
-
20
-
 21
21 -
 22
22 -
 23
23 -
 24
24 -
 25
25 -
 26
26 -
 27
27 -
 28
28 -
 29
29 -
 30
30 -
 31
31 -
32
-
33
-
34
-
35
-
36
-
37
-
38
-
39
-
40
-
41
-
42
-
43
-
44
-
45
-
46
-
47
-
48
-
49
-
50
-
51
-
52
-
53
-
54
-
55
-
56
-
57
-
58
-
59
-
60
-
61
-
62
-
63
-
64
-
65
-
66
-
67
-
68
-
69
-
70
-
71
-
72
-
73
-
74
-
75
-
76
-
77
-
78
-
79
-
80
-
81
-
82
-
83
-
84
-
85
-
86
-
87
-
88
-
89
-
90
-
91
-
92
-
93
-
94
-
95
-
96
-
97
-
98
-
99
-
100
-
101
-
102
-
103
-
104
-
105
-
106
-
107
-
108
-
109
-
110
-
111
-
112
-
113
-
114
-
115
-
116
-
117
-
118
-
119
-
120
-
121
-
122
-
123
-
124
-
125
-
126
-
127
-
128
-
129
-
130
-
131
-
132
-
133
-
134
-
135
-
136
-
137
-
138
-
139
-
140
-
141
-
142
-
143
-
144
-
145
-
146
-
147
-
148
-
149
-
150
-
151
-
152
-
153
-
154
-
155
-
156
-
157
-
158
-
159
-
160
-
161
-
162
-
163
-
164
-
165
-
166
-
167
-
168
-
169
-
170
-
171
-
172
-
173
-
174
-
175
-
176
-
177
-
178
-
179
-
180
-
181
-
182
-
183
-
184
-
185
-
186
-
187
-
188
-
189
-
190
-
191
-
192
-
193
-
194
-
195
-
196
 |
 |

1–10
Task 5: Load the print cartridge(s)
1
Make sure that, on the front panel, the
Cartridges
light is flashing.
If other lights
are on, look up their meaning in Chapter 8.
2
Open the cover using the small handle at the center front.
If necessary, wait for the
cartridge carriage to move to the service station (the area on the left of the printer).
Cartridge carriage
in service station
450C/
430
455CA
Don’t touch the plastic strip that runs the length of the printer behind the
cartridge carriage.
Keep hair, jewelry, clothing, and foreign objects away
from the printer mechanisms.
Setting up your printer
Task 5: Load the print cartridge(s)
CARTRIDGES
WARNING