HP 450c HP DesignJet 430, 450C, and 455CA Printer - User's Guide - Page 24
For operating temperature and humidity, see - will not take media
 |
View all HP 450c manuals
Add to My Manuals
Save this manual to your list of manuals |
Page 24 highlights
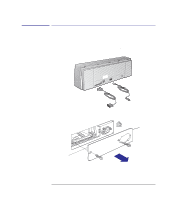
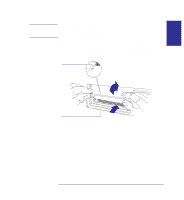
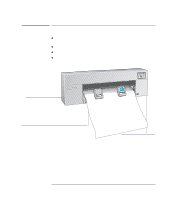
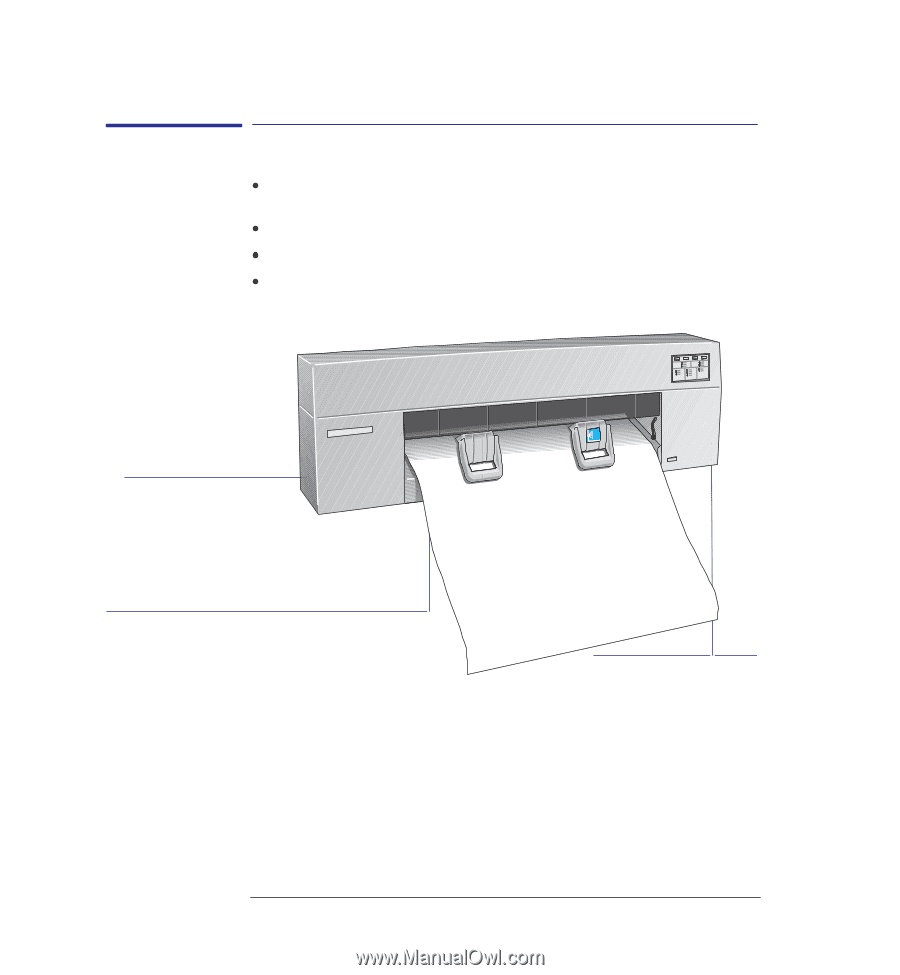
Setting up your printer Task 3: Position the printer Task 3: Position the printer If you have fitted the optional legs assembly for stability, this task does not apply. If you have not fitted the optional legs kit, position the printer as shown below. For operating temperature and humidity, see page 10-5. Allow enough space above the printer to open the cover. If the printer is without legs ... Level surface and sturdy support. For printer weights, see page 10-4. Leave enough space for your largest sheet size to hang freely from the media exit slot without touching the ground. Place the printer at the edge of the support, so that sheets exit without hitting the top of the support. 1-8
-
 1
1 -
2
-
3
-
4
-
5
-
6
-
7
-
8
-
9
-
10
-
11
-
12
-
13
-
14
-
15
-
16
-
17
-
18
-
 19
19 -
 20
20 -
 21
21 -
 22
22 -
 23
23 -
 24
24 -
 25
25 -
 26
26 -
 27
27 -
 28
28 -
 29
29 -
30
-
31
-
32
-
33
-
34
-
35
-
36
-
37
-
38
-
39
-
40
-
41
-
42
-
43
-
44
-
45
-
46
-
47
-
48
-
49
-
50
-
51
-
52
-
53
-
54
-
55
-
56
-
57
-
58
-
59
-
60
-
61
-
62
-
63
-
64
-
65
-
66
-
67
-
68
-
69
-
70
-
71
-
72
-
73
-
74
-
75
-
76
-
77
-
78
-
79
-
80
-
81
-
82
-
83
-
84
-
85
-
86
-
87
-
88
-
89
-
90
-
91
-
92
-
93
-
94
-
95
-
96
-
97
-
98
-
99
-
100
-
101
-
102
-
103
-
104
-
105
-
106
-
107
-
108
-
109
-
110
-
111
-
112
-
113
-
114
-
115
-
116
-
117
-
118
-
119
-
120
-
121
-
122
-
123
-
124
-
125
-
126
-
127
-
128
-
129
-
130
-
131
-
132
-
133
-
134
-
135
-
136
-
137
-
138
-
139
-
140
-
141
-
142
-
143
-
144
-
145
-
146
-
147
-
148
-
149
-
150
-
151
-
152
-
153
-
154
-
155
-
156
-
157
-
158
-
159
-
160
-
161
-
162
-
163
-
164
-
165
-
166
-
167
-
168
-
169
-
170
-
171
-
172
-
173
-
174
-
175
-
176
-
177
-
178
-
179
-
180
-
181
-
182
-
183
-
184
-
185
-
186
-
187
-
188
-
189
-
190
-
191
-
192
-
193
-
194
-
195
-
196
 |
 |
1–8
Task 3: Position the printer
If you have fitted the optional legs assembly for stability, this task does not
apply.
If you have not fitted the optional legs kit, position the printer as shown below.
For operating temperature and humidity, see page 10–5.
Allow enough space above the printer to open the cover.
Level surface and sturdy sup-
port.
For printer weights, see
page 10–4.
Place the printer at the edge of
the support, so that sheets exit
without hitting the top of the
support.
Leave enough space for your largest sheet size
to hang freely from the media exit slot without
touching the ground.
If the printer is without legs ...
Setting up your printer
Task 3: Position the printer