HP J6480 User Guide - Page 118
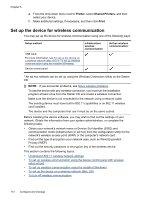
To set up wireless communication using the device control panel with wireless setup wizard
 |
UPC - 883585506811
View all HP J6480 manuals
Add to My Manuals
Save this manual to your list of manuals |
Page 118 highlights
Chapter 8 WPA2 is the second generation of WPA security; it provides enterprise and consumer Wi-Fi users with a high level of assurance that only authorized users can access their wireless networks. • Data encryption: ◦ Wired Equivalent Privacy (WEP) provides security by encrypting data sent over radio waves from one wireless device to another wireless device. Devices on a WEP-enabled network use WEP keys to encode data. If your network uses WEP, you must know the WEP key(s) it uses. ◦ WPA uses the Temporal Key Integrity Protocol (TKIP) for encryption and employs 802.1X authentication with one of the standard Extensible Authentication Protocol (EAP) types available today. ◦ WPA2 provides a new encryption scheme, the Advanced Encryption Standard (AES). AES is defined in counter cipher-block chaining mode (CCM) and supports the Independent Basic Service Set (IBSS) to enable security between client workstations operating in ad hoc mode. To set up wireless communication using the device control panel with wireless setup wizard The Wireless Setup Wizard provides an easy way to set up and manage a wireless connection to your device. NOTE: To use this method, you must have a wireless network set up and running. 1. Set up the device hardware (see the getting started guide or the setup poster that came with your device). 2. On the device control panel, press the Setup button. 3. Press an arrow button to move to Network, and then press OK. 4. Press an arrow button to move to Wizard, and then press OK. 5. Follow the display instructions to complete the setup. To set up wireless communication using the installer (Windows) For this method, you will need to have a network set up and running. 1. Set up the device hardware (see the setup poster). 2. Remove the protective cover from the device's network port. 3. Close any applications that are running on your computer system. 4. Insert the Starter CD into the CD drive. The CD menu runs automatically. If the CD menu does not start automatically, double-click the setup icon on the Starter CD. 5. On the CD menu, click Install and follow the onscreen instructions. 6. On the Connection Type screen, select Wireless, and then click Next. NOTE: If the device cannot be found, you will have the option to temporarily use a network cable to communicate with the device and configure its wireless settings. 114 Configure and manage
-
 1
1 -
2
-
3
-
4
-
5
-
6
-
7
-
8
-
9
-
10
-
11
-
12
-
13
-
14
-
15
-
16
-
17
-
18
-
19
-
20
-
21
-
22
-
23
-
24
-
25
-
26
-
27
-
28
-
29
-
30
-
31
-
32
-
33
-
34
-
35
-
36
-
37
-
38
-
39
-
40
-
41
-
42
-
43
-
44
-
45
-
46
-
47
-
48
-
49
-
50
-
51
-
52
-
53
-
54
-
55
-
56
-
57
-
58
-
59
-
60
-
61
-
62
-
63
-
64
-
65
-
66
-
67
-
68
-
69
-
70
-
71
-
72
-
73
-
74
-
75
-
76
-
77
-
78
-
79
-
80
-
81
-
82
-
83
-
84
-
85
-
86
-
87
-
88
-
89
-
90
-
91
-
92
-
93
-
94
-
95
-
96
-
97
-
98
-
99
-
100
-
101
-
102
-
103
-
104
-
105
-
106
-
107
-
108
-
109
-
110
-
111
-
112
-
 113
113 -
 114
114 -
 115
115 -
 116
116 -
 117
117 -
 118
118 -
 119
119 -
 120
120 -
 121
121 -
 122
122 -
 123
123 -
124
-
125
-
126
-
127
-
128
-
129
-
130
-
131
-
132
-
133
-
134
-
135
-
136
-
137
-
138
-
139
-
140
-
141
-
142
-
143
-
144
-
145
-
146
-
147
-
148
-
149
-
150
-
151
-
152
-
153
-
154
-
155
-
156
-
157
-
158
-
159
-
160
-
161
-
162
-
163
-
164
-
165
-
166
-
167
-
168
-
169
-
170
-
171
-
172
-
173
-
174
-
175
-
176
-
177
-
178
-
179
-
180
-
181
-
182
-
183
-
184
-
185
-
186
-
187
-
188
-
189
-
190
-
191
-
192
-
193
-
194
-
195
-
196
-
197
-
198
-
199
-
200
-
201
-
202
-
203
-
204
-
205
-
206
-
207
-
208
-
209
-
210
-
211
-
212
-
213
-
214
-
215
-
216
-
217
-
218
 |
 |