HP J6480 User Guide - Page 134
Clean the device, To insert a print cartridge into the print cartridge protector - scanner not working
 |
UPC - 883585506811
View all HP J6480 manuals
Add to My Manuals
Save this manual to your list of manuals |
Page 134 highlights
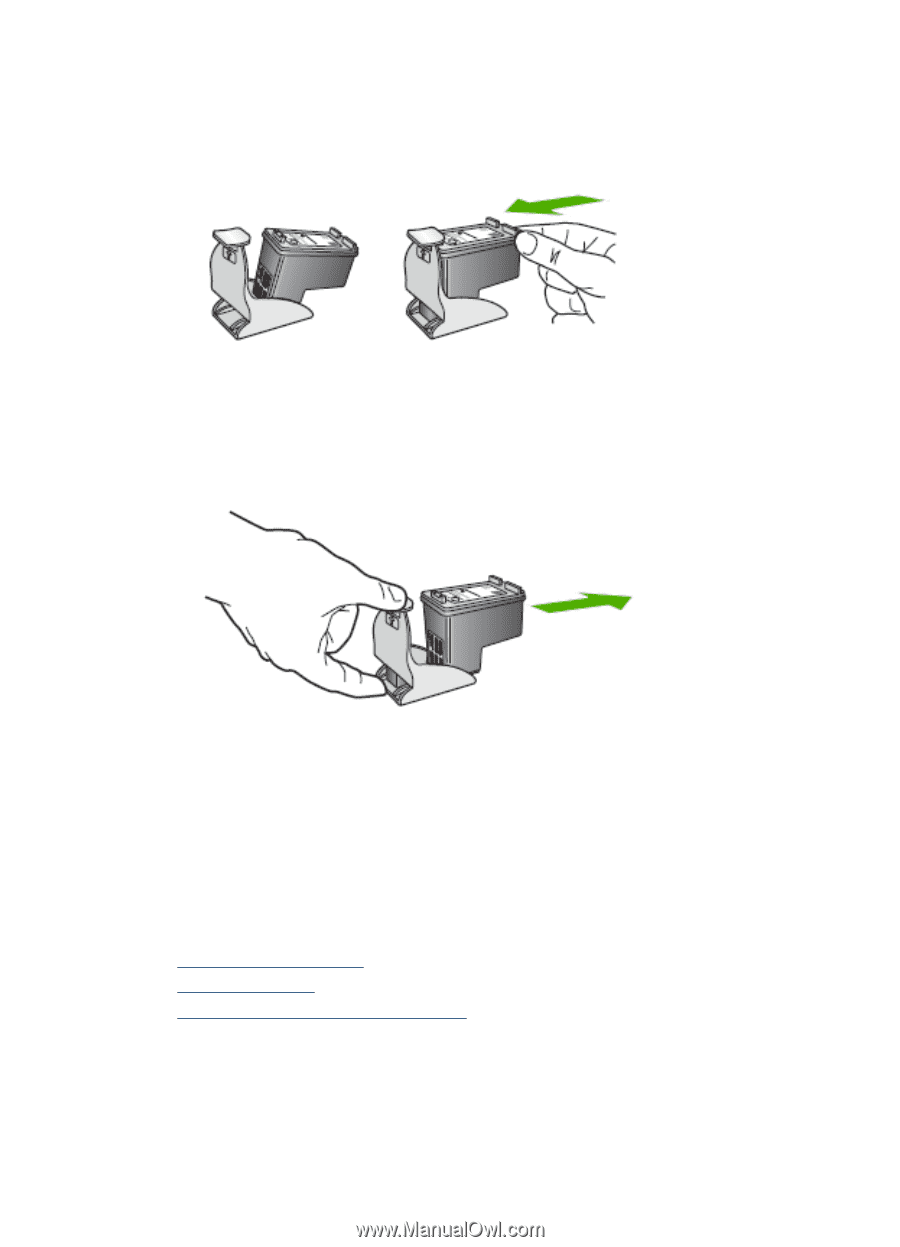
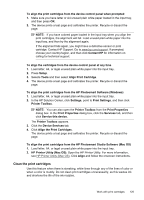
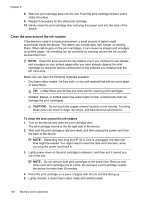
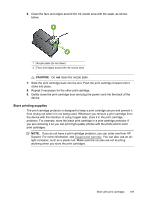
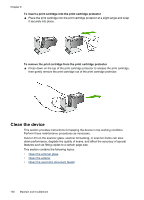
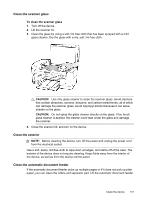
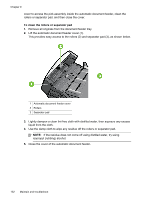
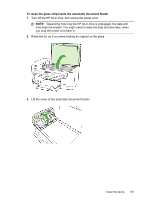
Chapter 9 To insert a print cartridge into the print cartridge protector ▲ Place the print cartridge into the print cartridge protector at a slight angle and snap it securely into place. To remove the print cartridge from the print cartridge protector ▲ Press down on the top of the print cartridge protector to release the print cartridge, then gently remove the print cartridge out of the print cartridge protector. Clean the device This section provides instructions for keeping the device in top working condition. Perform these maintenance procedures as necessary. Dust or dirt on the scanner glass, scanner lid backing, or scanner frame can slow down performance, degrade the quality of scans, and affect the accuracy of special features such as fitting copies to a certain page size. This section contains the following topics: • Clean the scanner glass • Clean the exterior • Clean the automatic document feeder 130 Maintain and troubleshoot
-
 1
1 -
2
-
3
-
4
-
5
-
6
-
7
-
8
-
9
-
10
-
11
-
12
-
13
-
14
-
15
-
16
-
17
-
18
-
19
-
20
-
21
-
22
-
23
-
24
-
25
-
26
-
27
-
28
-
29
-
30
-
31
-
32
-
33
-
34
-
35
-
36
-
37
-
38
-
39
-
40
-
41
-
42
-
43
-
44
-
45
-
46
-
47
-
48
-
49
-
50
-
51
-
52
-
53
-
54
-
55
-
56
-
57
-
58
-
59
-
60
-
61
-
62
-
63
-
64
-
65
-
66
-
67
-
68
-
69
-
70
-
71
-
72
-
73
-
74
-
75
-
76
-
77
-
78
-
79
-
80
-
81
-
82
-
83
-
84
-
85
-
86
-
87
-
88
-
89
-
90
-
91
-
92
-
93
-
94
-
95
-
96
-
97
-
98
-
99
-
100
-
101
-
102
-
103
-
104
-
105
-
106
-
107
-
108
-
109
-
110
-
111
-
112
-
113
-
114
-
115
-
116
-
117
-
118
-
119
-
120
-
121
-
122
-
123
-
124
-
125
-
126
-
127
-
128
-
 129
129 -
 130
130 -
 131
131 -
 132
132 -
 133
133 -
 134
134 -
 135
135 -
 136
136 -
 137
137 -
 138
138 -
 139
139 -
140
-
141
-
142
-
143
-
144
-
145
-
146
-
147
-
148
-
149
-
150
-
151
-
152
-
153
-
154
-
155
-
156
-
157
-
158
-
159
-
160
-
161
-
162
-
163
-
164
-
165
-
166
-
167
-
168
-
169
-
170
-
171
-
172
-
173
-
174
-
175
-
176
-
177
-
178
-
179
-
180
-
181
-
182
-
183
-
184
-
185
-
186
-
187
-
188
-
189
-
190
-
191
-
192
-
193
-
194
-
195
-
196
-
197
-
198
-
199
-
200
-
201
-
202
-
203
-
204
-
205
-
206
-
207
-
208
-
209
-
210
-
211
-
212
-
213
-
214
-
215
-
216
-
217
-
218
 |
 |