HP LaserJet 3200 HP LaserJet 3200m All-in-One Product - (English for Australia - Page 35
Direct connect installation (parallel cable), To connect the product to
 |
View all HP LaserJet 3200 manuals
Add to My Manuals
Save this manual to your list of manuals |
Page 35 highlights
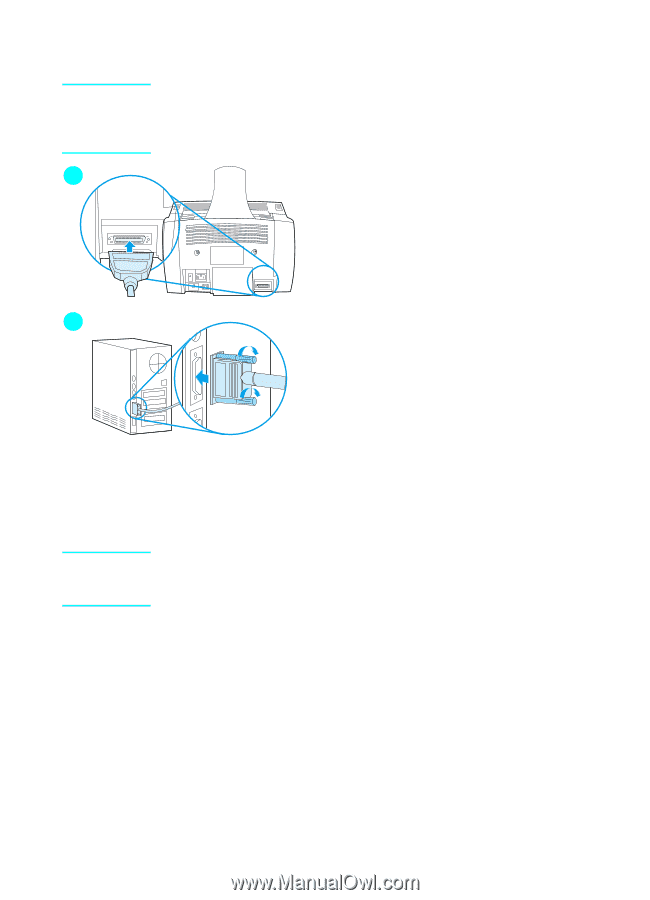
Note 2 3 CAUTION Direct connect installation (parallel cable) If you have a Macintosh computer, you cannot use a parallel cable to connect the product. To connect the product to a Macintosh computer using a USB cable, see "Direct connect installation (USB cable)" on page 29. To connect the product to a computer with a parallel cable 1 Turn off the computer. 2 Squeeze the clips on the sides of the parallel cable and attach it to the connector on the back of the product. Gently tug on the cable to ensure it is securely connected, and then push it back in. 3 Connect the other end of the cable to a dedicated parallel port on the computer and secure the cable by tightening the screws. The product should be connected directly to a dedicated, IEEE-1284 bidirectional or ECP-compliant parallel port. If the parallel port has another device attached to it, such as an external storage device, that device must be disconnected. Do not connect the parallel cable to a serial port on the computer. Doing so can damage the product. If you need help locating the parallel port, see the documentation for the computer. 4 Turn the computer back on. 5 After the computer restarts, follow the steps listed for the version of Windows that you use: • for Windows 95, follow steps a through d on page 34. • for Windows 98, follow steps e through j on page 34. • for Windows 2000, follow steps k through q on page 35. • for Windows Millennium Edition, follow steps r through v on page 35. • for Windows NT 4.0, follow steps w through z on page 36. EN Completing installation 33
-
 1
1 -
2
-
3
-
4
-
5
-
6
-
7
-
8
-
9
-
10
-
11
-
12
-
13
-
14
-
15
-
16
-
17
-
18
-
19
-
20
-
21
-
22
-
23
-
24
-
25
-
26
-
27
-
28
-
29
-
 30
30 -
 31
31 -
 32
32 -
 33
33 -
 34
34 -
 35
35 -
 36
36 -
 37
37 -
 38
38 -
 39
39 -
 40
40 -
41
-
42
-
43
-
44
-
45
-
46
-
47
-
48
-
49
-
50
-
51
-
52
-
53
-
54
-
55
-
56
-
57
-
58
-
59
-
60
-
61
-
62
-
63
-
64
-
65
-
66
-
67
-
68
 |
 |