HP StorageWorks 16-EL SAN Switch 2/16 version 3.1.x - Installation Guide - Page 39
Sliding the switch into an HP 9000 Series rack, Securing the Rack Mount Brackets,
 |
View all HP StorageWorks 16-EL manuals
Add to My Manuals
Save this manual to your list of manuals |
Page 39 highlights
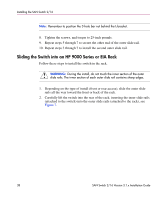
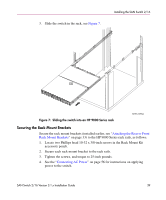
3. Slide the switch in the rack, see Figure 7. Installing the SAN Switch 2/16 Figure 7: Sliding the switch into an HP 9000 Series rack SHR-2476A Securing the Rack Mount Brackets Secure the rack mount brackets (installed earlier, see "Attaching the Rear or Front Rack Mount Brackets" on page 33) to the HP 9000 Series rack rails, as follows. 1. Locate two Phillips head 10-32 x 3/8-inch screws in the Rack Mount Kit accessory pouch. 2. Secure each rack mount bracket to the rack rails. 3. Tighten the screws, and torque to 25-inch pounds. 4. See the "Connecting AC Power" on page 56 for instructions on applying power to the switch. SAN Switch 2/16 Version 3.1.x Installation Guide 39
-
 1
1 -
2
-
3
-
4
-
5
-
6
-
7
-
8
-
9
-
10
-
11
-
12
-
13
-
14
-
15
-
16
-
17
-
18
-
19
-
20
-
21
-
22
-
23
-
24
-
25
-
26
-
27
-
28
-
29
-
30
-
31
-
32
-
33
-
 34
34 -
 35
35 -
 36
36 -
 37
37 -
 38
38 -
 39
39 -
 40
40 -
 41
41 -
 42
42 -
 43
43 -
 44
44 -
45
-
46
-
47
-
48
-
49
-
50
-
51
-
52
-
53
-
54
-
55
-
56
-
57
-
58
-
59
-
60
-
61
-
62
-
63
-
64
-
65
-
66
-
67
-
68
-
69
-
70
-
71
-
72
-
73
-
74
-
75
-
76
-
77
-
78
-
79
-
80
-
81
-
82
-
83
-
84
-
85
-
86
-
87
-
88
-
89
-
90
-
91
-
92
-
93
-
94
-
95
-
96
-
97
-
98
-
99
-
100
-
101
-
102
-
103
-
104
-
105
-
106
-
107
-
108
-
109
-
110
-
111
-
112
-
113
-
114
-
115
-
116
-
117
-
118
-
119
-
120
 |
 |
Installing the SAN Switch 2/16
39
SAN Switch 2/16 Version 3.1.x Installation Guide
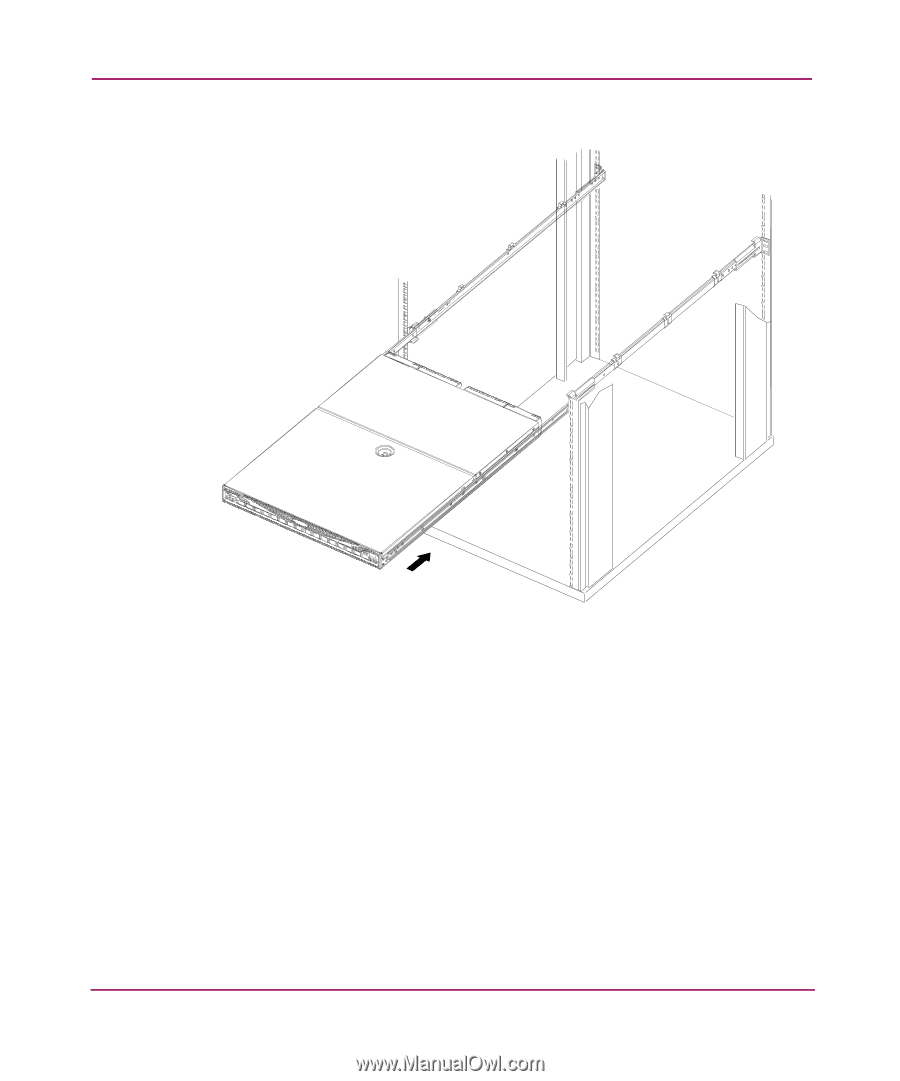
3.
Slide the switch in the rack, see
Figure 7
.
Figure 7:
Sliding the switch into an HP 9000 Series rack
Securing the Rack Mount Brackets
Secure the rack mount brackets (installed earlier, see “
Attaching the Rear or Front
Rack Mount Brackets
” on page 33) to the HP 9000 Series rack rails, as follows.
1.
Locate two Phillips head 10-32 x 3/8-inch screws in the Rack Mount Kit
accessory pouch.
2.
Secure each rack mount bracket to the rack rails.
3.
Tighten the screws, and torque to 25-inch pounds.
4.
See the “
Connecting AC Power
” on page 56 for instructions on applying
power to the switch.
SHR-2476A