HP StorageWorks 16-EL SAN Switch 2/16 version 3.1.x - Installation Guide - Page 60
To con Port Settings in a UNIX, Flow control: None
 |
View all HP StorageWorks 16-EL manuals
Add to My Manuals
Save this manual to your list of manuals |
Page 60 highlights
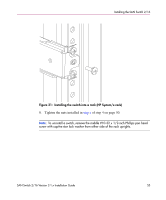
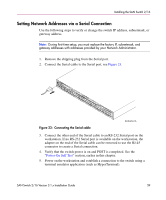
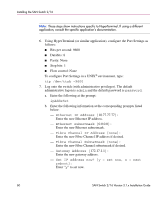
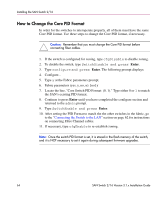
Installing the SAN Switch 2/16 Note: These steps show instructions specific to HyperTerminal. If using a different application, consult the specific application's documentation. 6. Using HyperTerminal (or similar application), configure the Port Settings as follows: ■ Bits per second: 9600 ■ Databits: 8 ■ Parity: None ■ Stop bits: 1 ■ Flow control: None To configure Port Settings in a UNIX® environment, type: tip /dev/ttyb -9600 7. Log onto the switch (with administrative privileges). The default administrative logon is admin and the default password is password. a. Enter the following at the prompt: ipAddrSet b. Enter the following information at the corresponding prompts listed below: - Ethernet IP Address [10.77.77.77]: Enter the new Ethernet IP address. - Ethernet subnetmask [0.0.0.0]: Enter the new Ethernet subnetmask. - Fibre Channel IP Address [none]: Enter the new Fibre Channel IP address if desired. - Fibre Channel Subnetmask [none]: Enter the new Fibre Channel subnetmask if desired. - Gateway Address [172.17.1.1]: Enter the new gateway address. - Set IP address now? [y = set now, n = next reboot]: Enter "y" to set now. 60 SAN Switch 2/16 Version 3.1.x Installation Guide
-
 1
1 -
2
-
3
-
4
-
5
-
6
-
7
-
8
-
9
-
10
-
11
-
12
-
13
-
14
-
15
-
16
-
17
-
18
-
19
-
20
-
21
-
22
-
23
-
24
-
25
-
26
-
27
-
28
-
29
-
30
-
31
-
32
-
33
-
34
-
35
-
36
-
37
-
38
-
39
-
40
-
41
-
42
-
43
-
44
-
45
-
46
-
47
-
48
-
49
-
50
-
51
-
52
-
53
-
54
-
 55
55 -
 56
56 -
 57
57 -
 58
58 -
 59
59 -
 60
60 -
 61
61 -
 62
62 -
 63
63 -
 64
64 -
 65
65 -
66
-
67
-
68
-
69
-
70
-
71
-
72
-
73
-
74
-
75
-
76
-
77
-
78
-
79
-
80
-
81
-
82
-
83
-
84
-
85
-
86
-
87
-
88
-
89
-
90
-
91
-
92
-
93
-
94
-
95
-
96
-
97
-
98
-
99
-
100
-
101
-
102
-
103
-
104
-
105
-
106
-
107
-
108
-
109
-
110
-
111
-
112
-
113
-
114
-
115
-
116
-
117
-
118
-
119
-
120
 |
 |
