HP StorageWorks 16-EL SAN Switch 2/16 version 3.1.x - Installation Guide - Page 59
Setting Network Addresses via a Serial Connection, Connecting the Serial cable,
 |
View all HP StorageWorks 16-EL manuals
Add to My Manuals
Save this manual to your list of manuals |
Page 59 highlights
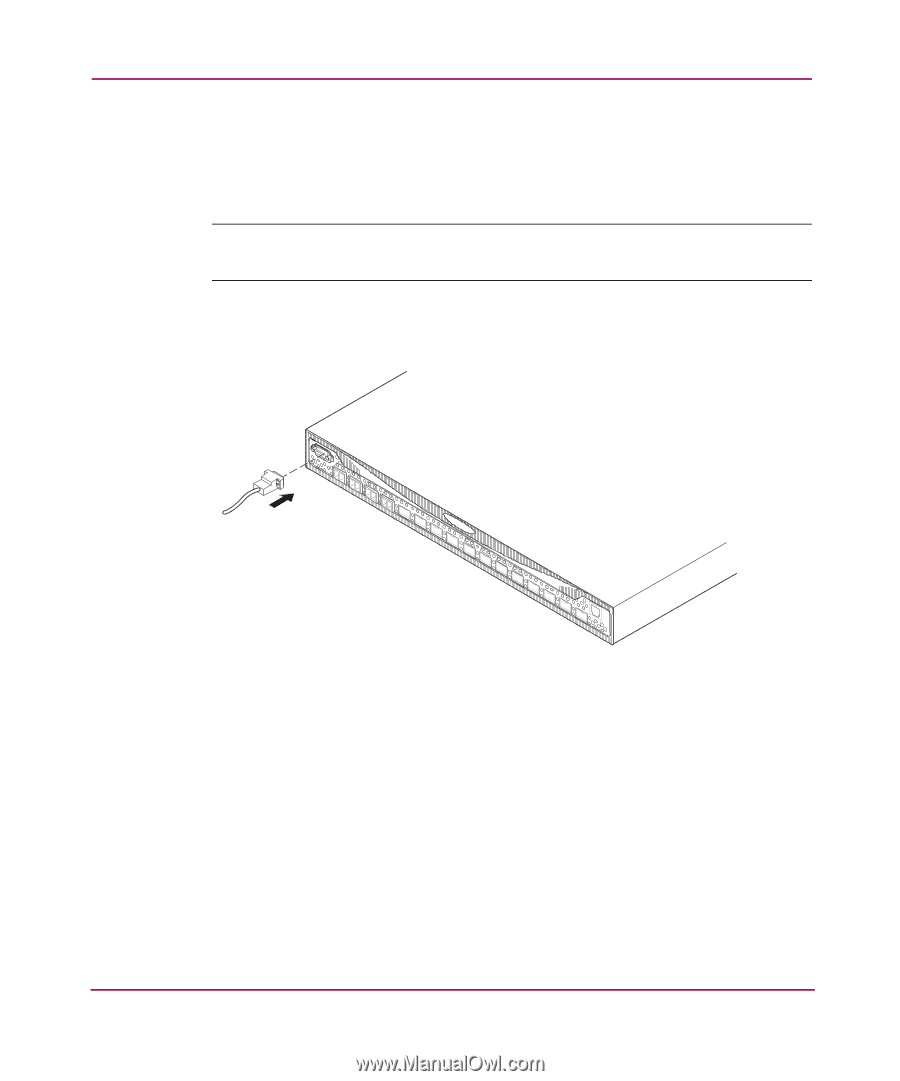
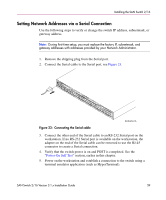
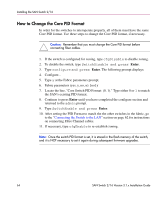
Installing the SAN Switch 2/16 Setting Network Addresses via a Serial Connection Use the following steps to verify or change the switch IP address, subnetmask, or gateway address. Note: During first-time setup, you must replace the factory IP, subnetmask, and gateway addresses with addresses provided by your Network Administrator. 1. Remove the shipping plug from the Serial port. 2. Connect the Serial cable to the Serial port, see Figure 23. Figure 23: Connecting the Serial cable SHR-2551A 3. Connect the other end of the Serial cable to an RS-232 Serial port on the workstation. If no RS-232 Serial port is available on the workstation, the adapter on the end of the Serial cable can be removed to use the RJ-45 connector to create a Serial connection. 4. Verify that the switch power is on and POST is completed. See the "Power-On Self Test" section, earlier in this chapter. 5. Power on the workstation and establish a connection to the switch using a terminal emulator application (such as HyperTerminal). SAN Switch 2/16 Version 3.1.x Installation Guide 59
-
 1
1 -
2
-
3
-
4
-
5
-
6
-
7
-
8
-
9
-
10
-
11
-
12
-
13
-
14
-
15
-
16
-
17
-
18
-
19
-
20
-
21
-
22
-
23
-
24
-
25
-
26
-
27
-
28
-
29
-
30
-
31
-
32
-
33
-
34
-
35
-
36
-
37
-
38
-
39
-
40
-
41
-
42
-
43
-
44
-
45
-
46
-
47
-
48
-
49
-
50
-
51
-
52
-
53
-
 54
54 -
 55
55 -
 56
56 -
 57
57 -
 58
58 -
 59
59 -
 60
60 -
 61
61 -
 62
62 -
 63
63 -
 64
64 -
65
-
66
-
67
-
68
-
69
-
70
-
71
-
72
-
73
-
74
-
75
-
76
-
77
-
78
-
79
-
80
-
81
-
82
-
83
-
84
-
85
-
86
-
87
-
88
-
89
-
90
-
91
-
92
-
93
-
94
-
95
-
96
-
97
-
98
-
99
-
100
-
101
-
102
-
103
-
104
-
105
-
106
-
107
-
108
-
109
-
110
-
111
-
112
-
113
-
114
-
115
-
116
-
117
-
118
-
119
-
120
 |
 |