HP StorageWorks 8/80 HP StorageWorks 8Gb SAN Switch hardware reference manual - Page 34
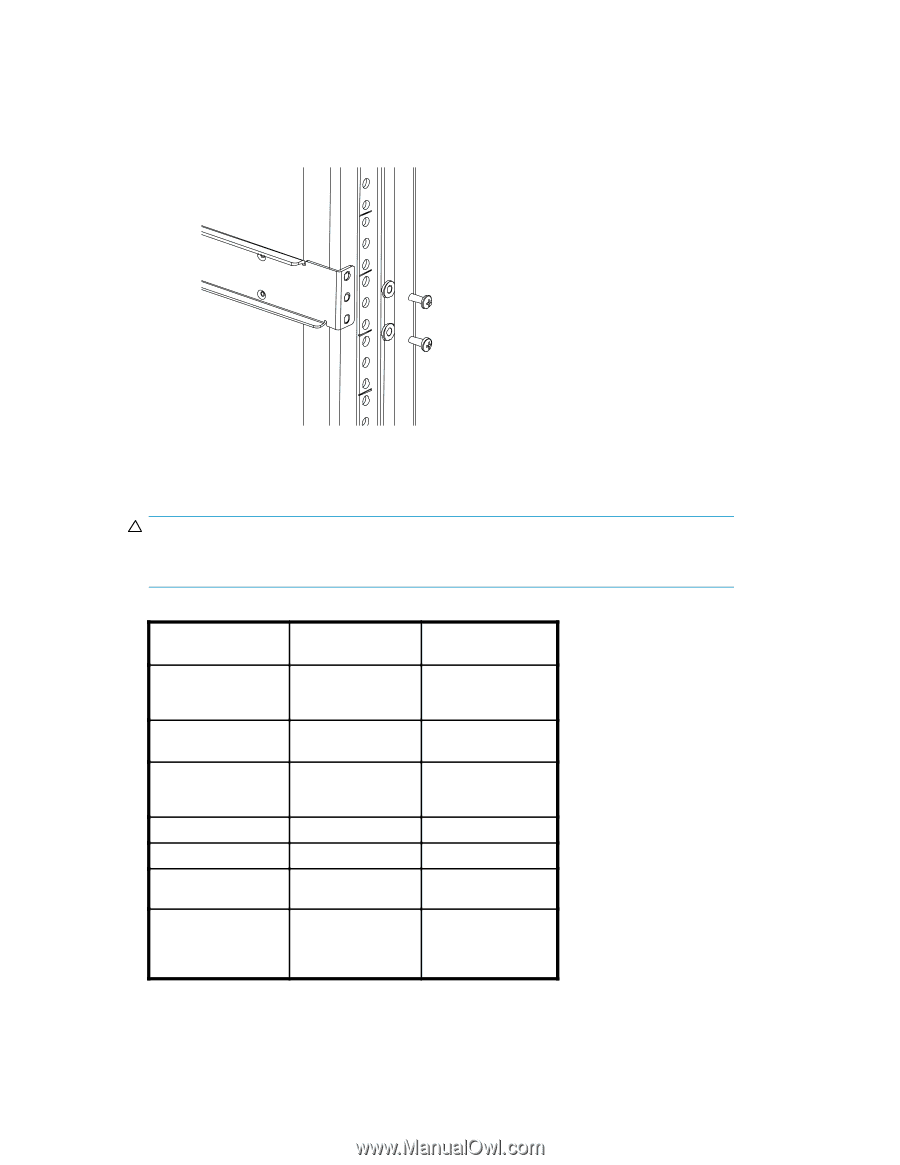
Assembling the outer rails HP System/e Rack
 |
View all HP StorageWorks 8/80 manuals
Add to My Manuals
Save this manual to your list of manuals |
Page 34 highlights
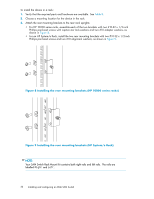
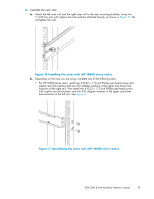
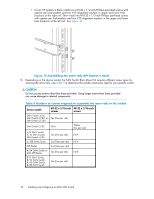
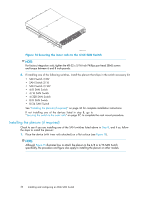
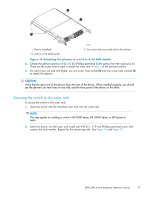
• For an HP System/e Rack, install two #10-32 x 1/2-inch Phillips pan-head screws with captive star lock-washers and two #10 alignment washers in upper and lower hole locations of the right rail. Then install two #10-32 x 1/2-inch Phillips pan-head screws with captive star lock-washers and two #10 alignment washers in the upper and lower hole locations of the left rail. See Figure 12. Figure 12 Assembling the outer rails (HP System/e Rack) 5. Depending on the device model, the SAN Switch Rack Mount Kit requires different screw types for securing the inner rails. Use Table 9 to determine the number and screw type for your specific switch. CAUTION: Do not use any screws other than those provided. Using longer screws than those provided can cause damage to internal components. Table 9 Number of screws required to assemble the inner rails to the switch Device model #8-32 x 5/16-inch #8-32 x 3/16-inch screws screws SAN Switch 2/16, SAN Switch 2/8V, or Ten (Five per rail) SAN Switch 2/16V SAN Switch 2/32 N/A Twelve nl (Six per rail) 4/8 SAN Switch, 4/16 SAN Switch, SAN Switch 4/32 Ten (Five per rail) N/A 4/32B SAN Switch Six (Three per rail) N/A MP Router Six (Three per rail) 4/64 SAN Switch or 400 MP Router Ten (Five per rail) N/A 8/8 SAN Switch, 8/24 SAN Switch, 8/40 SAN Switch, 8/80 SAN Switch Ten (Five per rail) 34 Installing and configuring an 8Gb SAN Switch
-
 1
1 -
2
-
3
-
4
-
5
-
6
-
7
-
8
-
9
-
10
-
11
-
12
-
13
-
14
-
15
-
16
-
17
-
18
-
19
-
20
-
21
-
22
-
23
-
24
-
25
-
26
-
27
-
28
-
 29
29 -
 30
30 -
 31
31 -
 32
32 -
 33
33 -
 34
34 -
 35
35 -
 36
36 -
 37
37 -
 38
38 -
 39
39 -
40
-
41
-
42
-
43
-
44
-
45
-
46
-
47
-
48
-
49
-
50
-
51
-
52
-
53
-
54
-
55
-
56
-
57
-
58
-
59
-
60
-
61
-
62
-
63
-
64
-
65
-
66
-
67
-
68
-
69
-
70
-
71
-
72
-
73
-
74
-
75
-
76
-
77
-
78
-
79
-
80
-
81
-
82
-
83
-
84
 |
 |