HP Superdome SX2000 Installation Guide, Sixth Edition - HP Integrity Superdome - Page 33
Attaching the Leveling Feet and Leveling the Cabinet
 |
View all HP Superdome SX2000 manuals
Add to My Manuals
Save this manual to your list of manuals |
Page 33 highlights
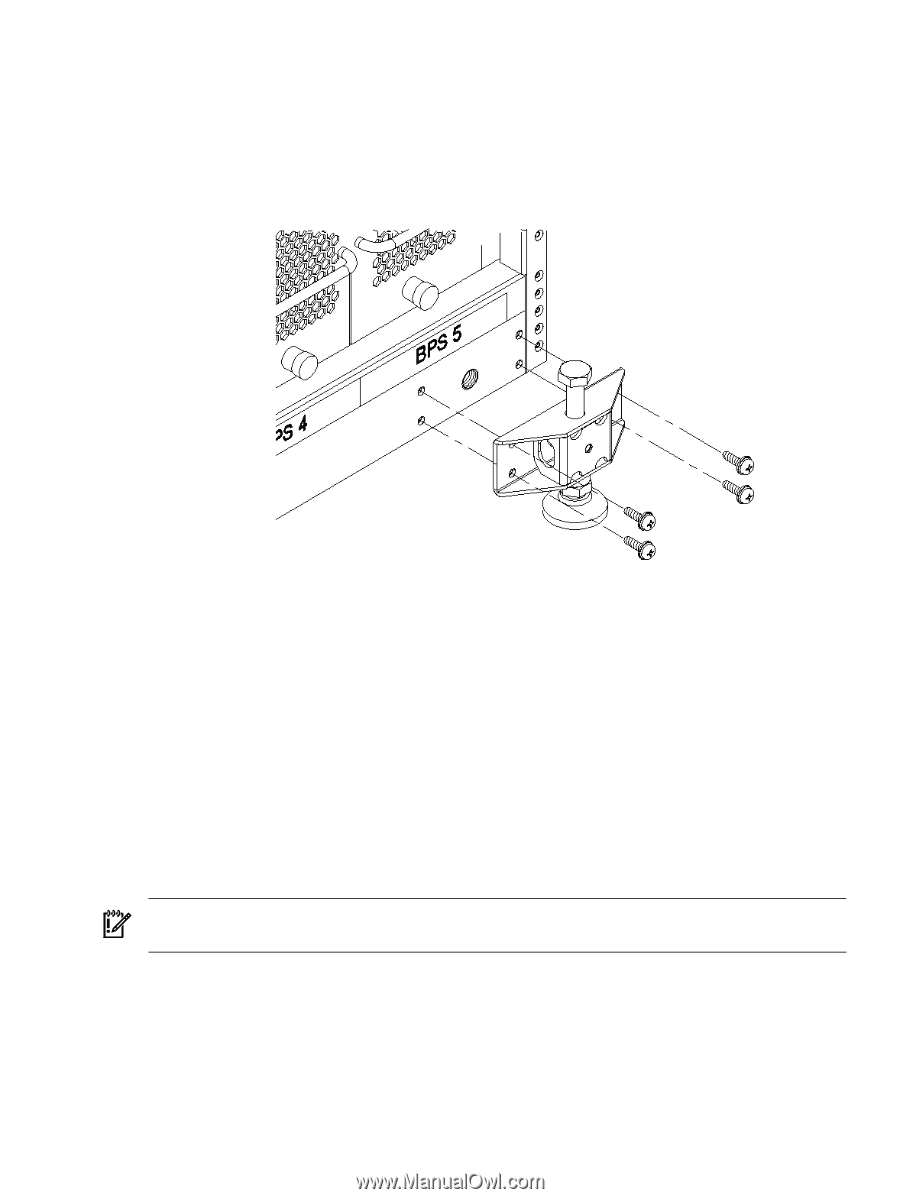
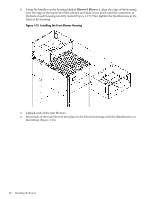
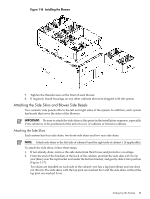
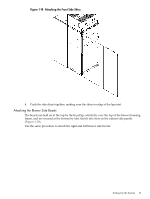
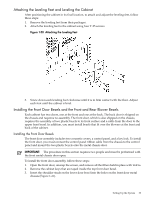
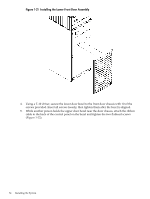
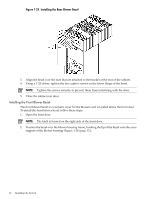
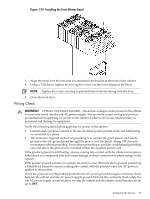
Attaching the Leveling Feet and Leveling the Cabinet After positioning the cabinet in its final location, to attach and adjust the leveling feet, follow these steps: 1. Remove the leveling feet from their packages. 2. Attach the leveling feet to the cabinet using four T-25 screws. Figure 1-20 Attaching the Leveling Feet 3. Screw down each leveling foot clockwise until it is in firm contact with the floor. Adjust each foot until the cabinet is level. Installing the Front Door Bezels and the Front and Rear Blower Bezels Each cabinet has two doors, one at the front and one at the back. The back door is shipped on the chassis and requires no assembly. The front door, which is also shipped on the chassis, requires the assembly of two plastic bezels to its front surface and a cable from the door to the upper front bezel. In addition, you must install bezels that fit over the blowers at the front and back of the cabinet. Installing the Front Door Bezels The front door assembly includes two cosmetic covers, a control panel, and a key lock. To install the front door, you must connect the control panel ribbon cable from the chassis to the control panel and mount the two plastic bezels onto the metal chassis door. IMPORTANT: The procedure in this section requires two people and must be performed with the front metal chassis door open. To install the front door assembly, follow these steps: 1. Open the front door, unsnap the screen, and remove all the filters held in place with Velcro. 2. Remove the cabinet keys that are taped inside the top front door bezel. 3. Insert the shoulder studs on the lower door bezel into the holes on the front door metal chassis (Figure 1-21). Setting Up the System 33
-
 1
1 -
2
-
3
-
4
-
5
-
6
-
7
-
8
-
9
-
10
-
11
-
12
-
13
-
14
-
15
-
16
-
17
-
18
-
19
-
20
-
21
-
22
-
23
-
24
-
25
-
26
-
27
-
 28
28 -
 29
29 -
 30
30 -
 31
31 -
 32
32 -
 33
33 -
 34
34 -
 35
35 -
 36
36 -
 37
37 -
 38
38 -
39
-
40
-
41
-
42
-
43
-
44
-
45
-
46
-
47
-
48
-
49
-
50
-
51
-
52
-
53
-
54
-
55
-
56
-
57
-
58
-
59
-
60
-
61
-
62
-
63
-
64
-
65
-
66
-
67
-
68
 |
 |