HP Visualize J5000 hp Visualize J5000, J7000 workstations parts removal and re - Page 39
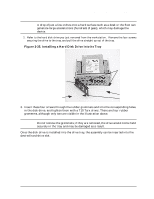
Installing a Hard Disk Drive into its Tray
 |
View all HP Visualize J5000 manuals
Add to My Manuals
Save this manual to your list of manuals |
Page 39 highlights
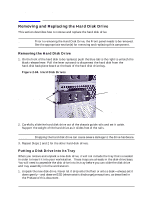
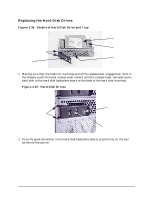
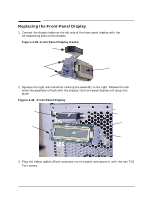
Parts Removal and Replacement Removing and Replacing the Hard Disk Drive CAUTION A drop of just a few inches onto a hard surface such as a desk or the floor can generate large accelerations (hundreds of gees), which may damage the device. 2. Refer to the hard disk drive you just removed from the workstation. Remove the four screws securing the drive to the tray, and pull the drive straight up out of the tray. Figure 2-35. Installing a Hard Disk Drive into its Tray Screw-storage tab Grommets (do not remove) Release lever Screw-storage tab Release hook 3. Insert these four screws through the rubber grommets and into the corresponding holes in the disk drive, and tighten them with a T15 Torx driver. There are four rubber grommets, although only two are visible in the illustration above. NOTE Do not remove the grommets; if they are removed, the drive would not be held securely in the tray and may be damaged as a result. Once the disk drive is installed into the drive tray, the assembly can be inserted into the desired hard-drive slot. Chapter 2 39
-
 1
1 -
2
-
3
-
4
-
5
-
6
-
7
-
8
-
9
-
10
-
11
-
12
-
13
-
14
-
15
-
16
-
17
-
18
-
19
-
20
-
21
-
22
-
23
-
24
-
25
-
26
-
27
-
28
-
29
-
30
-
31
-
32
-
33
-
 34
34 -
 35
35 -
 36
36 -
 37
37 -
 38
38 -
 39
39 -
 40
40 -
 41
41 -
 42
42 -
 43
43 -
 44
44 -
45
-
46
-
47
-
48
-
49
-
50
-
51
-
52
-
53
-
54
-
55
-
56
 |
 |
