HP Visualize J5000 hp Visualize J5000, J7000 workstations parts removal and re - Page 43
Removing and Replacing the I/O Board
 |
View all HP Visualize J5000 manuals
Add to My Manuals
Save this manual to your list of manuals |
Page 43 highlights
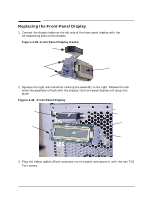
Parts Removal and Replacement Removing and Replacing the I/O Board Removing and Replacing the I/O Board This section describes how to remove and replace the I/O Board. NOTE Prior to removing the I/O Board, the Front, Top, and Left Side panels, the Power Supply, the PCI Retainer Clip, and PCI I/O Cards need to be removed. See the appropriate section(s) for removing and replacing these components. Replacing the I/O Board Removing the I/O Board 1. Remove the cables from the USB Clip from the back of the Workstation. Figure 2-41. Opening the USB Clip Keyboard and Mouse connectors. Insert a fingernail under the locking lever of the USB clip . Lift up. 2. Disconnect all cables and SCSI terminators from the back of the system. 3. Remove the two T-15 Torx screws that secure the I/O board to the back of the workstation. Chapter 2 43
-
 1
1 -
2
-
3
-
4
-
5
-
6
-
7
-
8
-
9
-
10
-
11
-
12
-
13
-
14
-
15
-
16
-
17
-
18
-
19
-
20
-
21
-
22
-
23
-
24
-
25
-
26
-
27
-
28
-
29
-
30
-
31
-
32
-
33
-
34
-
35
-
36
-
37
-
 38
38 -
 39
39 -
 40
40 -
 41
41 -
 42
42 -
 43
43 -
 44
44 -
 45
45 -
 46
46 -
 47
47 -
 48
48 -
49
-
50
-
51
-
52
-
53
-
54
-
55
-
56
 |
 |
