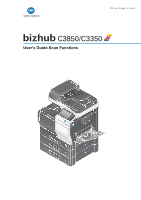
Konica Minolta bizhub C3350 bizhub C3850/C3350 Scan Functions User Guide
Konica Minolta bizhub C3350 Manual
 |
View all Konica Minolta bizhub C3350 manuals
Add to My Manuals
Save this manual to your list of manuals |
Konica Minolta bizhub C3350 manual content summary:
- Konica Minolta bizhub C3350 | bizhub C3850/C3350 Scan Functions User Guide - Page 1
User's Guide Scan Functions - Konica Minolta bizhub C3350 | bizhub C3850/C3350 Scan Functions User Guide - Page 2
the LDAP server 1-11 Scan option settings ...1-12 Basic options such as color and original size 1-12 Selecting the color mode to scan the original ([Color 1-12 Specifying the size of the original to be scanned ([Scan Size 1-12 Specifying the resolution to scan the original ([Resolution 1-12 - Konica Minolta bizhub C3350 | bizhub C3850/C3350 Scan Functions User Guide - Page 3
2-9 Operation flow...2-9 3 Sending a File to a Shared Folder of a Computer (SMB Send) 3.1 3.2 3.2.1 3.2.2 3.2.3 service 3-15 Using LLMNR...3-16 Using in the DFS environment ...3-16 How to send...3-17 Application functions...3-19 Sending data to your computer (Scan to Home 3-19 Scan - Konica Minolta bizhub C3350 | bizhub C3850/C3350 Scan Functions User Guide - Page 4
HDD...6-6 Downloading the file memory 7-3 7.3 How to save ...7-4 8 Sending with Web Service (WS Scan) 8.1 8.2 8.2.1 8.2.2 8.2.3 8.2.4 8.3 8.4 WS Scan function...8-2 Preparation for WS Scan Images by TWAIN/WIA Scan 9.1 9.2 9.2.1 TWAIN/WIA scan function ...9-2 Preparation for TWAIN/WIA scanning - Konica Minolta bizhub C3350 | bizhub C3850/C3350 Scan Functions User Guide - Page 5
to use this function 9-3 Operating environment of computer 9-3 Installing the scanner driver (Windows 9-4 Installing the scanner driver (Mac OS 9-4 TWAIN scanning...9-5 WIA scanning...9-7 Uninstalling the scanner driver...9-8 In Windows: ...9-8 In Mac OS: ...9-8 10 Registering Frequently Used - Konica Minolta bizhub C3350 | bizhub C3850/C3350 Scan Functions User Guide - Page 6
1 Scan Function - Konica Minolta bizhub C3350 | bizhub C3850/C3350 Scan Functions User Guide - Page 7
data saved in the HDD can be downloaded via the Web browser on your computer. Saves the original data scanned by this machine in the USB memory device connected to the machine. Imports original data by issuing a scan instruction from a computer without configuring complicated system settings - Konica Minolta bizhub C3350 | bizhub C3850/C3350 Scan Functions User Guide - Page 8
1 Load the original. 2 Tap the key of the desired function. % To use Scan to E-mail, tap [Scan To E-mail]. % To use SMB Send, FTP Send, WebDAV Send, Save to HDD, Save to USB Memory, or WS Scan, tap [Scan To Folder]. 3 Specify the destination. % For details on how to specify a destination, refer to - Konica Minolta bizhub C3350 | bizhub C3850/C3350 Scan Functions User Guide - Page 9
, scanning stops. To cancel scanning the orig- inal, delete inactive jobs from the Job screen. Sending starts. Related setting You can change the default options for scan transmission to suit your environment. To configure settings: [Utility] - [User Settings] - [Scan/Fax Settings] - [Default Scan - Konica Minolta bizhub C3350 | bizhub C3850/C3350 Scan Functions User Guide - Page 10
register the address book in advance. For details on how to register a destination, refer to page 10-2. 1 Tap [Scan To E-mail] or [Scan To Folder]. 2 Tap [Application], then configure scan option settings. % The settings configured here are registered as a program. 3 Tap [Program]. 4 Tap [Register - Konica Minolta bizhub C3350 | bizhub C3850/C3350 Scan Functions User Guide - Page 11
Web Connection to register a program. For details, refer to Chapter 2 "Configuring the Operating Environment of This Machine" in [User's Guide Applied Functions]. Recalling a program for sending 1 Load the original. 2 Tap [Scan To E-mail] or [Scan To Folder]. 3 Tap [Program]. [Scan Functions] 1-6 - Konica Minolta bizhub C3350 | bizhub C3850/C3350 Scan Functions User Guide - Page 12
. % Tap [Delete] to delete the selected program. 5 Press the Start key. % Tap [Check Settings] before sending data, and check the specified destination and settings if necessary. % To redo operations for specifying destinations or option settings, press Reset. Sending starts. [Scan Functions] 1-7 - Konica Minolta bizhub C3350 | bizhub C3850/C3350 Scan Functions User Guide - Page 13
the destinations to be displayed in the address book. Item [Favorites] [Group] Description Displays the destinations registered in Favorites when registering a destination. Displays group destinations. [Scan Functions] 1-8 - Konica Minolta bizhub C3350 | bizhub C3850/C3350 Scan Functions User Guide - Page 14
user name to log in (using ASCII characters of up to 63 bytes). • Entry example: "public_user" Enter the password (using ASCII characters of up to 63 bytes). If necessary, change the port number. Normally, you can use the original port number. [21] is specified by default. When the PASV mode - Konica Minolta bizhub C3350 | bizhub C3850/C3350 Scan Functions User Guide - Page 15
. • Entry example: "scan/document" Enter the name of a user who has privileges to access the folder specified in [File Path] (using ASCII characters of up to 63 bytes). • Entry example: "public_user" Enter the password (using ASCII characters of up to 63 bytes). If necessary, change the port number - Konica Minolta bizhub C3350 | bizhub C3850/C3350 Scan Functions User Guide - Page 16
2 "Configuring the Operating Environment of This Machine" in [User's Guide Applied Functions]. 0 This function is available in Scan to E-mail mode. 1 Select [Addr. Book] - [LDAP], then tap [Address Search (LDAP)] or [Adv. Search (LDAP)]. 2 Enter the keyword, then tap [Search]. % [Address Search - Konica Minolta bizhub C3350 | bizhub C3850/C3350 Scan Functions User Guide - Page 17
1.4.1 Basic options such as color and original size Selecting the color mode to scan the original ([Color]) To display: [Application] - [Basic] - [Color] Select a color mode for scanning originals. Settings [Auto Color] [Full Color] [Gray Scale] [Black] Description Select this option to - Konica Minolta bizhub C3350 | bizhub C3850/C3350 Scan Functions User Guide - Page 18
2], you can allow only the printing with low resolution ([Low Resolution]). • [Enable Copying]: Select whether or not to allow users to copy texts and images from PDF files. • [Printing Allowed]: Select whether or not to allow users to change the contents of a PDF file. If [Encryption Level] is - Konica Minolta bizhub C3350 | bizhub C3850/C3350 Scan Functions User Guide - Page 19
displayed by default. If necessary, change the sender User's Guide Applied Functions]. Renaming a file ([File Name]) To display: [Application] - [Basic] - [File Name] This function is available in Scan To Folder mode. If necessary, you can rename a file of the scanned edge of the paper. When the long - Konica Minolta bizhub C3350 | bizhub C3850/C3350 Scan Functions User Guide - Page 20
original tray, and do not load the sheets up to the point where the top of the stack is higher than the , mark. Doing so may cause a paper jam involving the originals, damage the originals, and/or cause an ADF failure. 2 Tap [Application] - [Original] - [Separate Scan], then set to [ON]. 3 Press the - Konica Minolta bizhub C3350 | bizhub C3850/C3350 Scan Functions User Guide - Page 21
refer to Chapter 1 "Using Web Connection" in [User's Guide Applied Functions]. Adding digital signature to E-mails ([Digital Signature]) To display: [Application] - [App] - [Digital Signature] This function is available in the E-mail transmission mode. Add a digital signature to an E-mail to be sent - Konica Minolta bizhub C3350 | bizhub C3850/C3350 Scan Functions User Guide - Page 22
2 Sending Original Data as an E-mail Attachment (Scan to E-mail) - Konica Minolta bizhub C3350 | bizhub C3850/C3350 Scan Functions User Guide - Page 23
easy operation and installation. It supports S/MIME or SSL/TLS encryption and POP before SMTP authentication, assuring security measures. If the LDAP server or Active Directory of Windows Server is used for user management, an E-mail address can be searched via the server. [Scan Functions] 2-2 - Konica Minolta bizhub C3350 | bizhub C3850/C3350 Scan Functions User Guide - Page 24
. Preparing the E-mail environment Enabling the Scan to E-mail function Registering an E-mail send data. Using an LDAP server to specify addresses % When the LDAP server or Active Directory is used its setting. Using S/MIME % This machine supports S/MIME to avoid risks such as an E-mail - Konica Minolta bizhub C3350 | bizhub C3850/C3350 Scan Functions User Guide - Page 25
] - [User Settings] - [Printer Settings] - [Print Reports] - [Configuration Page]. dReference If no IP address is assigned to this machine, you will need to configure the network. For details, refer to Chapter 4 "Initial Settings of This Machine" in [Quick Start Guide]. Configuring the Scan to - Konica Minolta bizhub C3350 | bizhub C3850/C3350 Scan Functions User Guide - Page 26
the Operating Environment of This Machine" in [User's Guide Applied Functions]. Using S/MIME This machine supports S/MIME to avoid risks such as an E-mail Machine" in [User's Guide Applied Functions]. dReference For details on how to send data using S/MIME, refer to page 2-9. [Scan Functions] 2-5 - Konica Minolta bizhub C3350 | bizhub C3850/C3350 Scan Functions User Guide - Page 27
2.3 How to send 2 2.3 How to send 1 Load the original. 2 Tap [Scan To E-mail]. 3 Specify the destination E-mail address. % For details on how to specify a destination, refer to page 1-8. % You can specify multiple destinations. [Scan Functions] 2-6 - Konica Minolta bizhub C3350 | bizhub C3850/C3350 Scan Functions User Guide - Page 28
color and original size To specify the method to scan the original To adjust the image change the default of the Scan to E-mail screen. To configure settings: [Utility] - [User Settings] - [Custom Display Settings] - [Scan/Fax Settings] - [Scan to Email Default Tab] (default: [Favorites]). [Scan - Konica Minolta bizhub C3350 | bizhub C3850/C3350 Scan Functions User Guide - Page 29
use this function (for administrators) Register an E-mail address in the user's registration information. For details on the setting procedure, refer to or option settings, press Reset. % If you press the Stop key while scanning the original, scanning stops. To cancel scanning the orig- inal, - Konica Minolta bizhub C3350 | bizhub C3850/C3350 Scan Functions User Guide - Page 30
the specified destination and settings if necessary. % To redo operations for specifying destinations or option settings, press Reset. % If you press the Stop key while scanning the original, scanning stops. To cancel scanning the orig- inal, delete inactive jobs from the Job screen. Sending starts - Konica Minolta bizhub C3350 | bizhub C3850/C3350 Scan Functions User Guide - Page 31
3 Sending a File to a Shared Folder of a Computer (SMB Send) - Konica Minolta bizhub C3350 | bizhub C3850/C3350 Scan Functions User Guide - Page 32
function This function converts original data scanned by this machine into a file supported by a computer, and sends it to a shared folder of a computer or server. It also sends a file to your computer as well as to a file server that is usually used to transfer files, which enables sharing of the - Konica Minolta bizhub C3350 | bizhub C3850/C3350 Scan Functions User Guide - Page 33
and user names % Check the destination computer name and available user name. Creating a shared folder % Create a destination folder, service. (You can use this function with the default settings unless otherwise requested.) Using LLMNR % When using LLMNR (Link-local Multicast Name Resolution) - Konica Minolta bizhub C3350 | bizhub C3850/C3350 Scan Functions User Guide - Page 34
to use this function When using Windows 7/8: Carry out preparations to send original data scanned by this machine to your computer. First, check the name of your computer and that of the login user. 0 Administrator privileges are required to perform this task. 1 From the Start menu, click [Computer - Konica Minolta bizhub C3350 | bizhub C3850/C3350 Scan Functions User Guide - Page 35
in to the computer. % The user name is required to configure folder sharing settings and specify destinations. Write down the user name. % For domain users, type in "set user", and check the user name. Then, close the window. Next, create a folder where to send the scanned original data, and start - Konica Minolta bizhub C3350 | bizhub C3850/C3350 Scan Functions User Guide - Page 36
3 9 Click the [Sharing] tab, and also click [Advanced Sharing]. 10 Select the [Share this folder] check box, then click [Permissions]. 11 In [Group or user names], click [Everyone]. 12 Select the check box to permit [Change], then click [OK]. 13 Click [OK] or [Close], then close each screen. The - Konica Minolta bizhub C3350 | bizhub C3850/C3350 Scan Functions User Guide - Page 37
[Computer name]. % The computer name is required to specify a destination. Write down the computer name. % For domain user, the domain name is required to specify a destination along with the user name. Write down the domain name. Then, close the window. 3 From the Start menu, click [All Programs - Konica Minolta bizhub C3350 | bizhub C3850/C3350 Scan Functions User Guide - Page 38
in to the computer. % The user name is required to configure folder sharing settings and specify destinations. Write down the user name. % For domain users, type in "set user", and check the user name. Then, close the window. Next, create a folder where to send the scanned original data, and start - Konica Minolta bizhub C3350 | bizhub C3850/C3350 Scan Functions User Guide - Page 39
for reconfirming the start of file sharing, click [Continue]. 10 Select the [Share this folder] check box, then click [Permissions]. 11 In [Group or user names], click [Everyone]. 12 Select the check box to permit [Change], then click [OK]. 13 Click [OK] or [Close], then close each screen. The - Konica Minolta bizhub C3350 | bizhub C3850/C3350 Scan Functions User Guide - Page 40
computer name:]. % The computer name is required to specify a destination. Write down the computer name. % For domain user, the domain name is required to specify a destination along with the user name. Write down the domain name. Then, click [Cancel]. 3 From the Start menu, click [All Programs - Konica Minolta bizhub C3350 | bizhub C3850/C3350 Scan Functions User Guide - Page 41
characters. 6 Double-click the folder, and select [Tools] - [Folder Options..]. 7 Click the [View] tab, and clear the [Use simple file sharing (Recommended)] check box. Click [OK], and close the window. 8 Right-click on the closed folder, then click [Sharing and Security..]. [Scan Functions] 3-11 - Konica Minolta bizhub C3350 | bizhub C3850/C3350 Scan Functions User Guide - Page 42
3.2 Preparation for SMB Send 3 9 Select the [Share this folder] check box, then click [Permissions]. % Do not change [Share name]. 10 In [Group or user names], click [Everyone]. 11 Select the check box to permit [Change], then click [OK]. 12 Click [OK], and close the screen. The settings on the - Konica Minolta bizhub C3350 | bizhub C3850/C3350 Scan Functions User Guide - Page 43
user name are required to configure folder sharing settings and specify destinations. Write them both down. Then, close the window. 5 Select [System Preferences...] in the Apple menu. 6 In the [System Preferences...] screen, click [Sharing]. 7 Select the [File Sharing] check box. [Scan Functions - Konica Minolta bizhub C3350 | bizhub C3850/C3350 Scan Functions User Guide - Page 44
name (displayed name) check box. % When the [Authentication] screen appears, enter the password of the login user, then click [OK]. Click [Done], and close the window. 9 Click [+]. On the displayed window, select the created folder, then click [Add]. 10 Check the user name and access rights of - Konica Minolta bizhub C3350 | bizhub C3850/C3350 Scan Functions User Guide - Page 45
out the Configuration Page, then check that an IP address is assigned to this machine. To print out the Configuration Page, select [Utility] - [User Settings] - [Printer Settings] - [Print Reports] - [Configuration Page]. dReference If no IP address is assigned to this machine, you will need to - Konica Minolta bizhub C3350 | bizhub C3850/C3350 Scan Functions User Guide - Page 46
installed in your environment, enable DFS. (You can use this function with the default settings unless otherwise requested.) For details on the setting procedure, refer to Chapter 2 "Configuring the Operating Environment of This Machine" in [User's Guide Applied Functions]. [Scan Functions] 3-16 - Konica Minolta bizhub C3350 | bizhub C3850/C3350 Scan Functions User Guide - Page 47
3.3 How to send 3 3.3 How to send 1 Load the original. 2 Tap [Scan To Folder]. 3 Specify the destination computer, user, and folder names. % For details on how to specify a destination, refer to page 1-8. % You can specify more than one destination to simultaneously perform FTP Send and SMB - Konica Minolta bizhub C3350 | bizhub C3850/C3350 Scan Functions User Guide - Page 48
color and original size To specify the method to scan the original To adjust the image change the default of the Scan To Folder screen. To configure settings: [Utility] - [User Settings] - [Custom Display Settings] - [Scan/Fax Settings] - [Scan to Folder Default Tab] (default: [Favorites]). [Scan - Konica Minolta bizhub C3350 | bizhub C3850/C3350 Scan Functions User Guide - Page 49
Operating Environment of This Machine" in [User's Guide Applied Functions]. Operation flow 1 Load the original. 2 Enter user information, and log in to this machine. 3 Tap [Scan To Folder]. 4 Select [Home]. 5 Configure Scan option settings as necessary. 6 Press the Start key. % Tap [Check Settings - Konica Minolta bizhub C3350 | bizhub C3850/C3350 Scan Functions User Guide - Page 50
Environment of This Machine" in [User's Guide Applied Functions]. Operation flow 1 Load the original. 2 Tap [Scan To Folder]. 3 Specify the destination. 4 Select option settings, press Reset. % If you press the Stop key while scanning the original, scanning stops. To cancel scanning the orig- - Konica Minolta bizhub C3350 | bizhub C3850/C3350 Scan Functions User Guide - Page 51
4 Sending to an FTP Server (FTP Send) - Konica Minolta bizhub C3350 | bizhub C3850/C3350 Scan Functions User Guide - Page 52
function converts original data scanned by this machine into a file supported by a computer, and uploads it to the FTP server. This function is useful when usually transferring a file through the FTP server. A file uploaded to the FTP server can be downloaded from a computer. [Scan Functions] 4-2 - Konica Minolta bizhub C3350 | bizhub C3850/C3350 Scan Functions User Guide - Page 53
print out the Configuration Page, select [Utility] - [User Settings] - [Printer Settings] - [Print default settings unless otherwise requested.) For details on the setting procedure, refer to Chapter 2 "Configuring the Operating Environment of This Machine" in [User's Guide Applied Functions]. [Scan - Konica Minolta bizhub C3350 | bizhub C3850/C3350 Scan Functions User Guide - Page 54
]. Using the proxy server When transferring data via a proxy server in your network environment, register a proxy server. For details on the registration procedure, refer to Chapter 2 "Configuring the Operating Environment of This Machine" in [User's Guide Applied Functions]. [Scan Functions] 4-4 - Konica Minolta bizhub C3350 | bizhub C3850/C3350 Scan Functions User Guide - Page 55
4.3 How to send 4 4.3 How to send 1 Load the original. 2 Tap [Scan To Folder]. 3 Specify a destination FTP server. % For details on how to specify a destination, refer to page 1-8. % You can specify more than one destination to simultaneously perform FTP Send and SMB Send. [Scan Functions] 4-5 - Konica Minolta bizhub C3350 | bizhub C3850/C3350 Scan Functions User Guide - Page 56
color and original size To specify the method to scan the original To adjust the image change the default of the Scan To Folder screen. To configure settings: [Utility] - [User Settings] - [Custom Display Settings] - [Scan/Fax Settings] - [Scan to Folder Default Tab] (default: [Favorites]). [Scan - Konica Minolta bizhub C3350 | bizhub C3850/C3350 Scan Functions User Guide - Page 57
Operating Environment of This Machine" in [User's Guide Applied Functions]. Operation flow 1 Load the original. 2 Tap [Scan To Folder]. 3 Specify the destination. 4 option settings, press Reset. % If you press the Stop key while scanning the original, scanning stops. To cancel scanning the orig- - Konica Minolta bizhub C3350 | bizhub C3850/C3350 Scan Functions User Guide - Page 58
5 Sending to a WebDAV Server (WebDAV Send) - Konica Minolta bizhub C3350 | bizhub C3850/C3350 Scan Functions User Guide - Page 59
function converts original data scanned by this machine into a file supported by a computer, and uploads it to the WebDAV server. This function is useful when transferring a file through the WebDAV server. A file uploaded to the WebDAV server can be downloaded from a computer. [Scan Functions] 5-2 - Konica Minolta bizhub C3350 | bizhub C3850/C3350 Scan Functions User Guide - Page 60
print out the Configuration Page, select [Utility] - [User Settings] - [Printer Settings] - [Print default settings unless otherwise requested.) For details on the setting procedure, refer to Chapter 2 "Configuring the Operating Environment of This Machine" in [User's Guide Applied Functions]. [Scan - Konica Minolta bizhub C3350 | bizhub C3850/C3350 Scan Functions User Guide - Page 61
Configuring the Operating Environment of This Machine" in [User's Guide Applied Functions]. Using the proxy server When transferring data via a proxy server in your network environment "Configuring the Operating Environment of This Machine" in [User's Guide Applied Functions]. [Scan Functions] 5-4 - Konica Minolta bizhub C3350 | bizhub C3850/C3350 Scan Functions User Guide - Page 62
5.3 How to scan 5 5.3 How to scan 1 Load the original. 2 Tap [Scan To Folder]. 3 Specify a destination WebDAV server. % For details on how to specify a destination, refer to page 1-8. % You can specify more than one destination to simultaneously perform WebDAV Send and SMB Send. [Scan Functions] - Konica Minolta bizhub C3350 | bizhub C3850/C3350 Scan Functions User Guide - Page 63
color and original size To specify the method to scan the original To adjust the image change the default of the Scan To Folder screen. To configure settings: [Utility] - [User Settings] - [Custom Display Settings] - [Scan/Fax Settings] - [Scan to Folder Default Tab] (default: [Favorites]). [Scan - Konica Minolta bizhub C3350 | bizhub C3850/C3350 Scan Functions User Guide - Page 64
Operating Environment of This Machine" in [User's Guide Applied Functions]. Operation flow 1 Load the original. 2 Tap [Scan To Folder]. 3 Specify the destination. 4 option settings, press Reset. % If you press the Stop key while scanning the original, scanning stops. To cancel scanning the orig- - Konica Minolta bizhub C3350 | bizhub C3850/C3350 Scan Functions User Guide - Page 65
6 Saving a File in the HDD of This Machine (Save to HDD) - Konica Minolta bizhub C3350 | bizhub C3850/C3350 Scan Functions User Guide - Page 66
a File in the HDD of This Machine (Save to HDD) 6.1 Save to HDD function The Save to HDD function is used to save original data scanned by this machine in the HDD on this machine. The original data saved in the HDD can be downloaded via the Web browser on your computer - Konica Minolta bizhub C3350 | bizhub C3850/C3350 Scan Functions User Guide - Page 67
6.2 How to save 6 6.2 How to save 0 Up to 100 files can be saved. 1 Load the original. 2 Tap [Scan To Folder]. 3 Tap [Direct Input] - [HDD]. [Scan Functions] 6-3 - Konica Minolta bizhub C3350 | bizhub C3850/C3350 Scan Functions User Guide - Page 68
to save in the HDD, then tap [OK]. % If user authentication is used , and if you are logging in as a registered user, select [Public] (public area in the HDD) or basic options such as color and original size To specify the method to scan the original To adjust the image quality or density depending - Konica Minolta bizhub C3350 | bizhub C3850/C3350 Scan Functions User Guide - Page 69
the Job screen. Saving starts. Related setting If necessary, you can change the default of the Scan To Folder screen. To configure settings: [Utility] - [User Settings] - [Custom Display Settings] - [Scan/Fax Settings] - [Scan to Folder Default Tab] (default: [Favorites]). [Scan Functions] 6-5 - Konica Minolta bizhub C3350 | bizhub C3850/C3350 Scan Functions User Guide - Page 70
log in to the administrator mode, you can view or delete files of all users. 3 In the [Storage] tab, click [Scan to HDD]. This displays a list of users who are saving files in the HDD. 4 Click [View] in the column of the user who is saving the file to be downloaded in the HDD. % If you - Konica Minolta bizhub C3350 | bizhub C3850/C3350 Scan Functions User Guide - Page 71
6 6.3.2 Viewing or deleting the file saved in the HDD You can view or delete a file in the HDD from the Control Panel. 1 Tap [Document Print/Delete]. 2 Tap [Scanned Documents]. 3 Select a file, then select the desired operation. % To view a file, tap [Details]. % To delete a file, tap [Delete - Konica Minolta bizhub C3350 | bizhub C3850/C3350 Scan Functions User Guide - Page 72
Operating Environment of This Machine" in [User's Guide Applied Functions]. Operation flow 1 Load the original. 2 Tap [Scan To Folder]. 3 Specify the destination. 4 option settings, press Reset. % If you press the Stop key while scanning the original, scanning stops. To cancel scanning the orig- - Konica Minolta bizhub C3350 | bizhub C3850/C3350 Scan Functions User Guide - Page 73
7 Saving Data in USB Memory (Save to USB) - Konica Minolta bizhub C3350 | bizhub C3850/C3350 Scan Functions User Guide - Page 74
7.1 USB memory saving function 7 7 Saving Data in USB Memory (Save to USB) 7.1 USB memory saving function The USB memory saving function is used to save original data scanned by this machine in the USB memory device connected to this machine. [Scan Functions] 7-2 - Konica Minolta bizhub C3350 | bizhub C3850/C3350 Scan Functions User Guide - Page 75
such as data encryption and password lock shall be released, or the security function shall be turned Off. Note the following points when connecting a USB memory device to this machine. - Do not disconnect the USB memory device while saving a file to the USB memory or printing a file in the USB - Konica Minolta bizhub C3350 | bizhub C3850/C3350 Scan Functions User Guide - Page 76
How to save 1 Connect a USB memory device to the USB port of this machine. 2 Load the original. 3 Tap [Scan To Folder]. 4 Tap [Application], then configure scan option settings. % Before scanning the original on this machine, specify the size of the original to be scanned. If you fail to set the - Konica Minolta bizhub C3350 | bizhub C3850/C3350 Scan Functions User Guide - Page 77
the USB memory, then tap [Start]. Saving starts. Related setting If necessary, you can change the default of the Scan To Folder screen. To configure settings: [Utility] - [User Settings] - [Custom Display Settings] - [Scan/Fax Settings] - [Scan to Folder Default Tab] (default: [Favorites]). [Scan - Konica Minolta bizhub C3350 | bizhub C3850/C3350 Scan Functions User Guide - Page 78
8 Sending with Web Service (WS Scan) - Konica Minolta bizhub C3350 | bizhub C3850/C3350 Scan Functions User Guide - Page 79
Sending with Web Service (WS Scan) 8.1 WS Scan function This function imports original data by issuing a scan instruction from a computer without configuring complicated system settings, or sends original data scanned by this machine to a computer. This function is supported in an operating system - Konica Minolta bizhub C3350 | bizhub C3850/C3350 Scan Functions User Guide - Page 80
required to use the WS Scan transmission function Enabling the Web service function % Check the Web service settings and scanner name. Preparing the environment required to use a computer Installing the scanner driver % Install a scanner driver used for Web service. Configuring the machine to - Konica Minolta bizhub C3350 | bizhub C3850/C3350 Scan Functions User Guide - Page 81
UAC (User Account Control) dialog box may appear. Check the details, and proceed to the next step. % If both of the scan and printer functions are enabled in the Web service settings of this machine, this machine is represented by the printer icon. % In Windows 8/Server 2012, click [Network] - [Add - Konica Minolta bizhub C3350 | bizhub C3850/C3350 Scan Functions User Guide - Page 82
right-click the icon of this machine, then click [Scan profiles] to change the default scan settings. % For details on the scan settings, refer to page 8-8. 7 On the Control Panel of this machine, tap [Direct Input] - [DPWS] on the Scan To Folder screen, and check that a target computer is displayed - Konica Minolta bizhub C3350 | bizhub C3850/C3350 Scan Functions User Guide - Page 83
to use this function" (page 8-4). 2 Tap [Scan To Folder]. 3 Select [Direct Input] - [DPWS]. % If another destination has already been specified, you cannot select [DPWS]. The computers on the network, in which this machine is designated as the Web service scanner, appear as the destinations - Konica Minolta bizhub C3350 | bizhub C3850/C3350 Scan Functions User Guide - Page 84
to handle the application for importing original data or check files saved by a scan transmission. % When using a scan transmission from this machine, start the application on a destination computer to import original data, or save original data in a specific folder. For details, refer to page - Konica Minolta bizhub C3350 | bizhub C3850/C3350 Scan Functions User Guide - Page 85
original data can be edited or saved in a computer. This section explains an example using Windows 7 and [Windows Fax and Scan] application software. 1 From the Start menu, click [All Programs] - [Windows Fax and Scan]. 2 Click [New Scan]. The [New Scan] dialog box appears. [Scan Functions] 8-8 - Konica Minolta bizhub C3350 | bizhub C3850/C3350 Scan Functions User Guide - Page 86
following to fit the original to be scanned. Settings [Scanner] [Profile] [Source] [Paper size] [Color format] [File type] [Resolution (DPI)] [Brightness] [Contrast] Description Displays the scanner name of this machine. To switch other scanner, click [Change]. Select a profile to fit the original - Konica Minolta bizhub C3350 | bizhub C3850/C3350 Scan Functions User Guide - Page 87
Importing data from a computer 8 If necessary, trim a displayed image, or adjust [Brightness], [Contrast], or [Resolution (DPI)]. After checking the scanned original, click [Scan]. The original is scanned, and displayed in the application window of [Windows Fax and Scan]. [Scan Functions] 8-10 - Konica Minolta bizhub C3350 | bizhub C3850/C3350 Scan Functions User Guide - Page 88
9 Importing Images by TWAIN/WIA Scan - Konica Minolta bizhub C3350 | bizhub C3850/C3350 Scan Functions User Guide - Page 89
9.1 TWAIN/WIA scan function 9 9 Importing Images by TWAIN/WIA Scan 9.1 TWAIN/WIA scan function Operate this machine through various TWAIN/WIA-compliant applications, and import the scanned original data. The imported original data can be edited or saved in a computer. [Scan Functions] 9-2 - Konica Minolta bizhub C3350 | bizhub C3850/C3350 Scan Functions User Guide - Page 90
machine. To print out the Configuration Page, select [Utility] - [User Settings] - [Printer Settings] - [Print Reports] - Guide]. 9.2.2 Computer side: Operations required to use this function Operating environment of computer In Windows: Item Supported operating systems CPU Memory Specifications - Konica Minolta bizhub C3350 | bizhub C3850/C3350 Scan Functions User Guide - Page 91
does not start, open the scanner driver folder on the CD-ROM, double-click [Auto- Run.exe], then proceed to Step 3. % If the [User Account Control] window appears, click [Continue] or [Yes]. 2 Click [Scanner]. The scanner driver installer starts. 3 Click [Next]. 4 Read the license agreement, select - Konica Minolta bizhub C3350 | bizhub C3850/C3350 Scan Functions User Guide - Page 92
, [Prescan] is not available. Go to Step 5. 5 Configure scan settings. % [Basic Mode] setting items Settings [Scan Objective] [Scan Type] [Resolution] [Auto Color Adjustment] [Auto Deskew] [Paper source] [Original Size] [Rotation] [Image size] Clear icon [Before] / [After] (RGB) [Width] / [Height - Konica Minolta bizhub C3350 | bizhub C3850/C3350 Scan Functions User Guide - Page 93
If Resolution is 1200 dpi e 1200 dpi, this setting is not supported. Select the scan mode. • [Auto]: Automatically adjusts a light image to a dark one and a dark image to a light one for a preview image. • [Manual]: Manually adjusts settings using the Brightness/Contrast, Filter, Curve, Level, Color - Konica Minolta bizhub C3350 | bizhub C3850/C3350 Scan Functions User Guide - Page 94
the original in color mode. Select this option to scan the original in gray scale mode. Select this option to scan the original in black and white mode. Select this option to use the setting values in the Detailed Properties window. Specify the brightness, contrast, resolution, and image type in the - Konica Minolta bizhub C3350 | bizhub C3850/C3350 Scan Functions User Guide - Page 95
Follow the subsequent on-screen instructions. 3 If the dialog box prompting to restart the computer appears, click [OK]. Uninstallation of the scanner driver is then completed. In Mac OS: 1 In [Macintosh HD] (HDD of the system), open [Library] - [Applications Support] - [KONICA MINOLTA], then double - Konica Minolta bizhub C3350 | bizhub C3850/C3350 Scan Functions User Guide - Page 96
10 Registering Frequently Used Destinations (Address Book) - Konica Minolta bizhub C3350 | bizhub C3850/C3350 Scan Functions User Guide - Page 97
will save you the trouble of having to enter mode. Related setting (for the administrator) You can select whether or not to allow the user to register or change folder for saving a file or information for accessing a folder. 1 Tap [Utility] - [One-Touch/User Box Registration] - [SMB] - [New]. [Scan - Konica Minolta bizhub C3350 | bizhub C3850/C3350 Scan Functions User Guide - Page 98
in [Host Name] (using up to 255 bytes). • Entry example: "scan" When specifying a folder in the shared folder, insert a symbol, "\", between folder names. • Entry example: "scan\document" Enter the name of a user who has privileges to access the folder specified in [File Path] (using up to 255 bytes - Konica Minolta bizhub C3350 | bizhub C3850/C3350 Scan Functions User Guide - Page 99
11 Index - Konica Minolta bizhub C3350 | bizhub C3850/C3350 Scan Functions User Guide - Page 100
6-7 Download 6-6 How to Save 6-3 Overview 6-2 URL notification 6-8 Save to USB How to Save 7-4 Overview 7-2 Preparation 7-3 Scan How to Scan 1-3 Overview 1-2 Scan Size 1-12 Scan to E-mail How to Send 2-6 Overview 2-2 Preparation 2-3 S/MIME 2-9 Scan to Me 2-8 Scanner Driver Install - Konica Minolta bizhub C3350 | bizhub C3850/C3350 Scan Functions User Guide - Page 101
http://konicaminolta.com A3GN-9561-00A © 2013 2013. 8
-
 1
1 -
 2
2 -
 3
3 -
 4
4 -
 5
5 -
 6
6 -
 7
7 -
8
-
9
-
10
-
11
-
12
-
13
-
14
-
15
-
16
-
17
-
18
-
19
-
20
-
21
-
22
-
23
-
24
-
25
-
26
-
27
-
28
-
29
-
30
-
31
-
32
-
33
-
34
-
35
-
36
-
37
-
38
-
39
-
40
-
41
-
42
-
43
-
44
-
45
-
46
-
47
-
48
-
49
-
50
-
51
-
52
-
53
-
54
-
55
-
56
-
57
-
58
-
59
-
60
-
61
-
62
-
63
-
64
-
65
-
66
-
67
-
68
-
69
-
70
-
71
-
72
-
73
-
74
-
75
-
76
-
77
-
78
-
79
-
80
-
81
-
82
-
83
-
84
-
85
-
86
-
87
-
88
-
89
-
90
-
91
-
92
-
93
-
94
-
95
-
96
-
97
-
98
-
99
-
100
-
101
 |
 |
User's Guide Scan Functions