Konica Minolta bizhub C3350 bizhub C3850/C3350 Scan Functions User Guide - Page 41
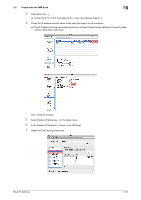
The folder name is required to specify a destination. Write down the folder name.
 |
View all Konica Minolta bizhub C3350 manuals
Add to My Manuals
Save this manual to your list of manuals |
Page 41 highlights
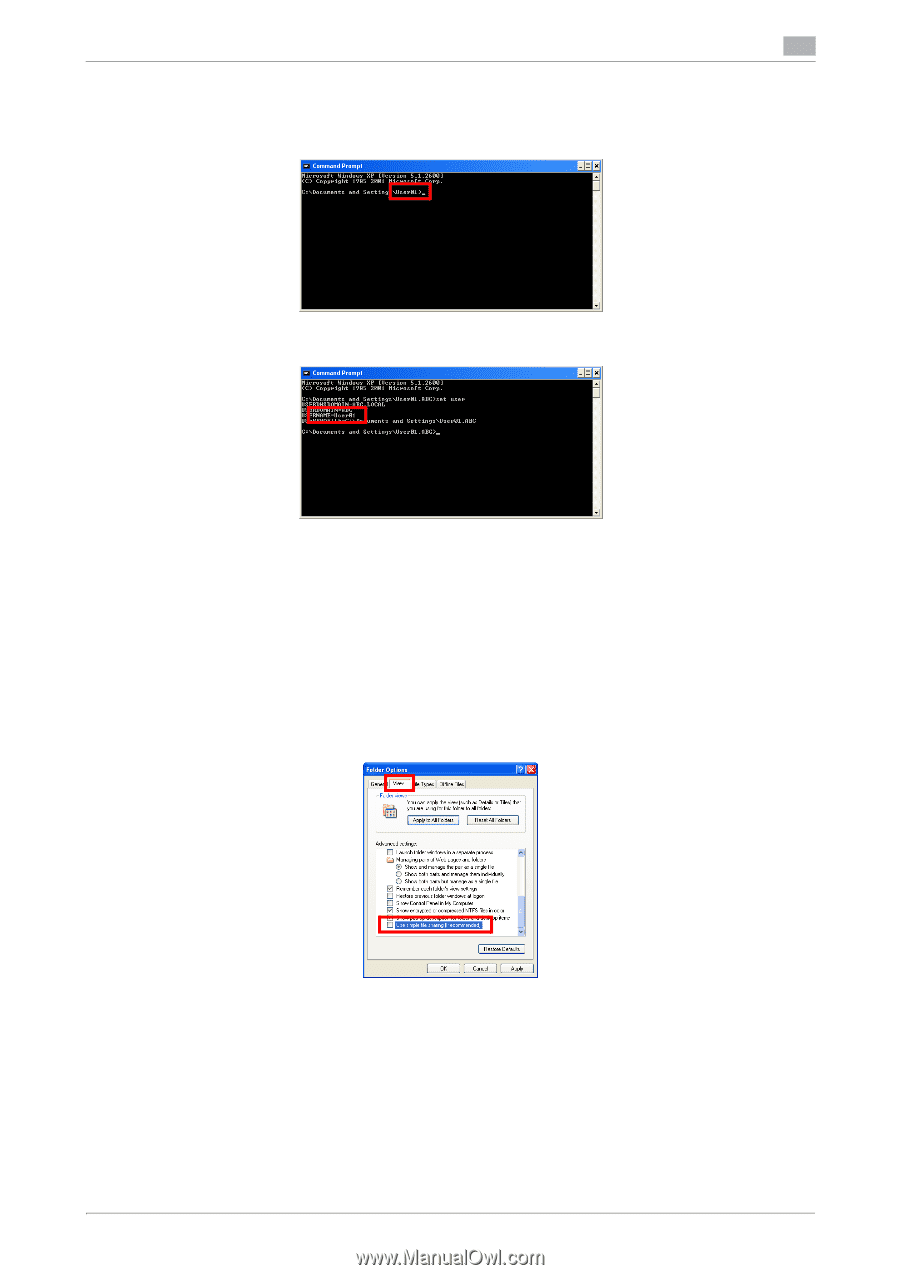
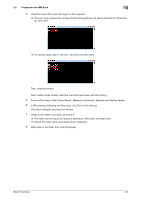
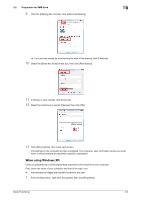
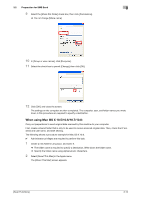
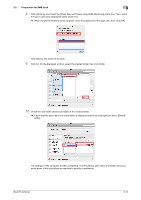
3.2 Preparation for SMB Send 3 4 Check the name of the user who logs in to the computer. % The user name is required to configure folder sharing settings and specify destinations. Write down the user name. % For domain users, type in "set user", and check the user name. Then, close the window. Next, create a folder where to send the scanned original data, and start sharing. 5 Create a new folder in any place, and name it. % The folder name is required to specify a destination. Write down the folder name. % Specify the folder name using alphanumeric characters. 6 Double-click the folder, and select [Tools] - [Folder Options..]. 7 Click the [View] tab, and clear the [Use simple file sharing (Recommended)] check box. Click [OK], and close the window. 8 Right-click on the closed folder, then click [Sharing and Security..]. [Scan Functions] 3-11
-
 1
1 -
2
-
3
-
4
-
5
-
6
-
7
-
8
-
9
-
10
-
11
-
12
-
13
-
14
-
15
-
16
-
17
-
18
-
19
-
20
-
21
-
22
-
23
-
24
-
25
-
26
-
27
-
28
-
29
-
30
-
31
-
32
-
33
-
34
-
35
-
 36
36 -
 37
37 -
 38
38 -
 39
39 -
 40
40 -
 41
41 -
 42
42 -
 43
43 -
 44
44 -
 45
45 -
 46
46 -
47
-
48
-
49
-
50
-
51
-
52
-
53
-
54
-
55
-
56
-
57
-
58
-
59
-
60
-
61
-
62
-
63
-
64
-
65
-
66
-
67
-
68
-
69
-
70
-
71
-
72
-
73
-
74
-
75
-
76
-
77
-
78
-
79
-
80
-
81
-
82
-
83
-
84
-
85
-
86
-
87
-
88
-
89
-
90
-
91
-
92
-
93
-
94
-
95
-
96
-
97
-
98
-
99
-
100
-
101
 |
 |